This feature is available in the CMS, TMS, and CAT module.
Localization Export and Import accompanies our core feature - Dependencies. It allows you to export translation files with the current statuses of strings. When you re-import using Localization Import statuses can be updated automatically.
Localization export
CMS module
Note
To use the Localization Export in the CMS module, you’ll first need to set up localization columns and add Dependencies to all the desired language pairs in your Grid.
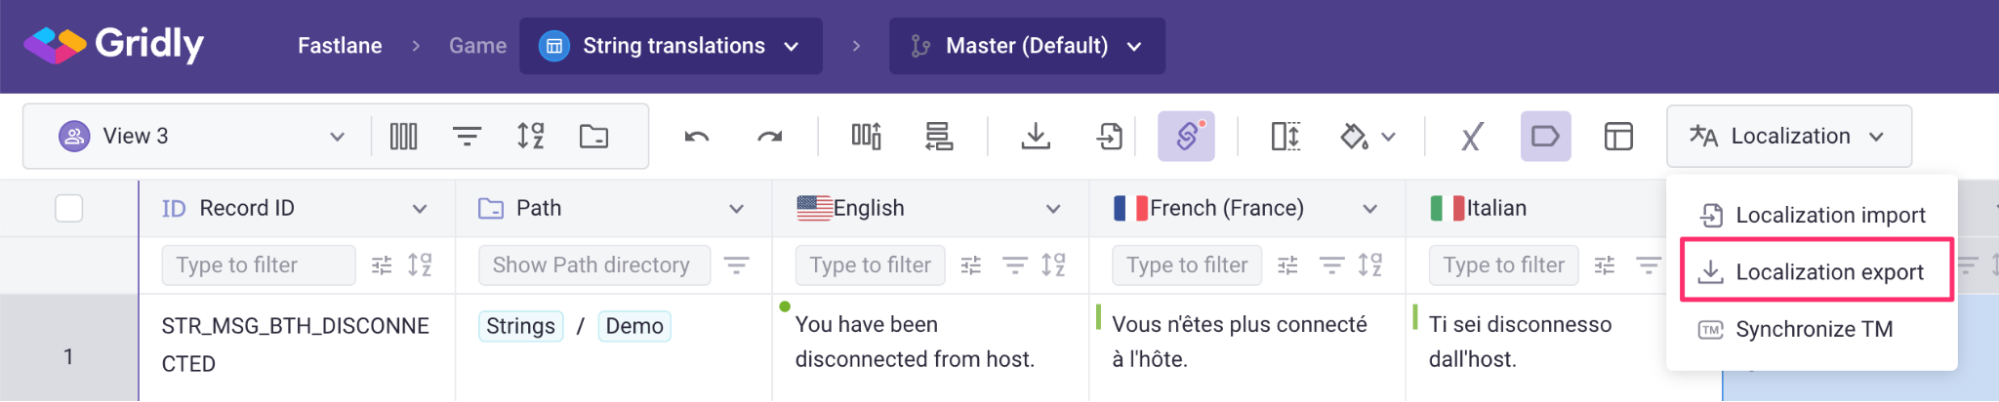
- Open a Grid, click the
 button in the top toolbar.
 - Select Localization export.
TMS module
Using the Localization export feature in the TMS module, you can export translations from a Job.
- Switch to the TMS module and go to the Job you want to export.
- Click the button and select Localization export.

CAT module
In the CAT module, you can export translations from the CAT editor with Localization export.
- Open the CAT editor.
- Click the
 button in the top toolbar and select Localization export.

Configure localization export
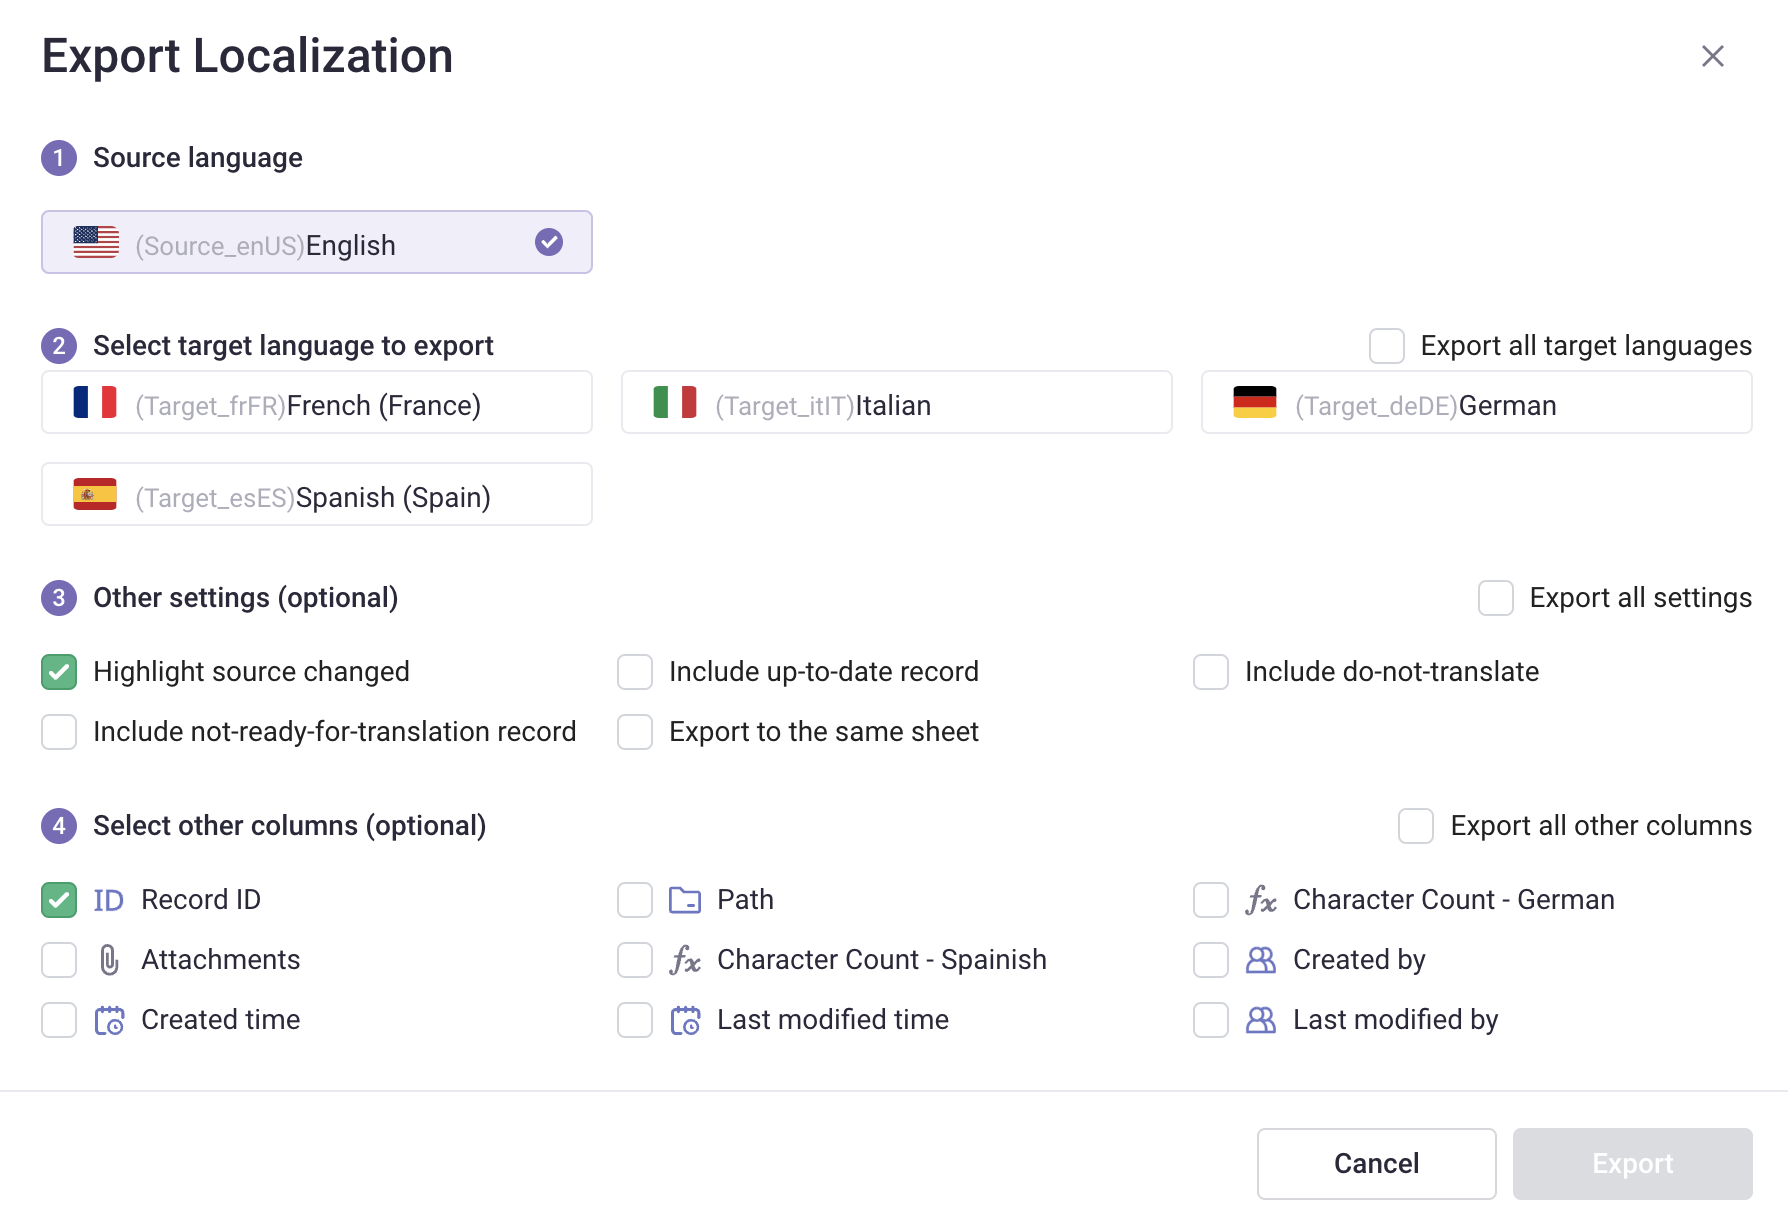
Gridly exports the translation file in XLSX (Excel format). You can select what to include in the file:
- Source language: Select the source language you want to export.
- Select target language to export: Select the target language columns to export.
-
Other settings (optional):
-
Highlight source changed: Highlight changes in the source language columns since the last translation update.

- Include up-to-date record: Files exported using the Localization export function will by default solely include records that need updating (Dependency status: Out-of-date, Unset). Select this option if you also want to include up-to-date records
- Include do-not-translate: Select this option if you want to include records with the source status: Do not translate
- Include not-ready-for-translation record: Select this option if you want to include records with the source status: Not ready for translation
- Export to the same sheet: For Grids containing more than 1 target language, each language will be exported to a separate sheet. Select this option if you want the languages to be exported to the same sheet
-
Highlight source changed: Highlight changes in the source language columns since the last translation update.
- Select other columns (optional): Select other columns you want to export.
Click Export when you are done.
Localization Import
After sending out to translators to update translations, you can re-import the translation file.
Note
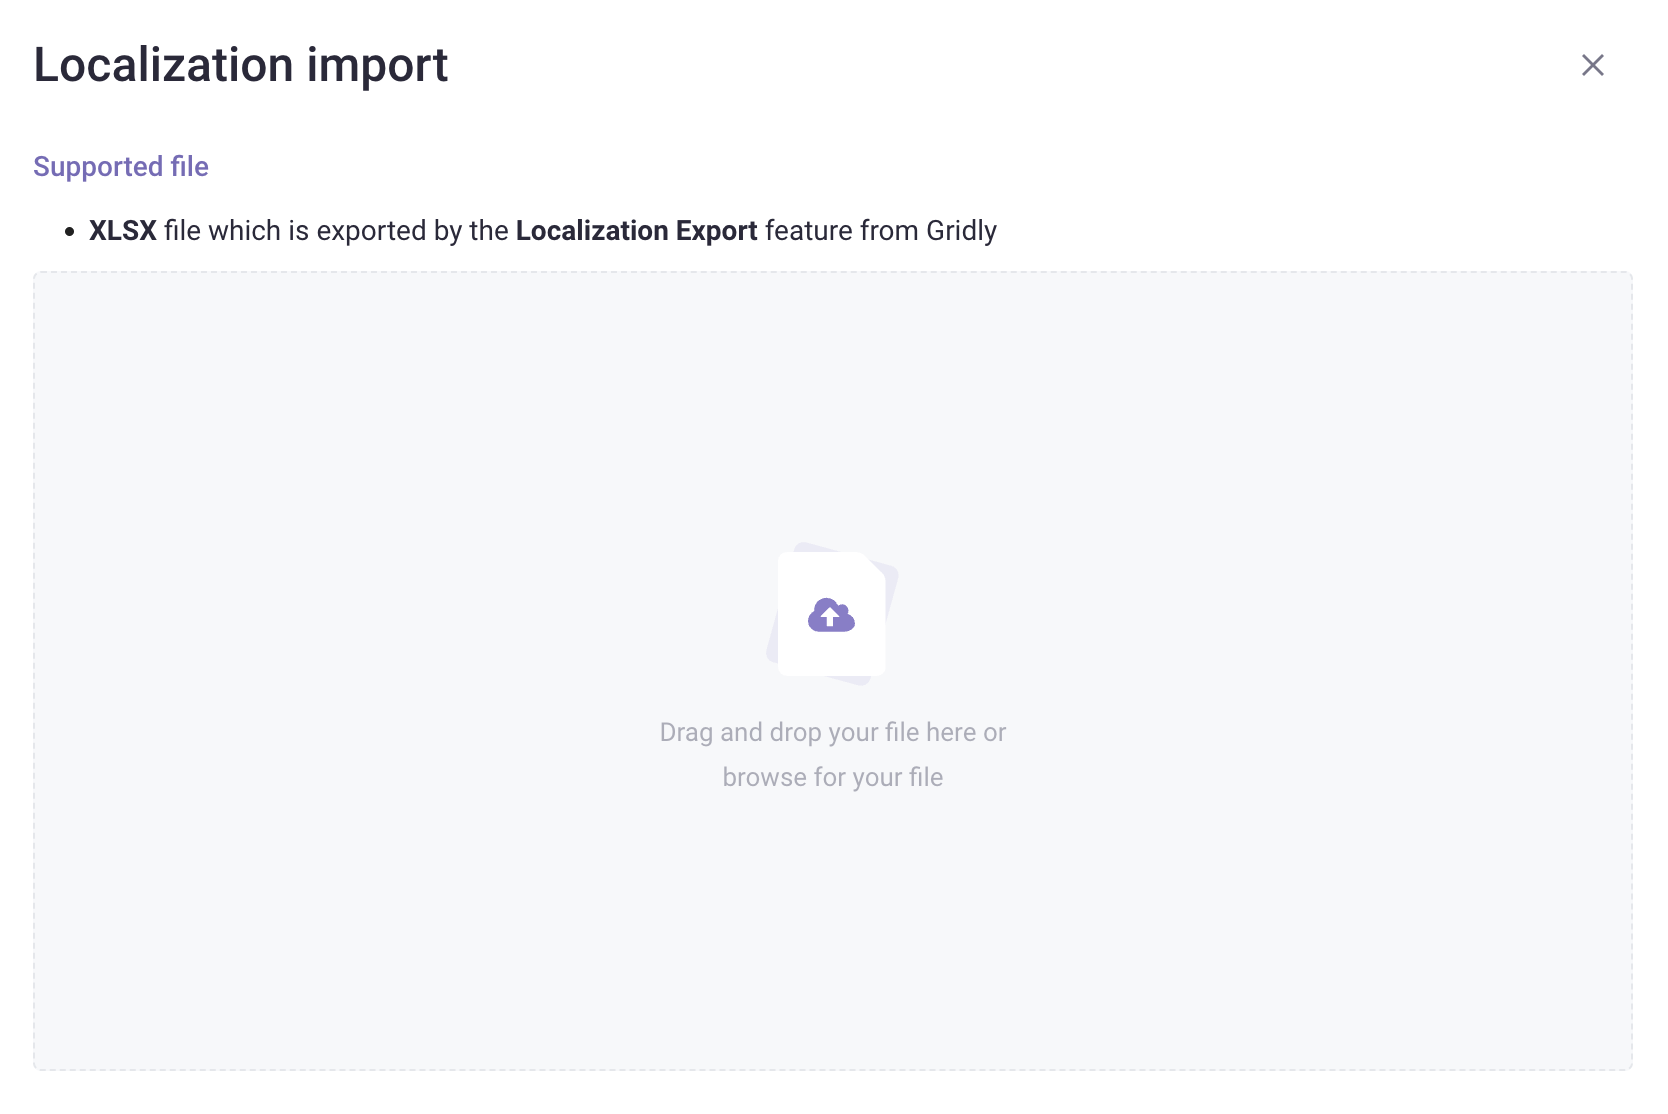
Localization import only supports XLSX files which have been initially generated using the Localization export feature.
CMS module
- Open the Grid, then click on the toolbar.
- Select Localization import from the dropdown list.
- Drag and drop, or click to browse for your files.
TMS module
- Switch to the TMS module and open a TMS Job.
- Click the button and select Localization import.
- Drag and drop, or click to browse for your files.
Note
When you import a localization file at the Job level, it updates all Task segments within that Job. To update a specific Task's segments only, open that Task in the CAT editor and import the localization file there.
CAT module
- Open the CAT editor.
- Click the button in the top toolbar and select Localization import.
- Drag and drop, or click to browse for your files.
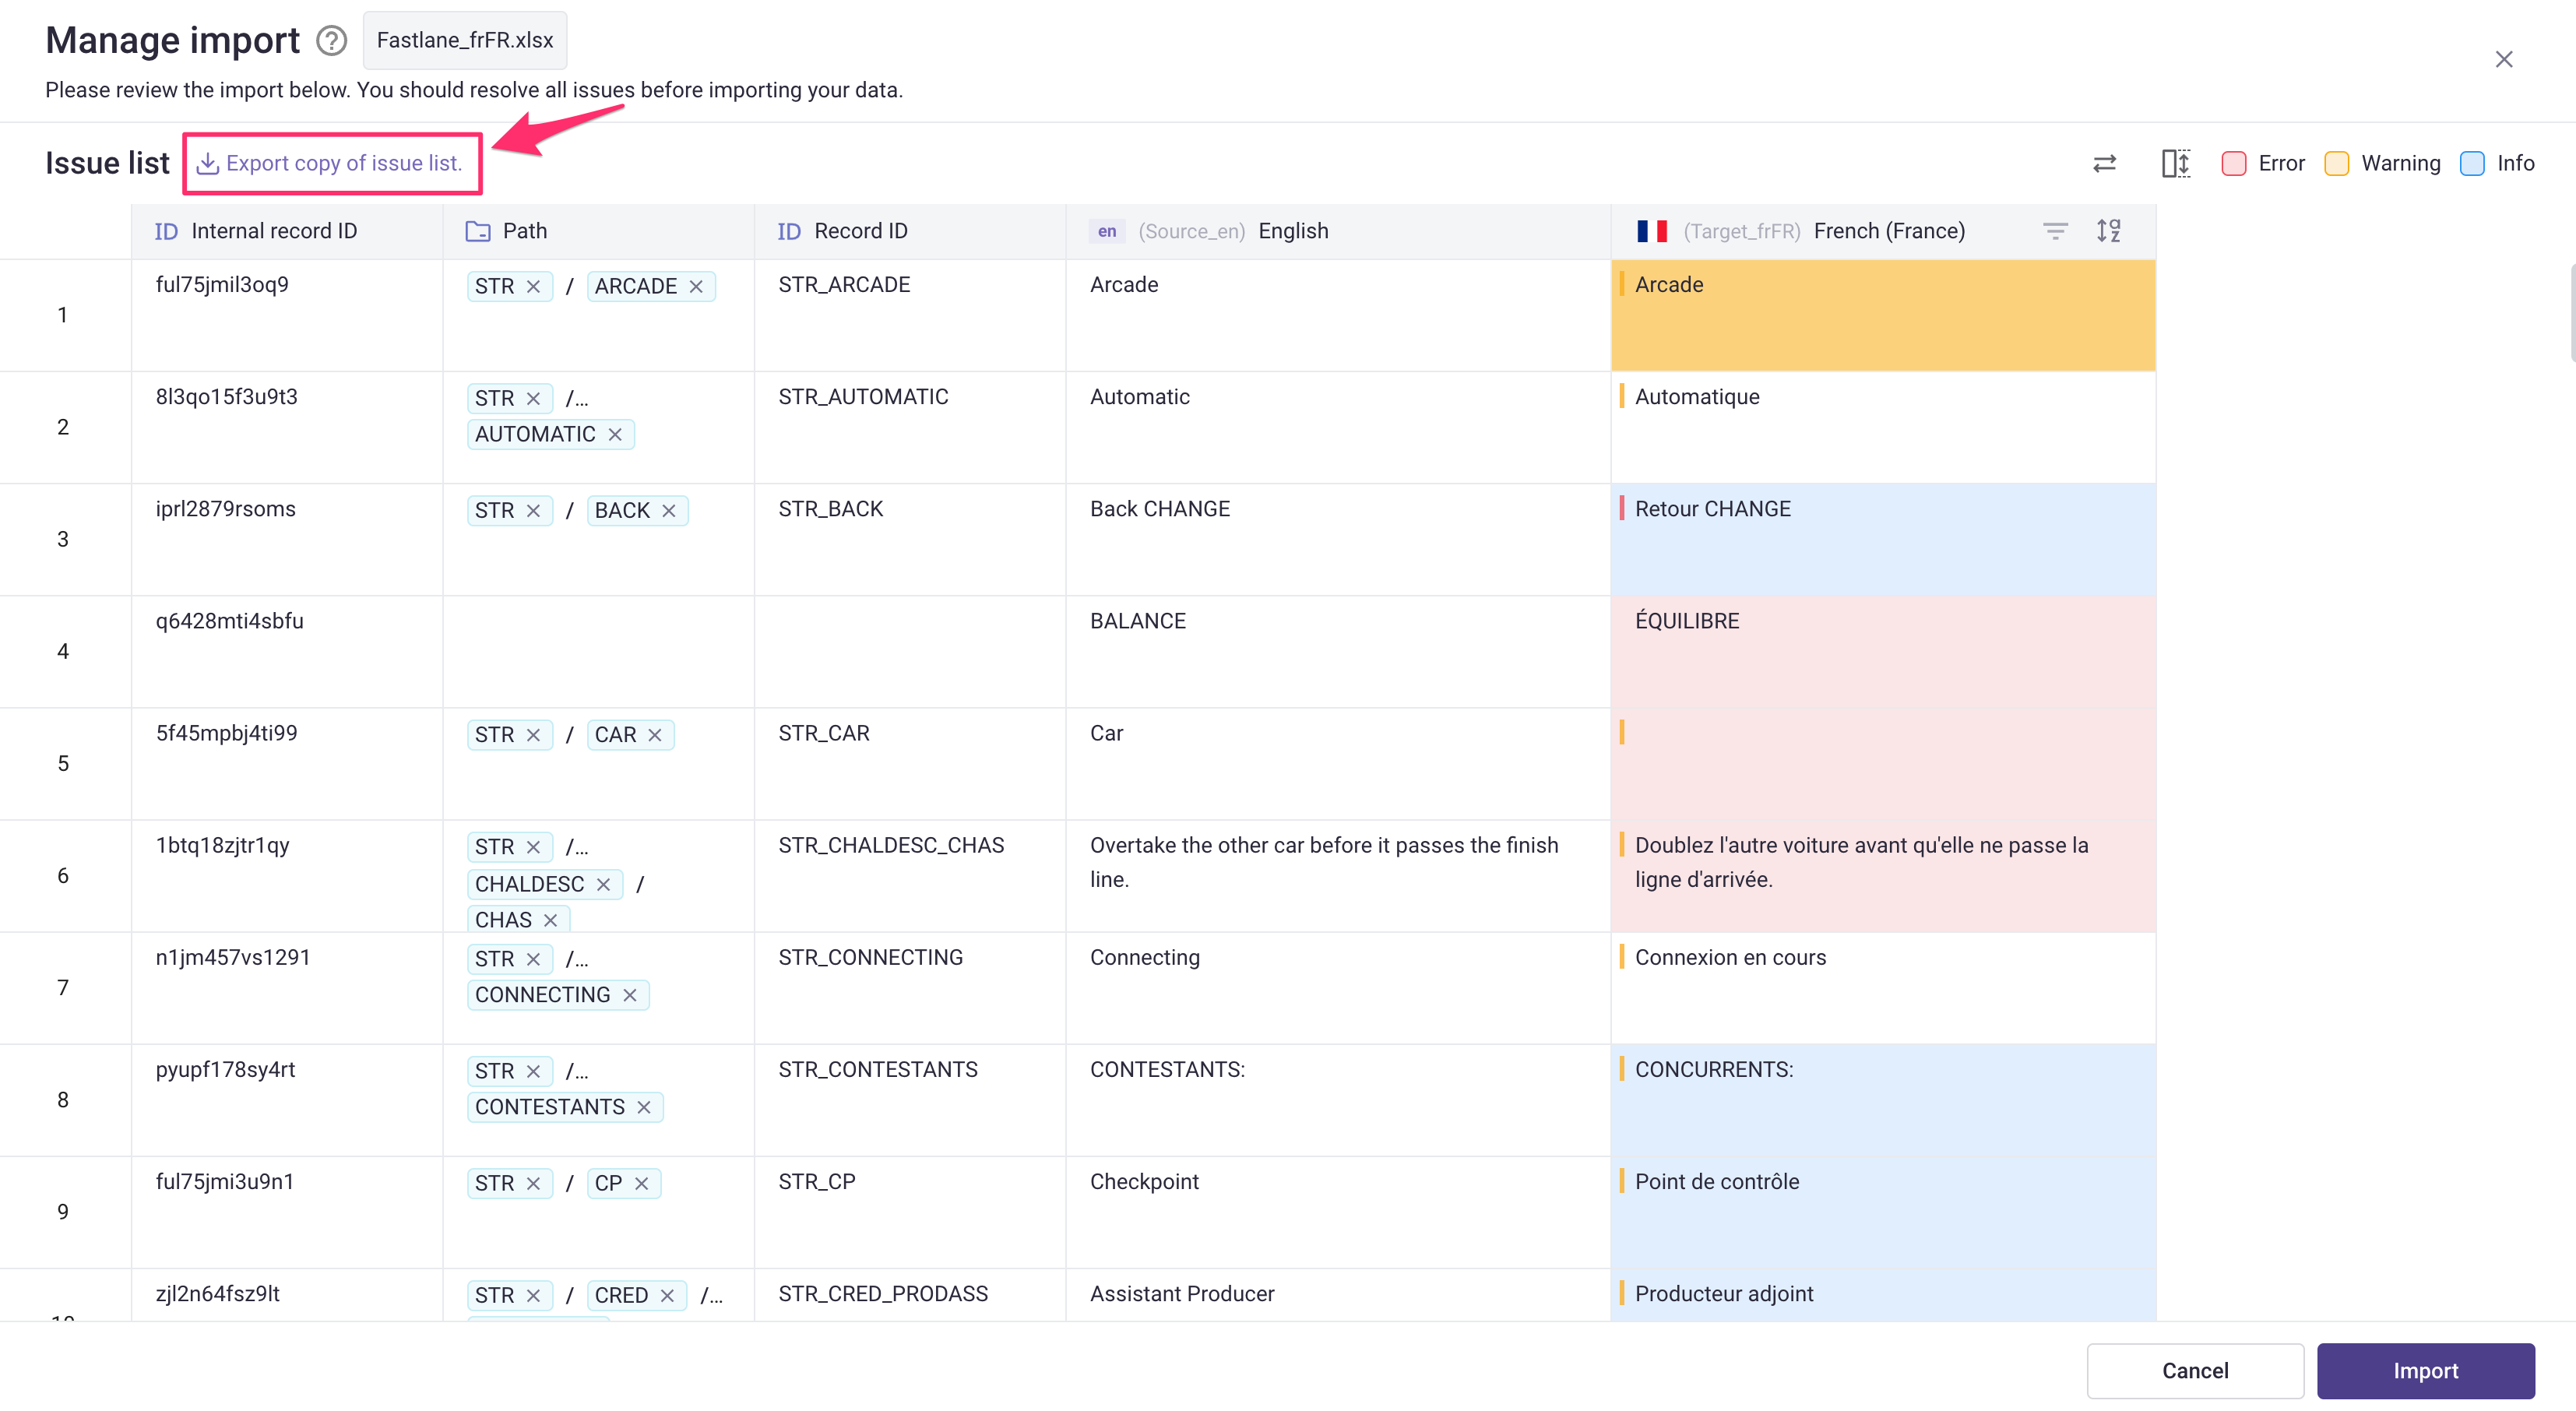
Manage import
Before importing, click Manage to preview the changes.
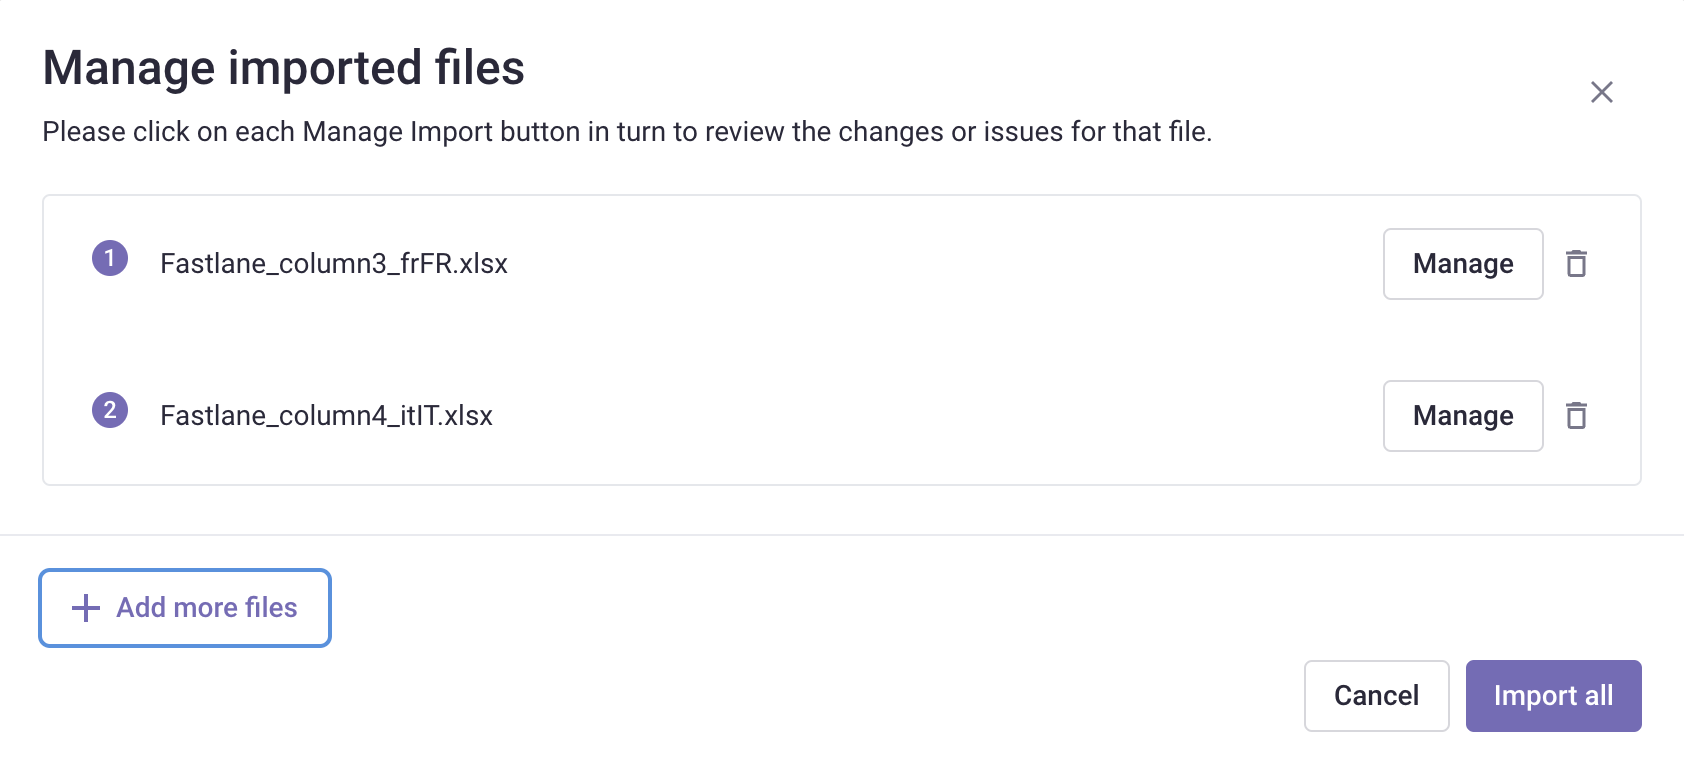
The Manage Import window displays a preview of imported records and their status. Changes are highlighted according to three types:
- Errors
- Warnings
- Info
Gridly will not import values or update translation statuses for certain changes. Review the table below for detailed information about which changes will be processed.
Filter issues and actions
Click ![]() next to the target language to filter issues by issue type and action:
next to the target language to filter issues by issue type and action:
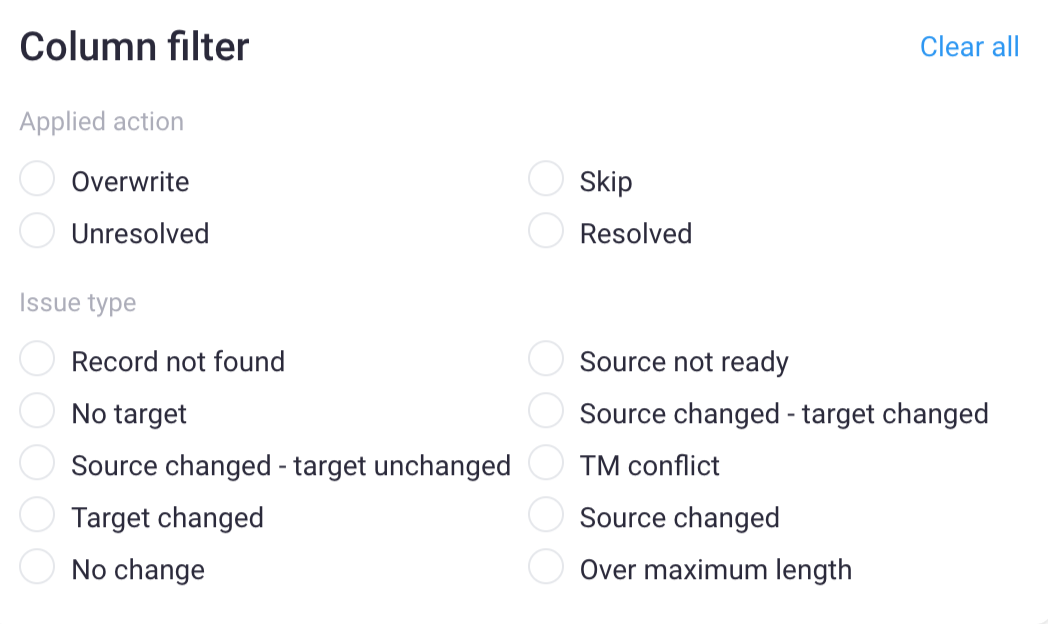
Click  to show unresolved issues.
View records details
You can compare the changes by clicking on the cells in the target language columns. For specific updates, you are required to select whether to overwrite or skip the updates, and set the statuses for the targets.
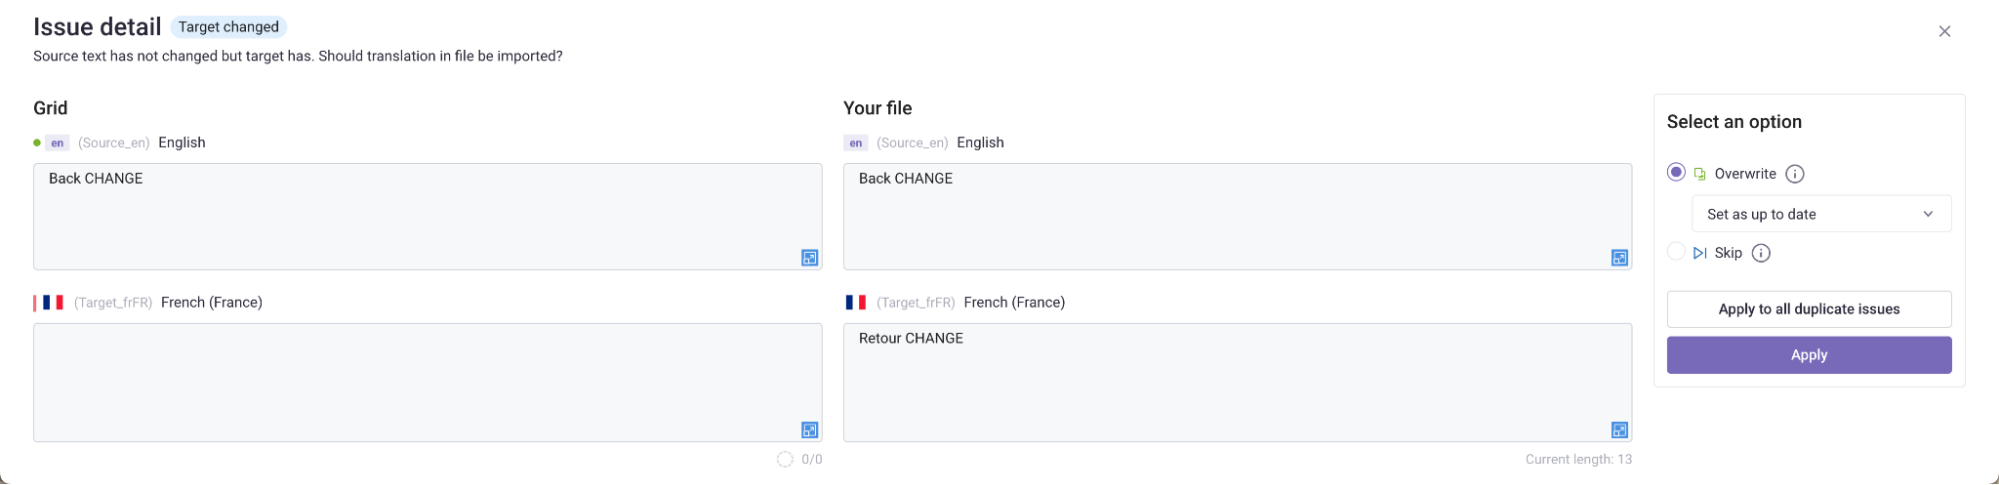
You can choose to apply an option to all similar issues:

Tips
For longer text, you can click  at the bottom right of each cell to expand and view the whole text.
Confirm import
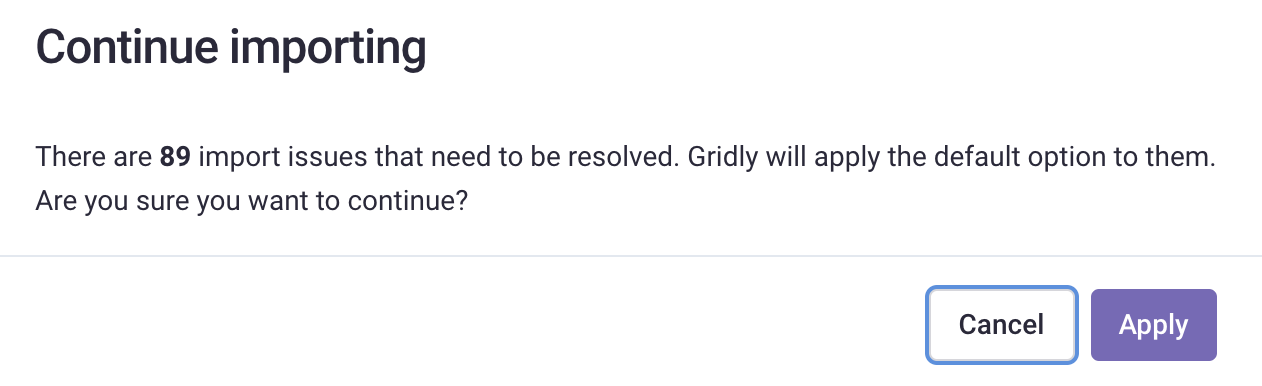
Click Import, then Apply.
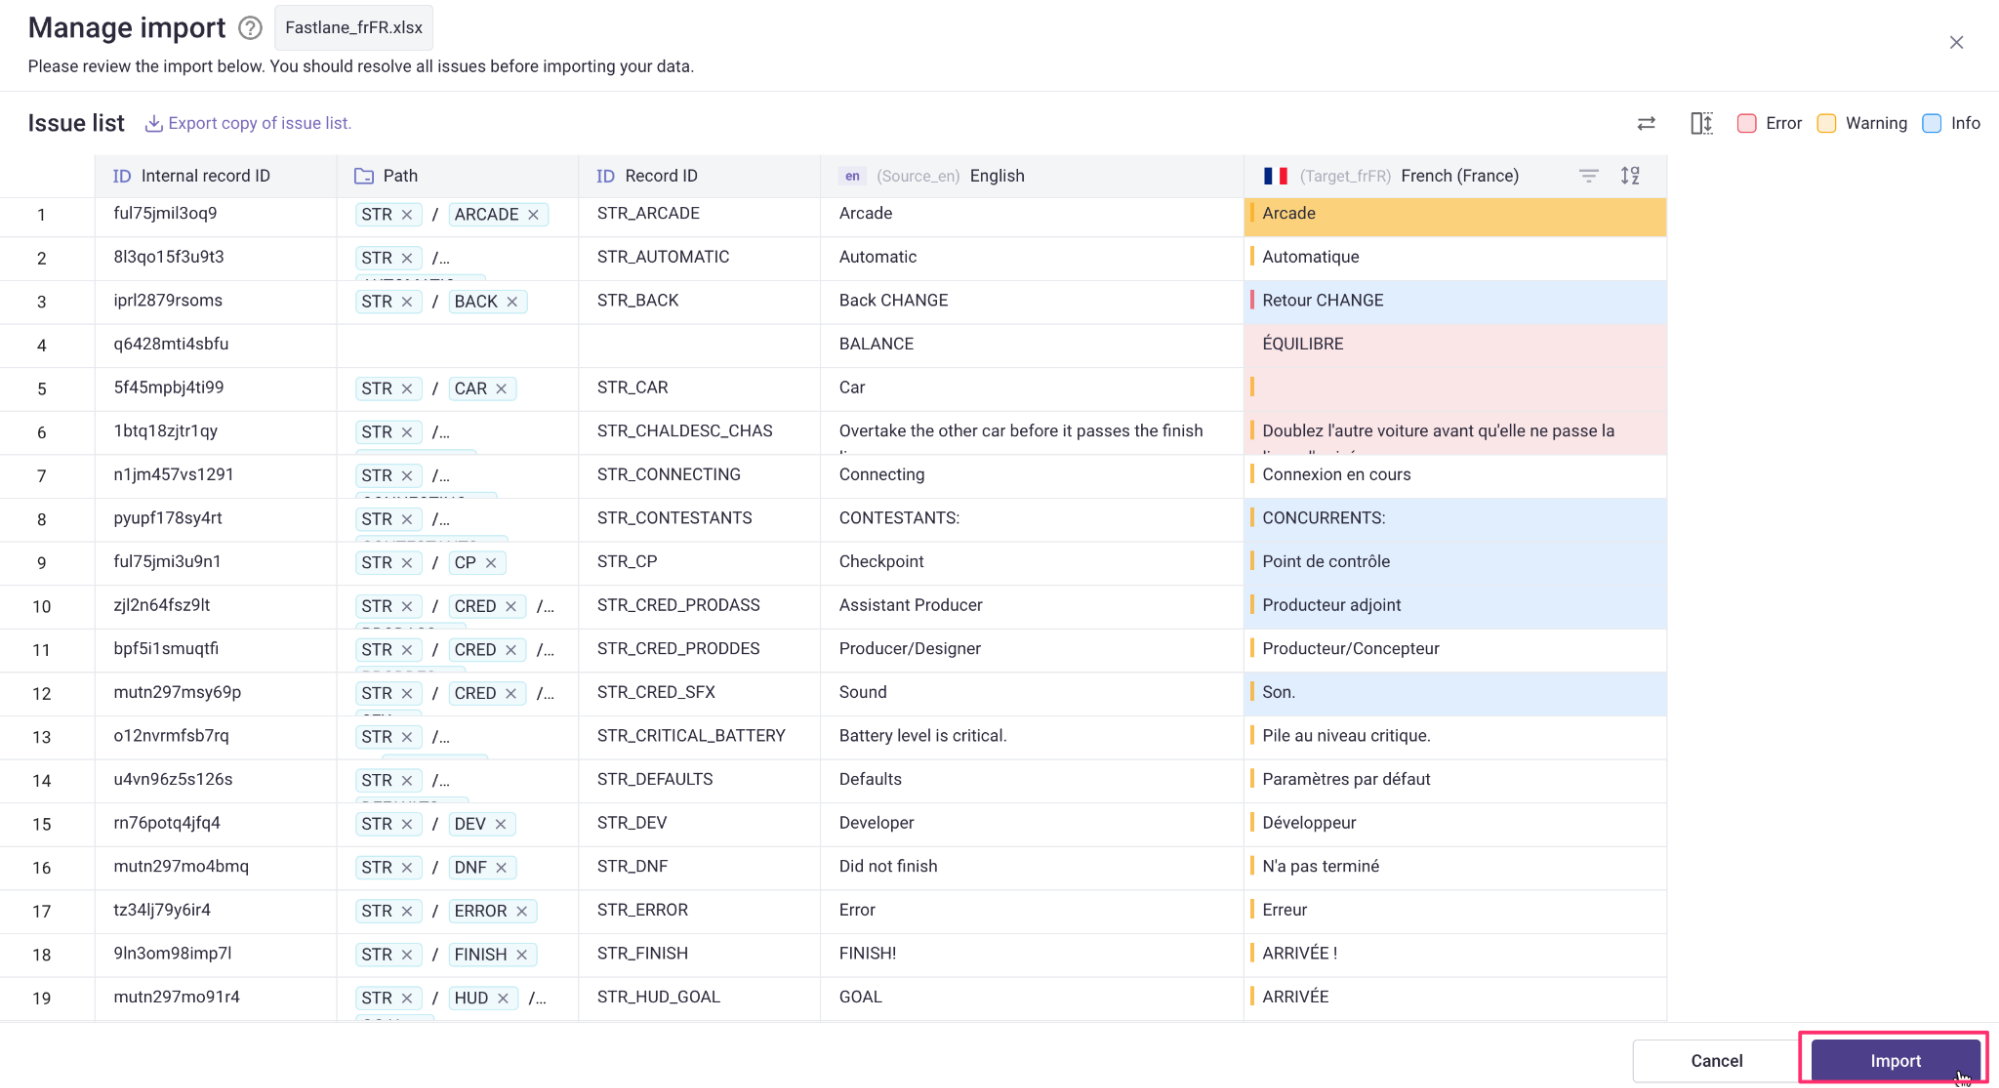
If you don’t manually resolve issues, Gridly will apply the default option for those.
Export the list of issues
If you don’t know how to resolve the issues, or simply want to save them for further investigation, you can choose Export copy of issue list to export a list of current import issues. The exported file will be in XLSX format.
Issue overview
Don't know what the issue is about? Here is the list of issues with detailed explanations. You can always open a record to view the issue details: 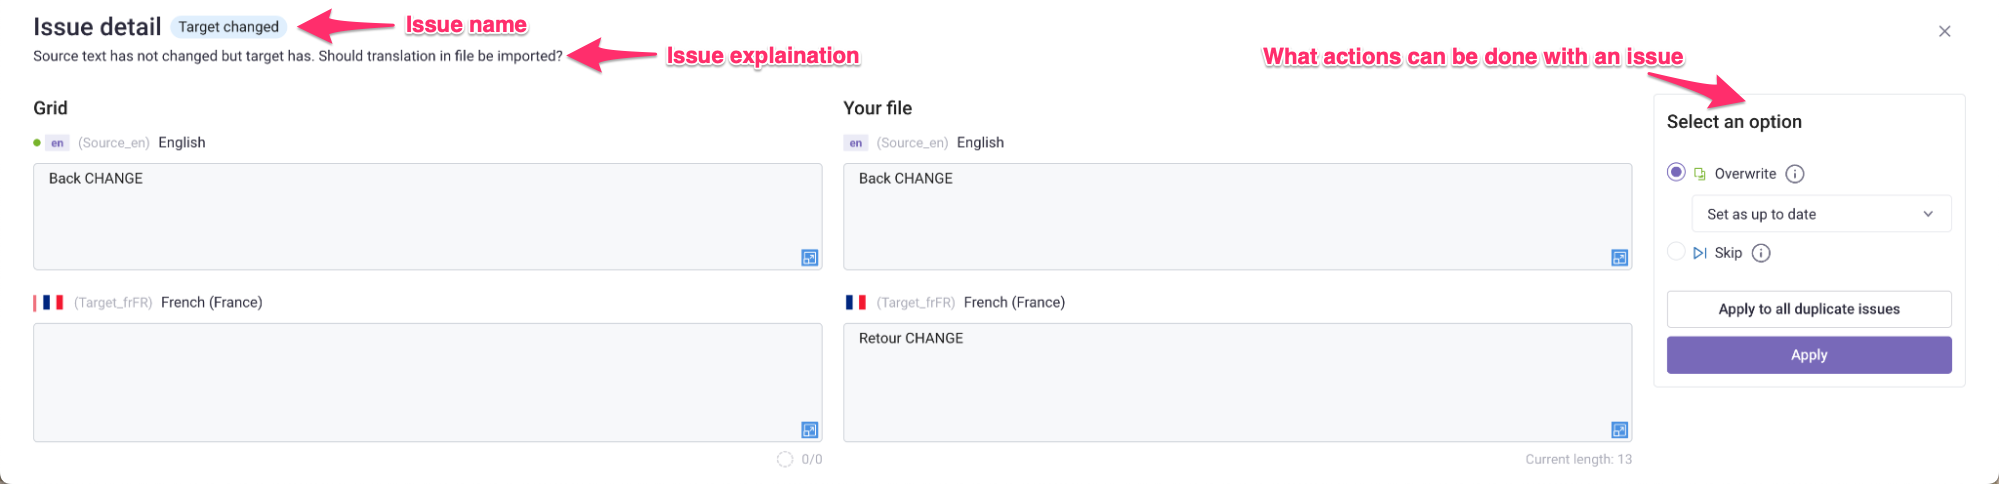
- Issue: the issue name.
- Issue type: Issues are highlighted by types: Error (Red), Warning (Yellow), Info (Blue).
- Description: Explain what the issue is about and why it occurs.
- Action: What can be done with the issue.
- Default Dependency status: the Dependency status of a string will be updated following this Default Dependency status if you don't take any separate actions.
| Issue | Type | Description | Action | Default Dependency status |
|---|---|---|---|---|
| Record not found | Error | This record was deleted from the Grid | Skip import of these records | Keep as current |
| Source not ready | Error | Translation cannot be imported if the source status of the strings is set as Not ready for translation, or Do not translate | Skip import of these records | Keep as current |
| No target | Error | There is no translation in the target language column in the file | Skip import of these records | Keep as current |
| Source changed - Target changed | Warning | The source text has been changed since the last export. | Select whether to Overwrite with updated text or Skip | Keep as current |
| Source changed - Target unchanged | Warning | The source text has been changed since the last export, but the translation is not updated | Skip import of these records | Keep as current |
| TM conflict | Warning | Strings that used TM (Translation Memory) have been updated with new TM data since the last export | Select whether to Overwrite with updated text or Skip | Mark as Up-to-date, and update the imported translation to TM |
| Length exceeded | Warning | Imported strings are longer than the maximum length set in the Grid | Select whether to Overwrite with updated text or Skip | Mark as Up-to-date |
| Source changed | Warning | The source text has been changed since the last export | Skip import of these records | Keep as current |
| Target changed | Info | The text in the target language has been changed | Select whether to Overwrite with updated text or Skip | Mark as Up-to-date |
| No change | Info | There is no change in the translation before and after exporting | Skip import of these records | Keep as current |
Import issue warning settings
You can choose whether to show warning messages for specific issue types and also select a default action if that issue is found. This is all configured in the Import warning tab.
On the project page, click  next to the company name and select Localization settings, then open the Import warning tab.
Default import warning settings are applied to all projects. You can toggle on or off and select the default action under each issue type. If you want to create a custom import warning for a specific project, click Create New Setting.
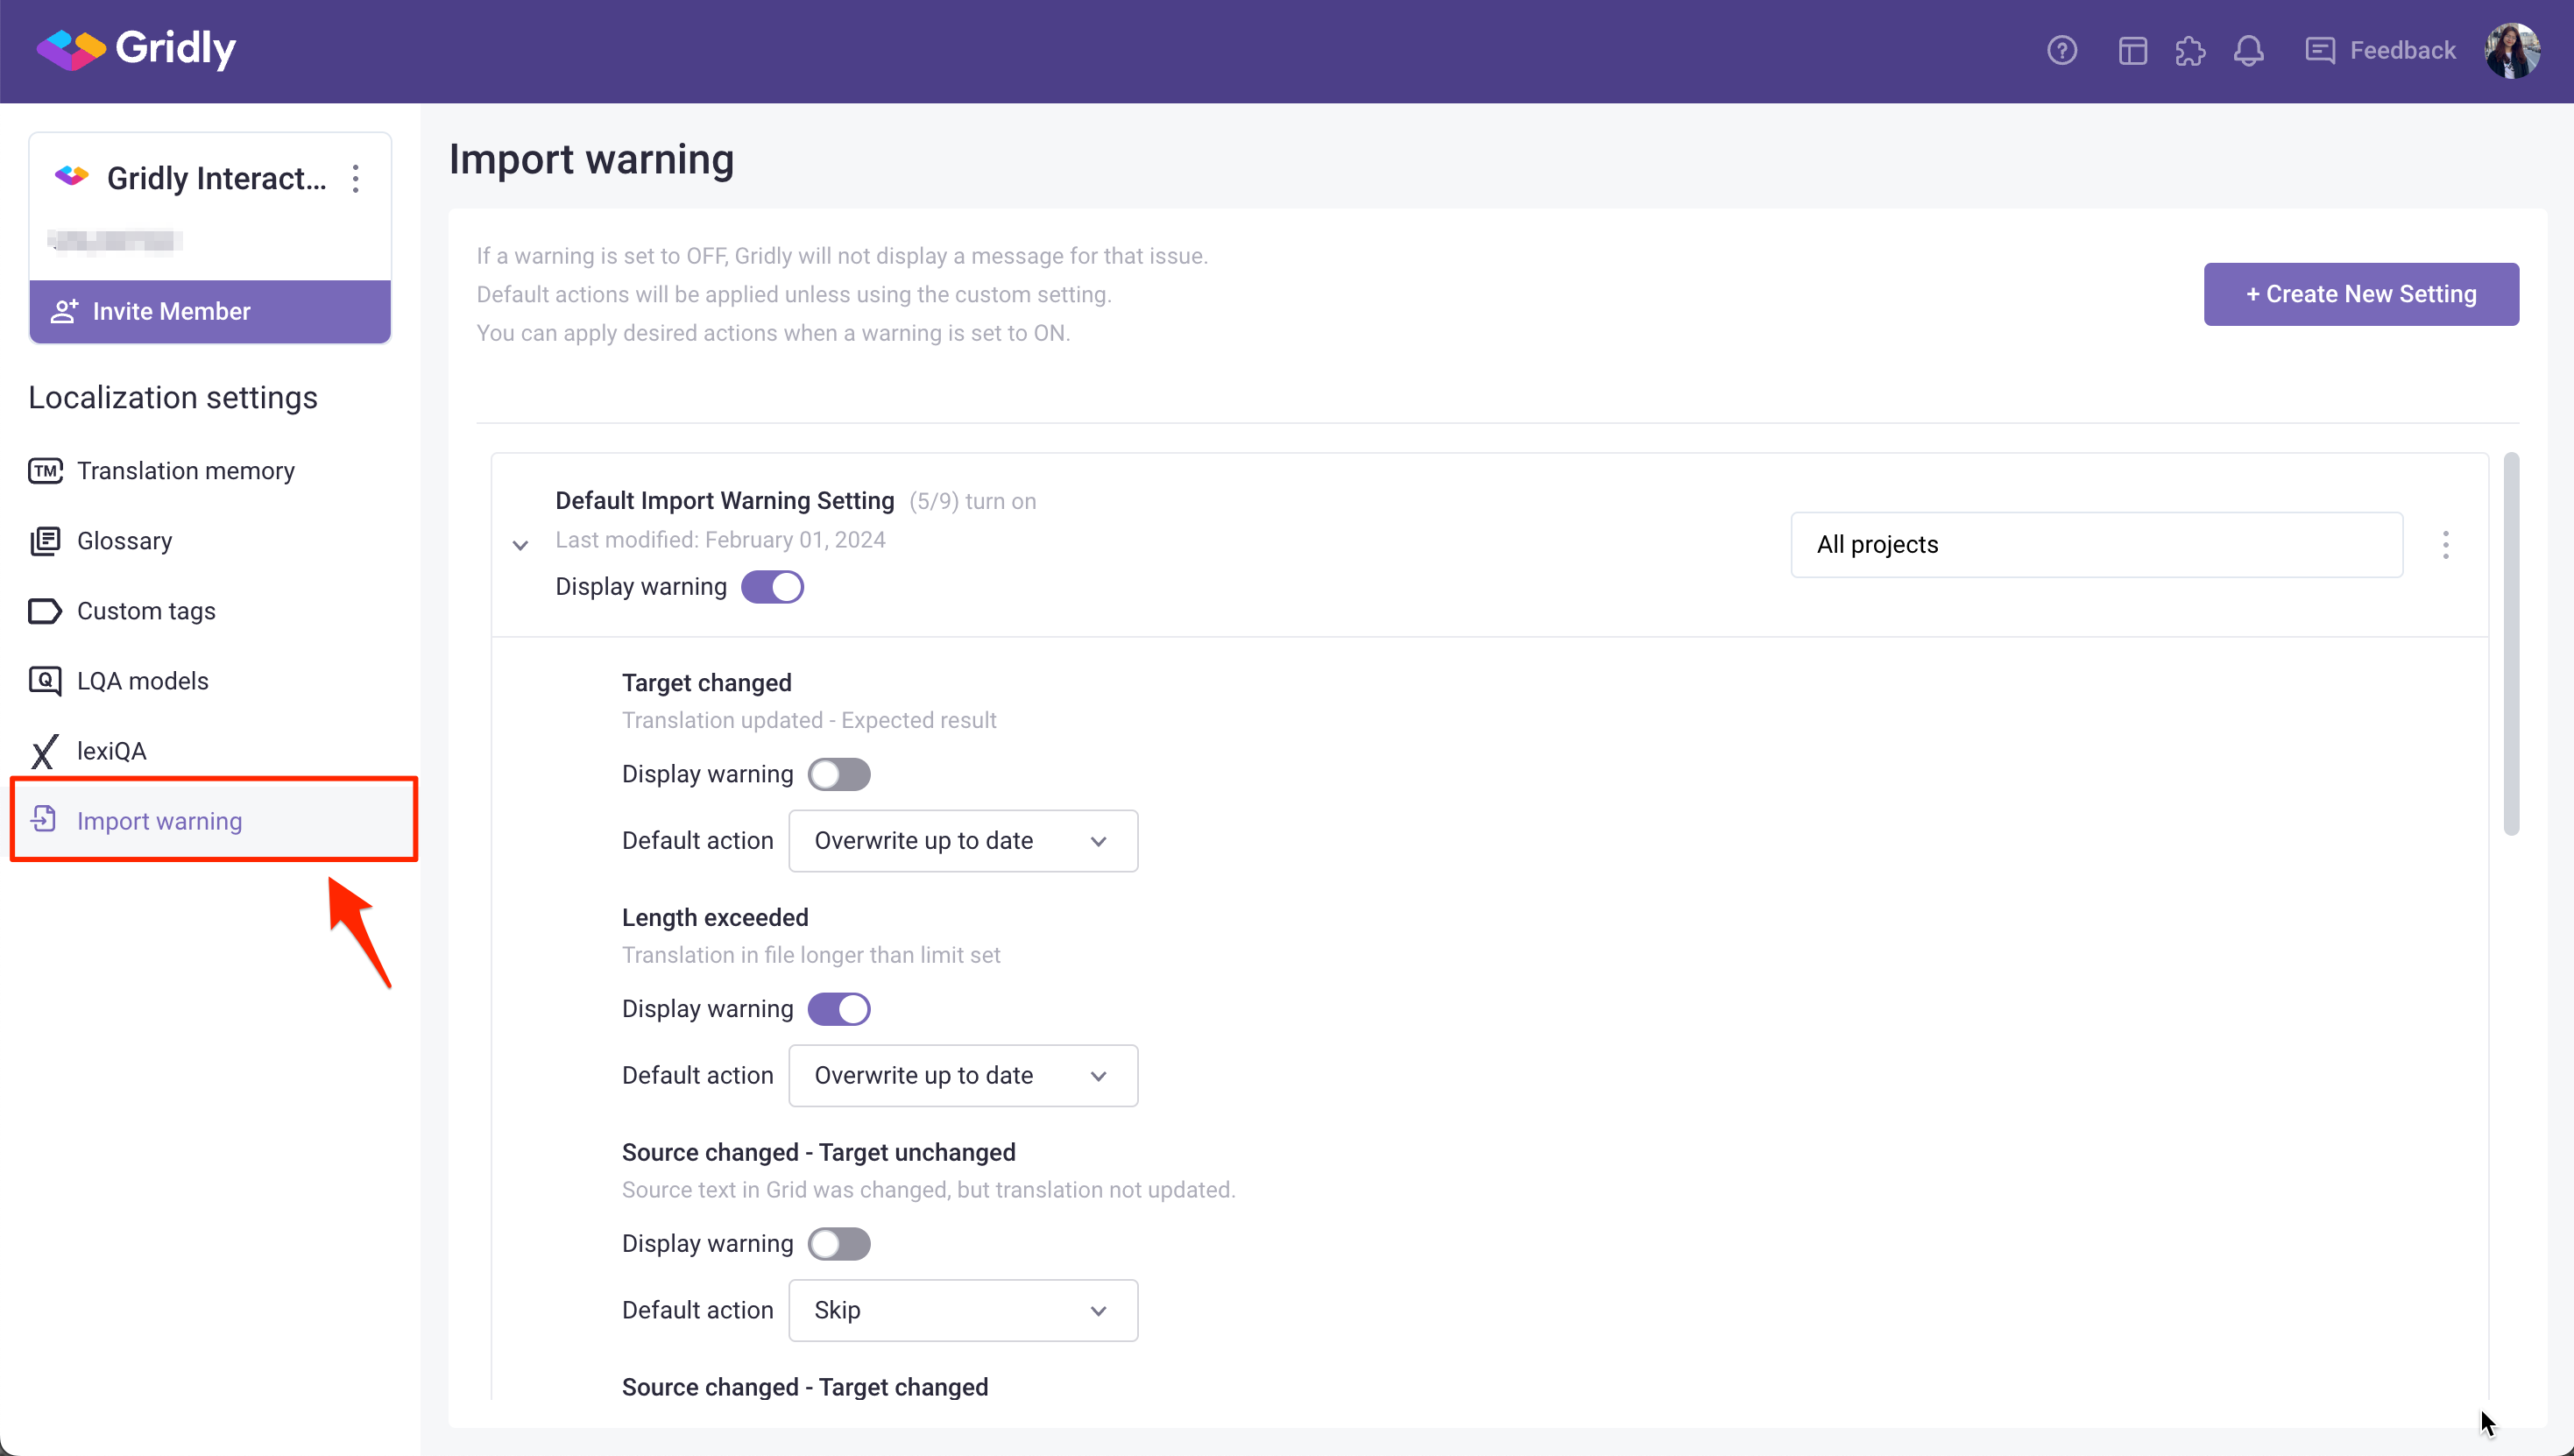
For example, the message below won't be displayed when the option Display warning is set to off. The default action will be applied automatically.

You can check and change the default actions for your issues in the Import warning setting.
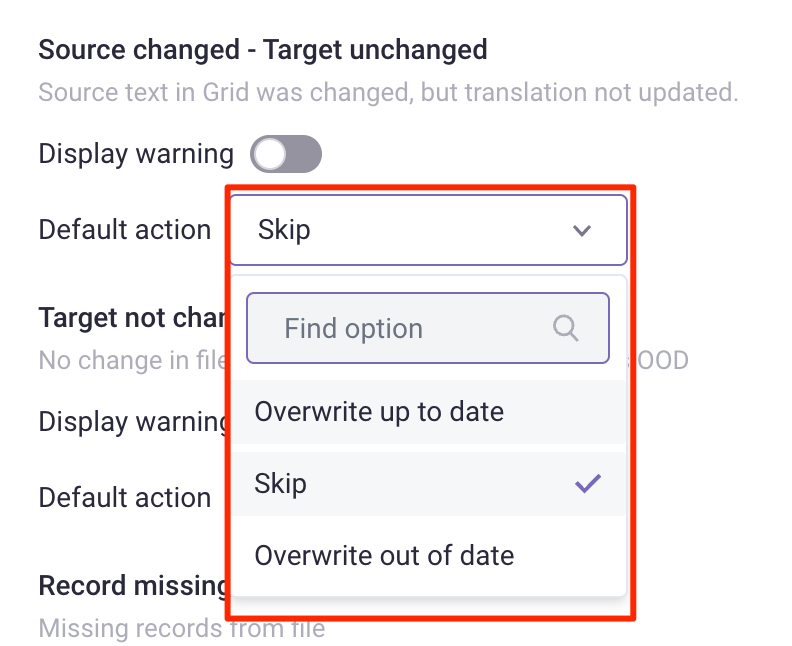
- Skip: Skip importing the records to the Grid
- Overwrite - set up-to-date: Overwrite with updated text from the imported file, mark the dependency status of the strings as up-to-date.
- Overwrite - set out-of-date: Overwrite with updated text from the imported file, mark the dependency status of the strings as out-of-date
Note
You cannot change the default action for Record not found and Source not ready issues. They will always be skipped when importing.