What is a Content Delivery Network?
A content delivery network (CDN) is a geographically distributed network of proxy servers and their data centers.
The purpose of using a CDN is to deliver content faster to users located all over the world. For example, if you were in New York and wanted to visit a London clothing site that is hosted in the UK, you would experience slow content load times. When a CDN is used, every incoming request will be routed to the closest server — the one with the best latency — to maximize the delivery speed.
CDN in Gridly
You can publish your data directly from your Grids to our secure and high-speed content delivery network using Gridly's CDN, powered by CloudFront, a leading CDN solution provided by Amazon.
CDN in Gridly also comes with advanced security measures, including signed URL protection that restricts access to the files based on a range of time and allowed IP ranges. This ensures that your app's data is fully protected and only accessible by authorized users, providing maximum security for both you and your customers.
Set up
Enable CDN in Gridly
If you are interested in using CDN in Gridly, please contact our support team and ask the team to enable it for you. You will need to supply a CDN Subdomain to allow setup of the CDN functionality.
Please note that this is only available for Enterprise tier users.
Add a CDN file
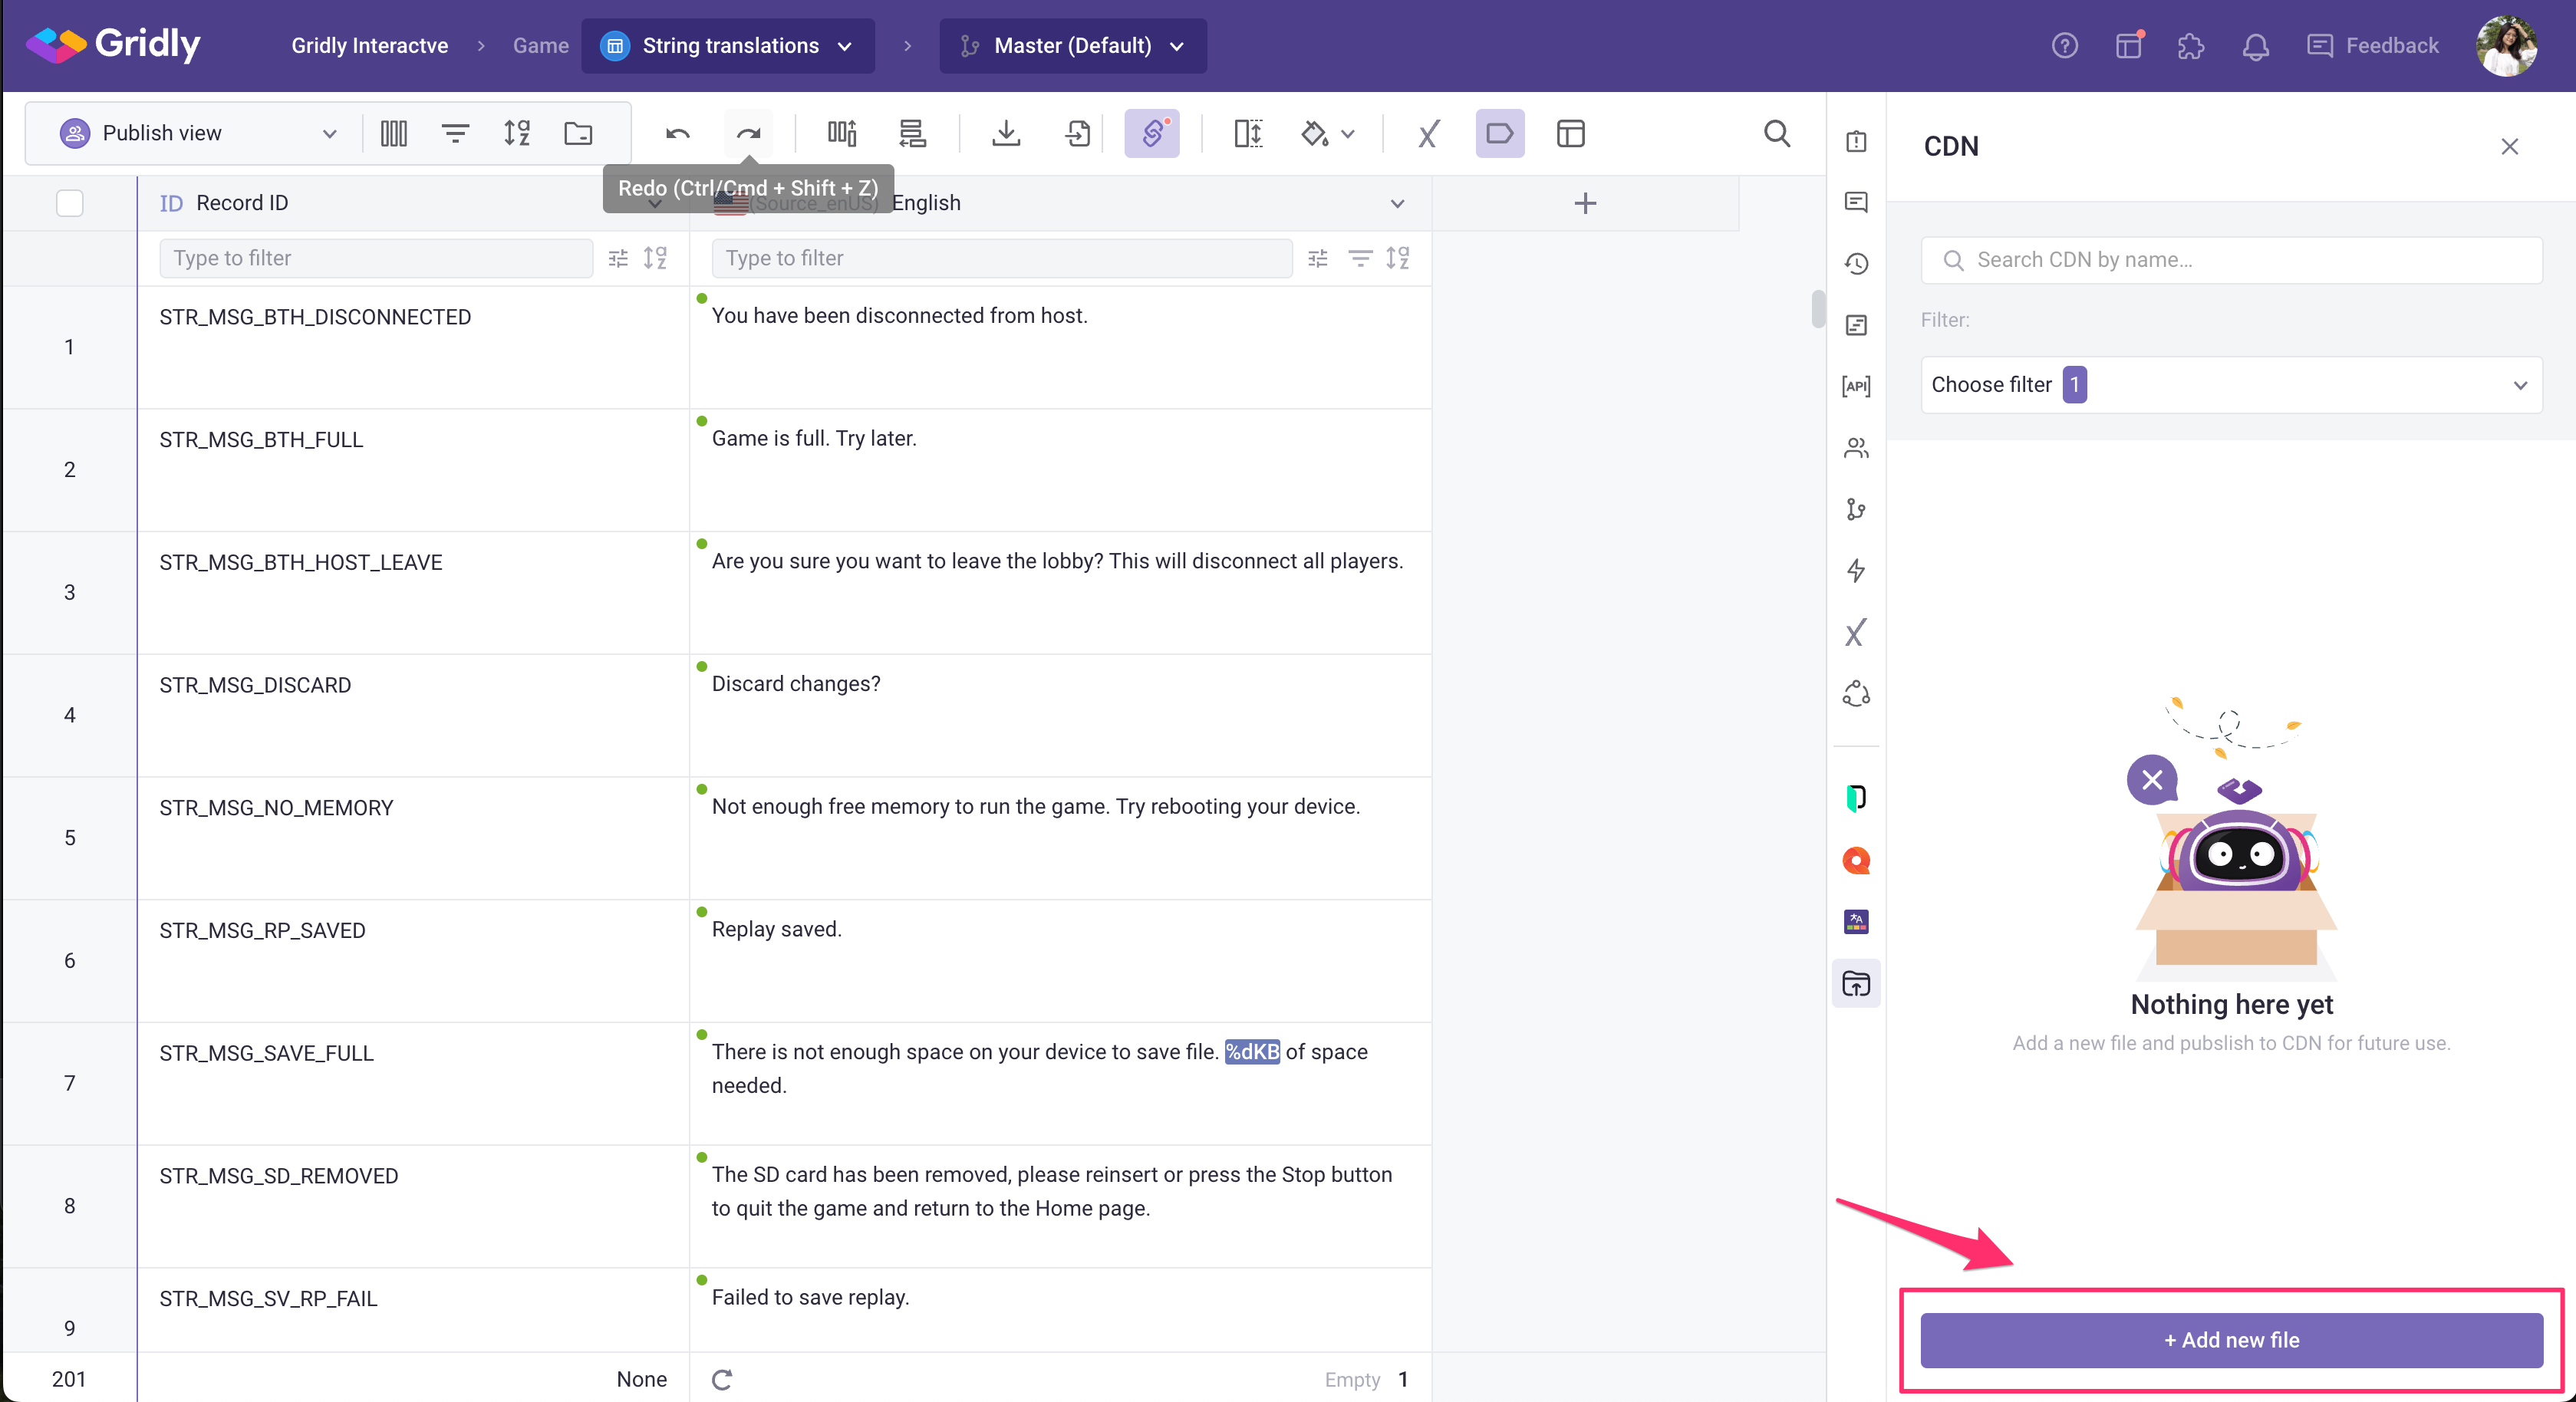
- Open a Grid, and on the sidebar on the right, find the icon to open CDN.
- Click + Add new file.
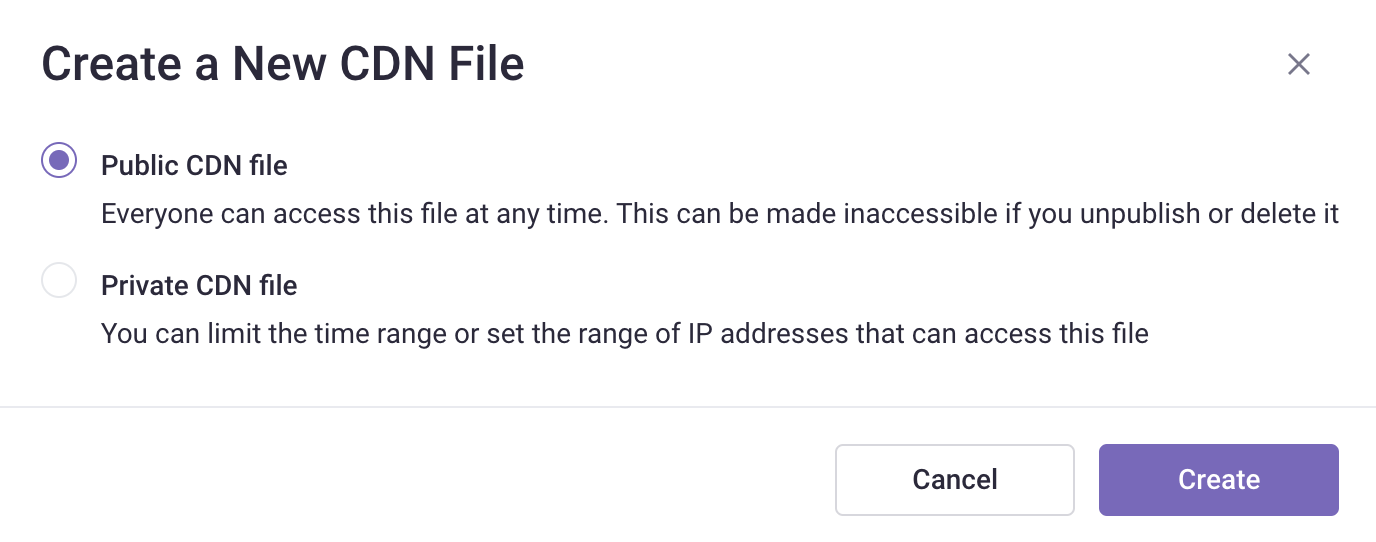
- Select CDN file types:
- Public file: Everyone can access this file at any time. This can be made inaccessible if you unpublish or delete it.
- Private file: You can limit the time range or set the range of IP addresses that can access this file.
Public CDN file
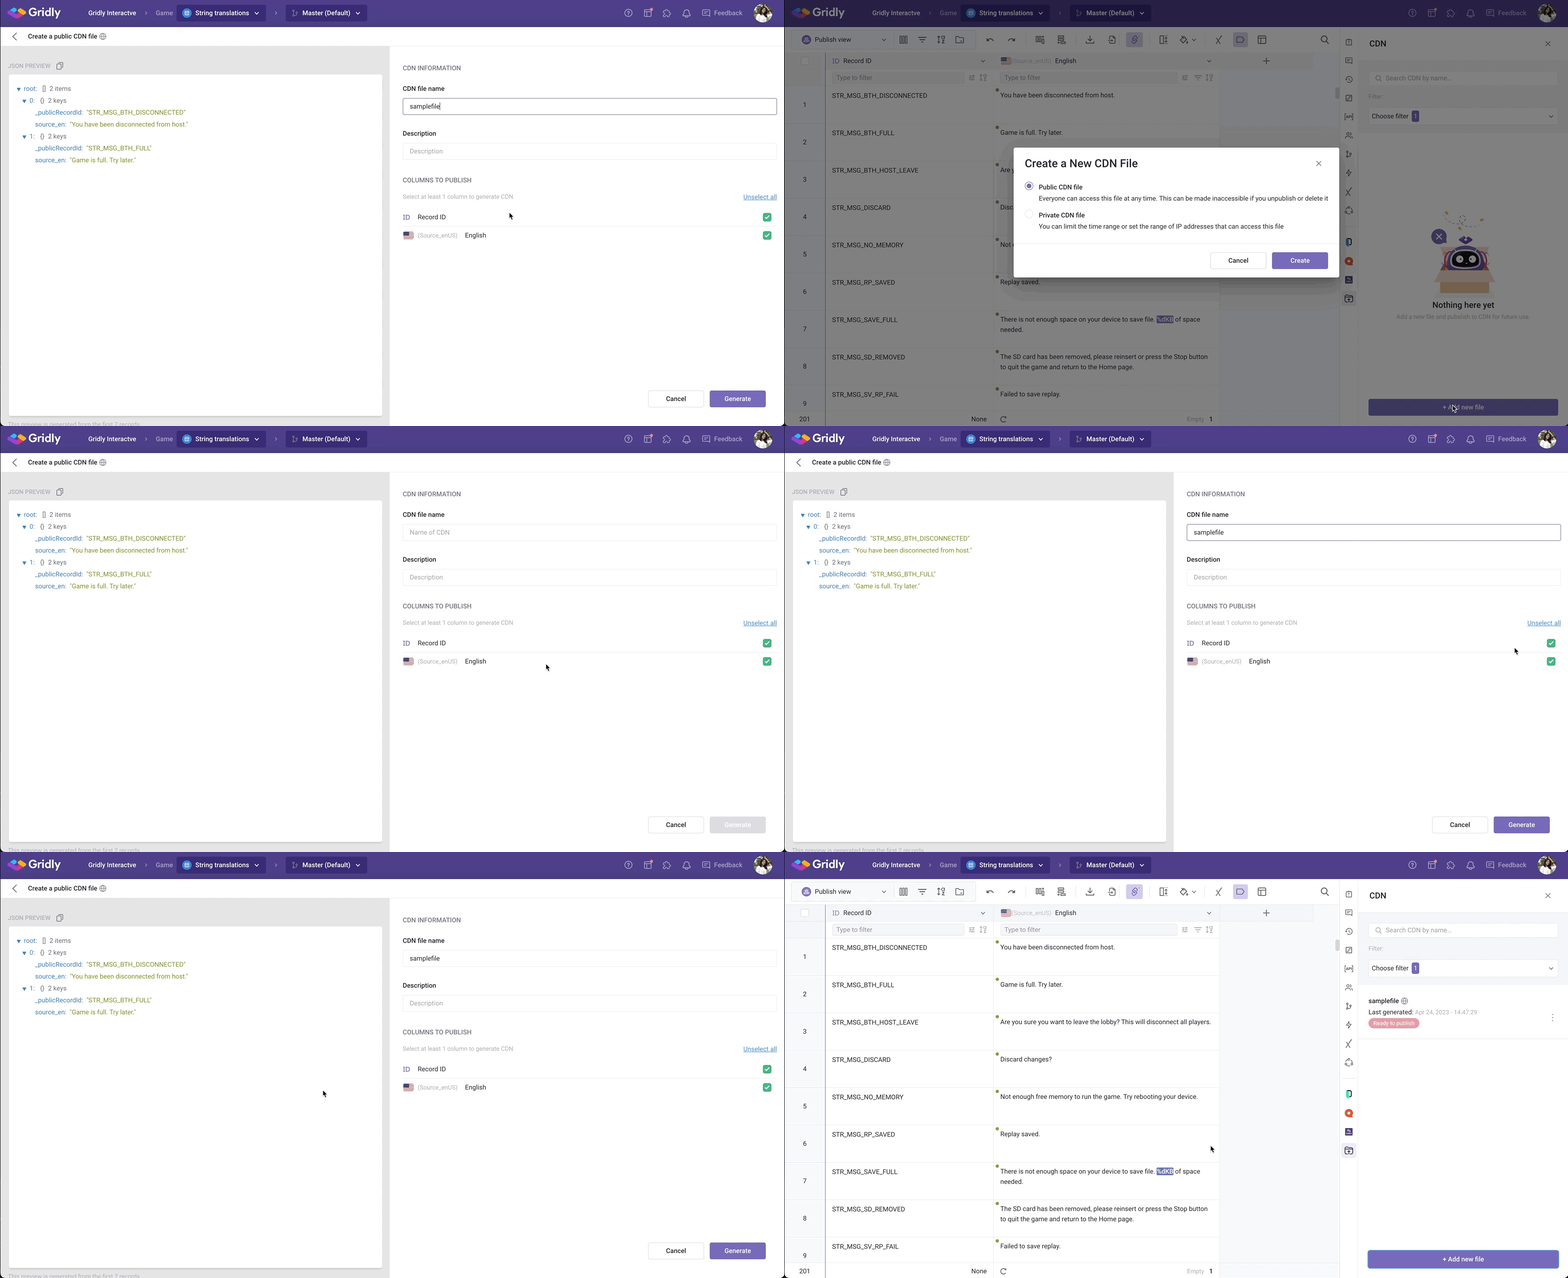
- Select Public CDN file, then click Create.
- Enter CDN file name and Description (optional).
- Select Columns to publish. All Columns are selected by default.
- Check the JSON preview on the left. Gridly shows you two sample records from your Grid so you can check the metadata. Click
 to copy the JSON Preview data.
 - Click Generate. When it’s done, click Back to CDN list.
Private CDN file
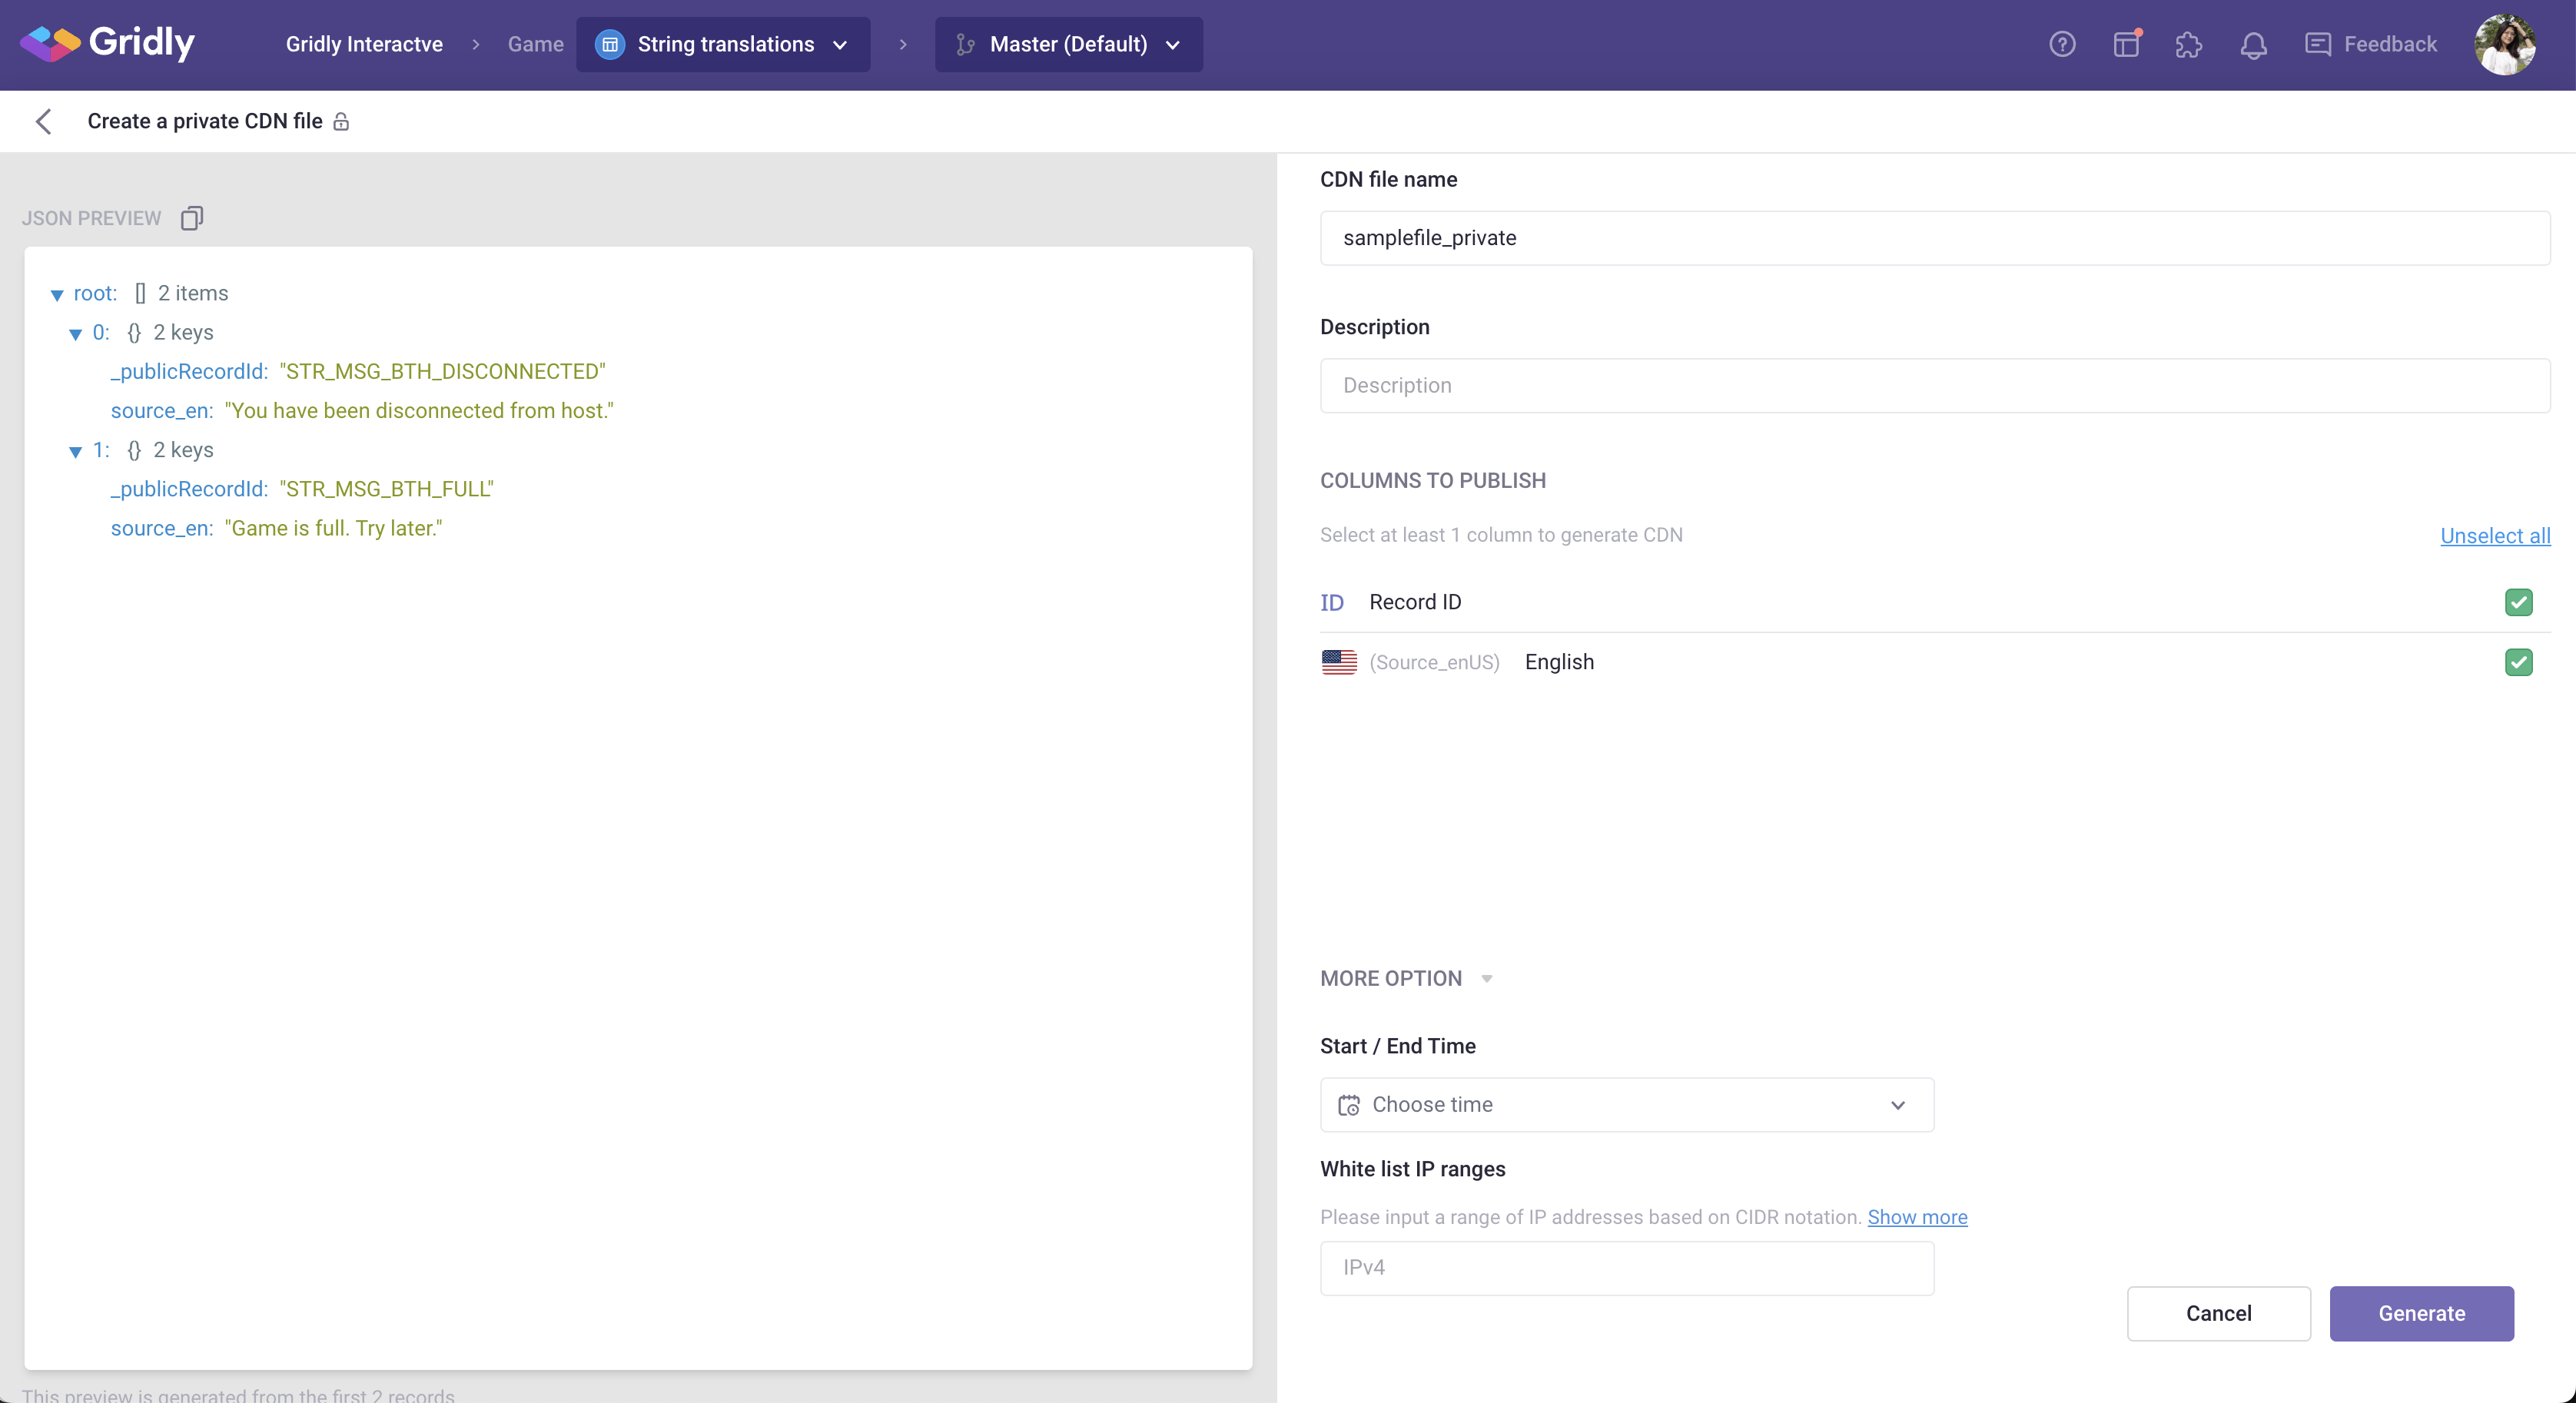
- Select Private CDN file, then click Create.
- Enter CDN file name and Description (optional).
- Select Columns to publish. All columns are selected by default.
- Select Start/ End time to restrict access to the files based on the time range.
- White list IP ranges: a range of IP addresses that are allowed. Input a range of IP addresses based on CIDR notation.
- Check the JSON preview on the left. Gridly shows you two sample records from your Grid so you can check the metadata. Click
 to copy the JSON Preview data.
 - Click Generate. When it’s done, click Back to CDN list.
Publish CDN file
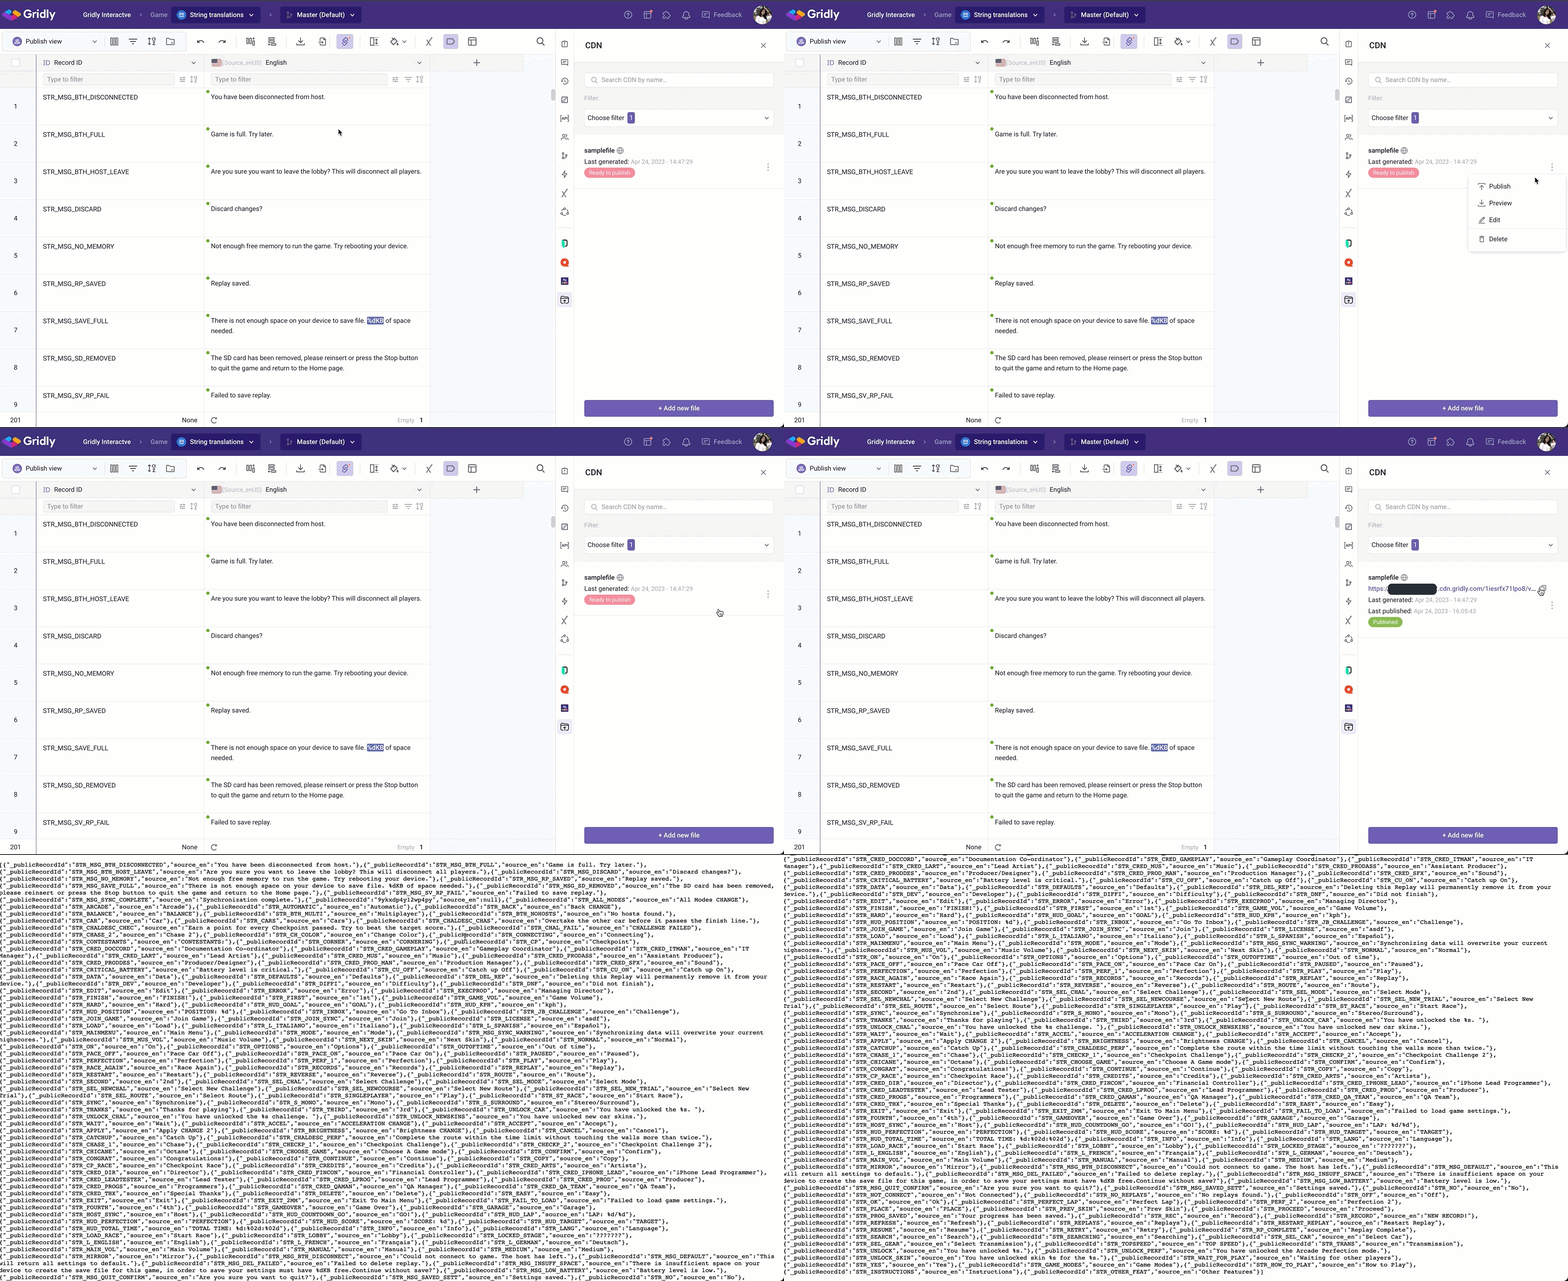
- Open the CDN list from the sidebar and click
 next to the CDN file you want to publish.
 - Click Publish.
- Click
 to copy your file URL and use it to configure the CDN in your project. Depending on the platform used in the project, the implementation method will differ.

Manage CDN files
Unpublish CDN files
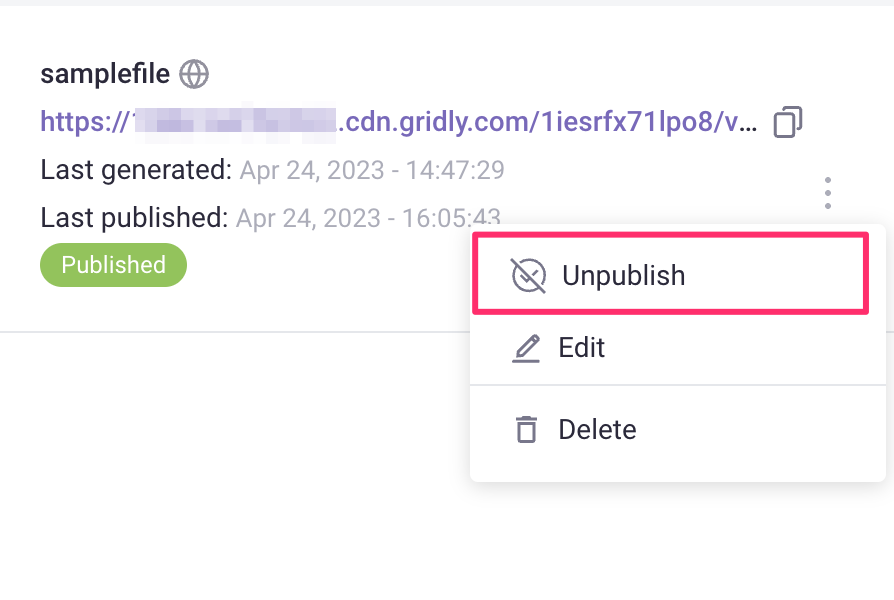
Open the CDN list from the sidebar and click  next to the CDN file you want to unpublish. Click Unpublish and confirm.
Note
Once unpublished, the file will no longer be accessible on the CDN.
Edit published CDN files
- Open the CDN list from the sidebar and click
 next to the CDN file you want to edit.
 - Click Edit.
- Edit the details and click Regenerate.
Note
This will replace all previously generated files and assets with new ones.
This action will not affect the currently published file, but it will be marked as Outdated. If you want to publish with the edited file, you'll need to publish it again after the generation process is completed.
Search CDN files
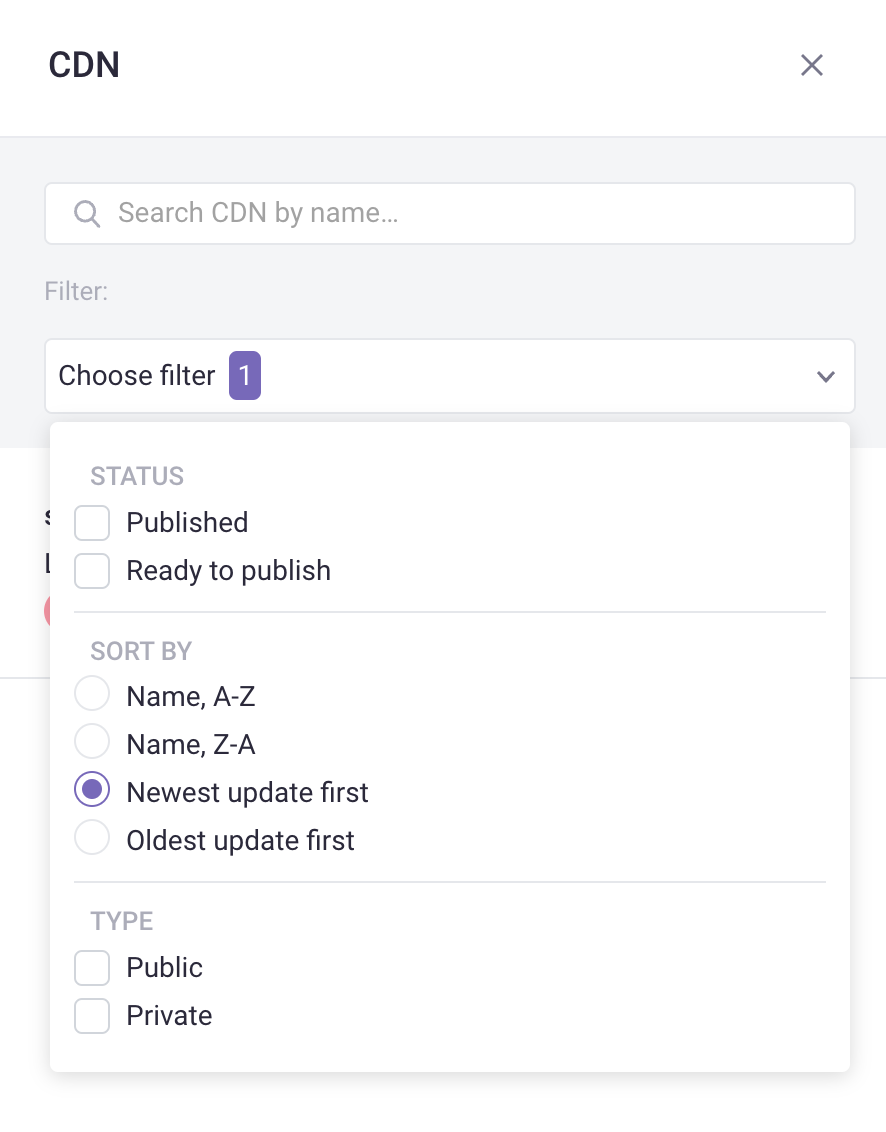
If you have many CDN files, you can search by name or filter by status on the CDN list.
Delete CDN files
Open the side menu for the CDN file and click Delete.
Warning
Once deleted, all data will be permanently removed and the file will no longer be accessible on the CDN.
Check CDN usage
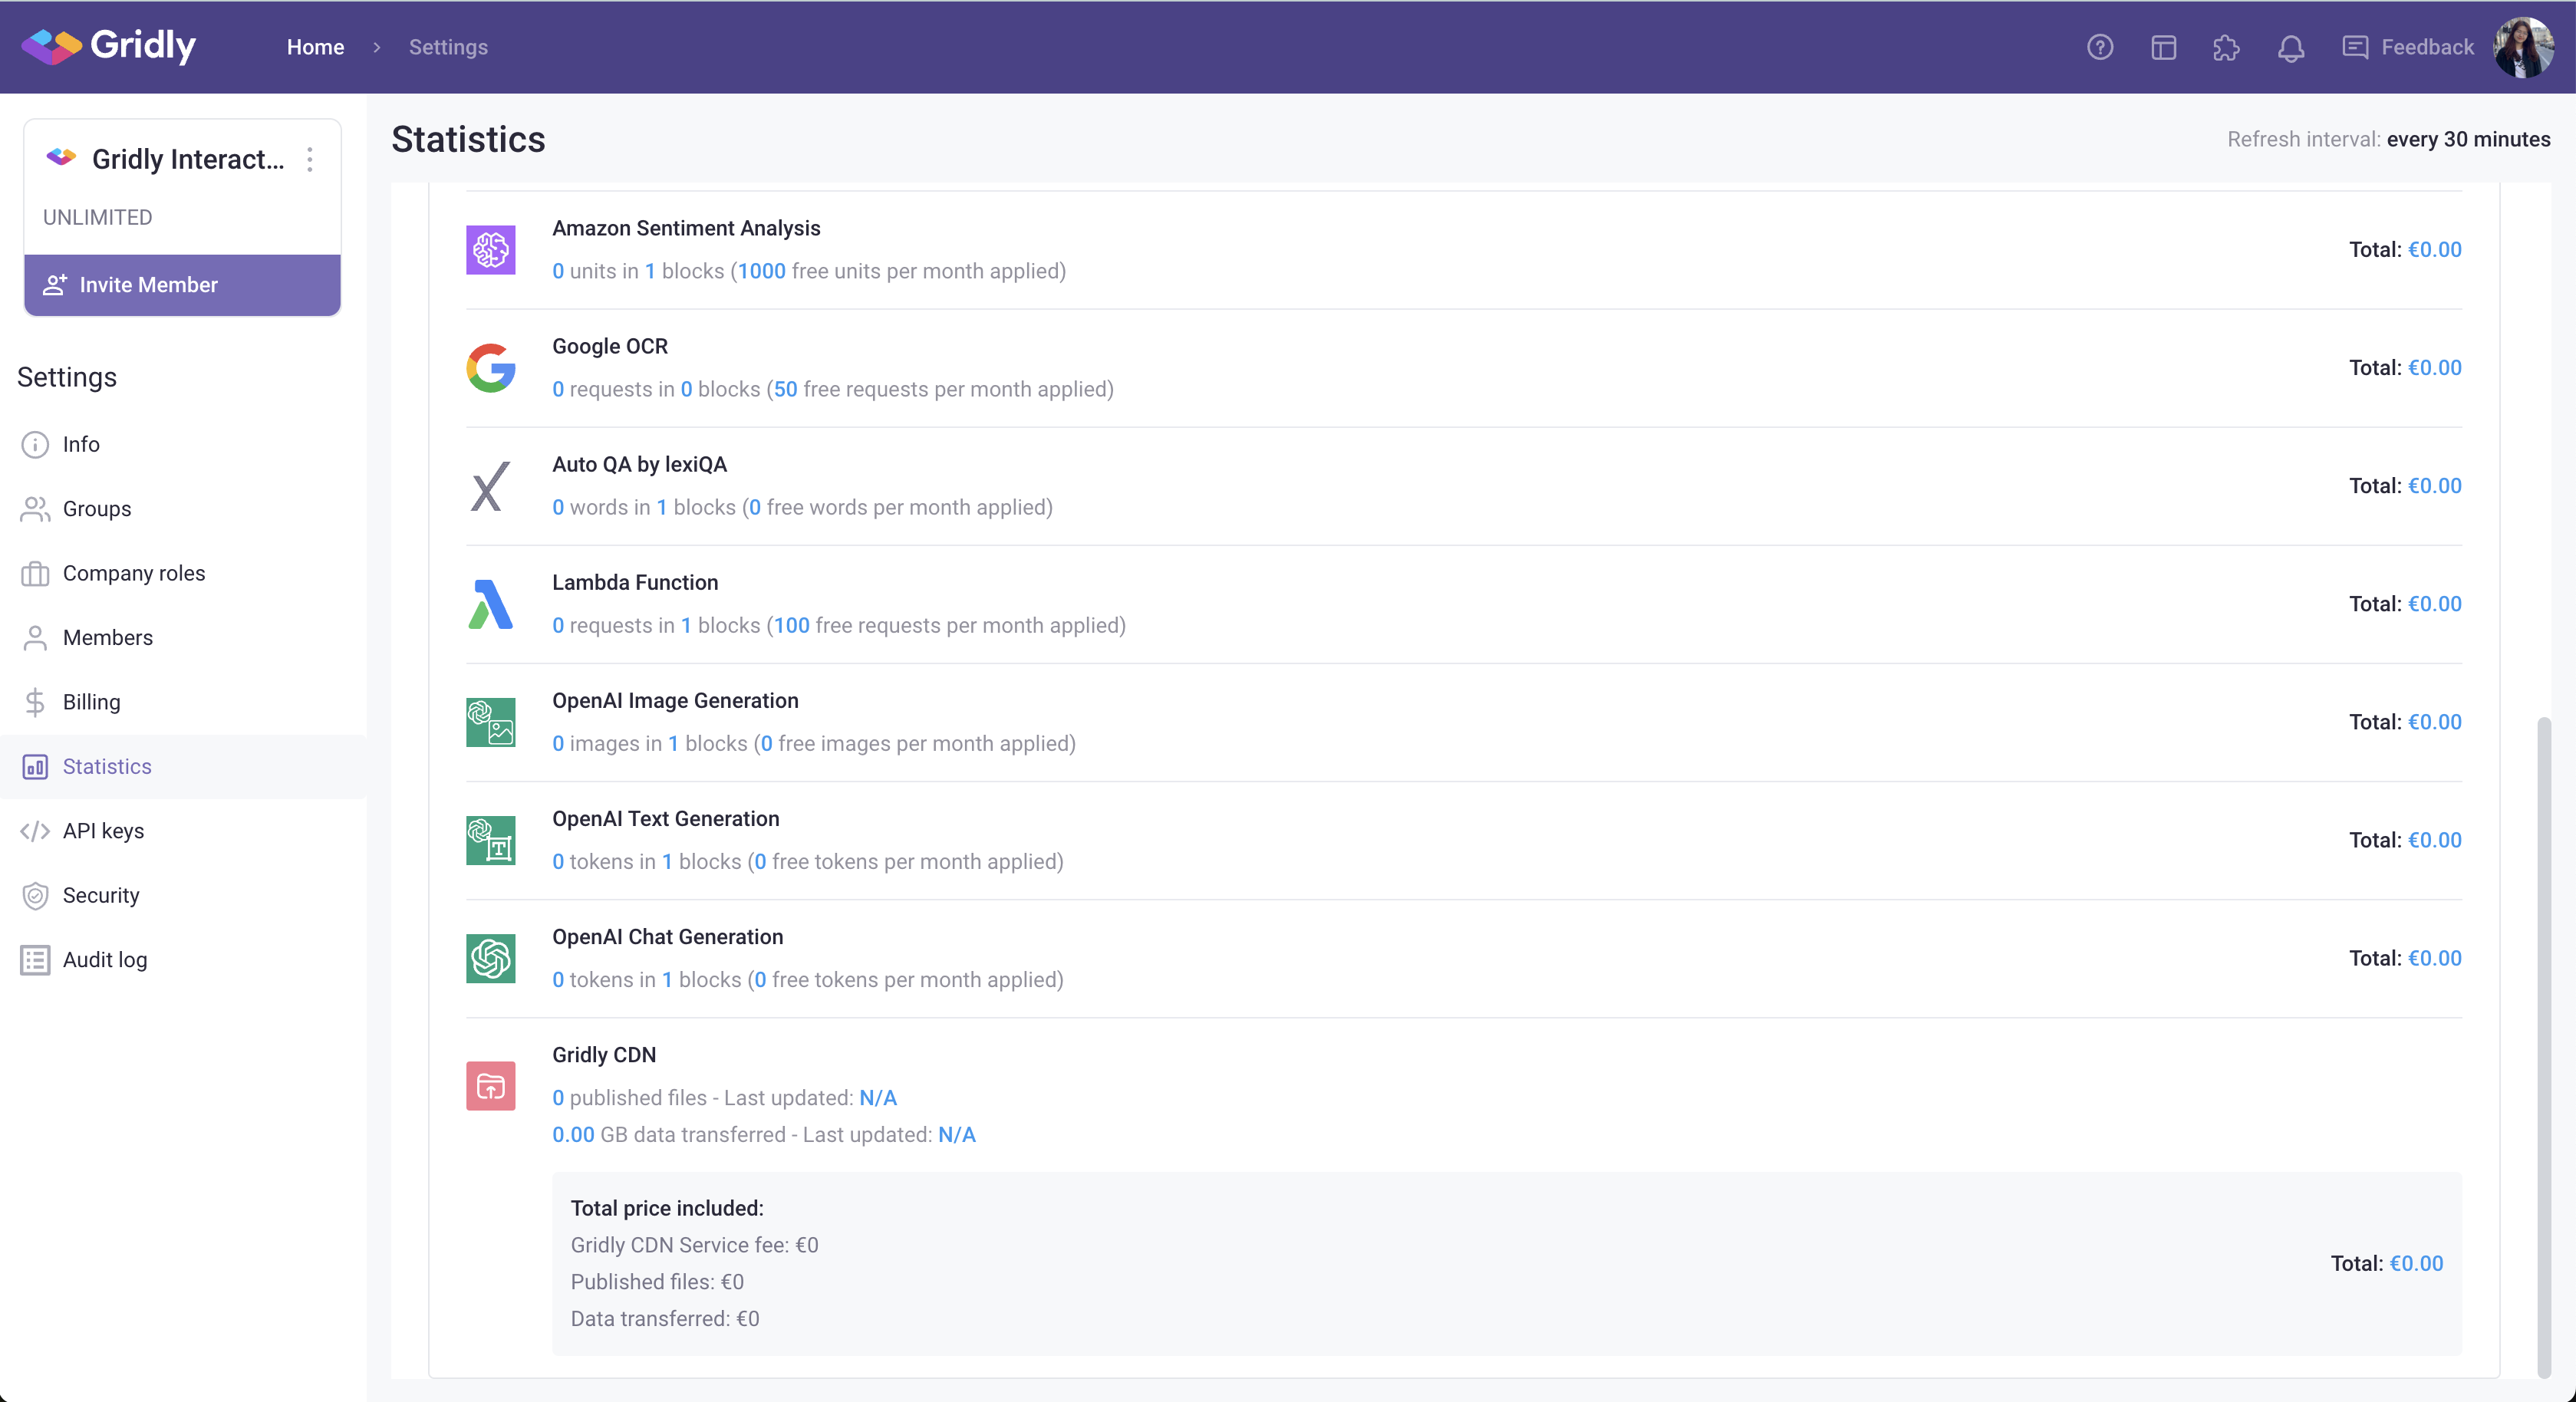
- On the project page, click
 next to the company name to open Company settings.
 - Find and open the Statistics page, scroll down to find statistics about CDN at the bottom.
Q&A
What are Published Files and how to count them?
Published Files are files that are successfully published to CDN, including all the asset files in the Grid.
Published Files can include:
- The JSON files you generate when create a CDN file.
- Asset files that are stored in the Files columns in the Grid.
For example, a Grid containing nine records, a Files column, and one image per record in the Files column would have 10 total Published Files: one JSON file and nine images.
If I want to stop using CDN, do I have to pay any fees?
If you want to stop using the CDN feature, please contact our support team to disable your account. You won't be charged any fees when canceling your service.
The amount due for the current month will be calculated based on the price quote that we previously provided. If you use the free allowance that we offer, you'll only need to pay the minimum fee each month. If you exceed the free allowance, you’ll be billed for any additional usage until you completely uninstall the CDN based on the pricing.
What will happen if I uninstall CDN?
Once you uninstall the CDN feature, all CDN Files that you've created will be completely deleted from the system and cannot be recovered.
In case you want to use CDN again after uninstalling it, we'll consider you as a new customer who's using our CDN service for the first time. You'll need to contact our support team to reactivate the CDN feature, and a new billing cycle will be started as usual. There won’t be any CDN Files in your list because your old files will have been completely deleted from the system.