When creating an Automation with the “Send a Slack message” action, a Slack message will be sent to your selected channel whenever the Automation runs successfully.
If you are not familiar with creating an Automation, please view the following article: Creating an Automation
Setup
After creating the Automation, you need to configure the trigger and action. In this example, we’ll create an Automation that sends a message to the Slack channel when a string in the source language column is edited.
Add “Record updated” trigger
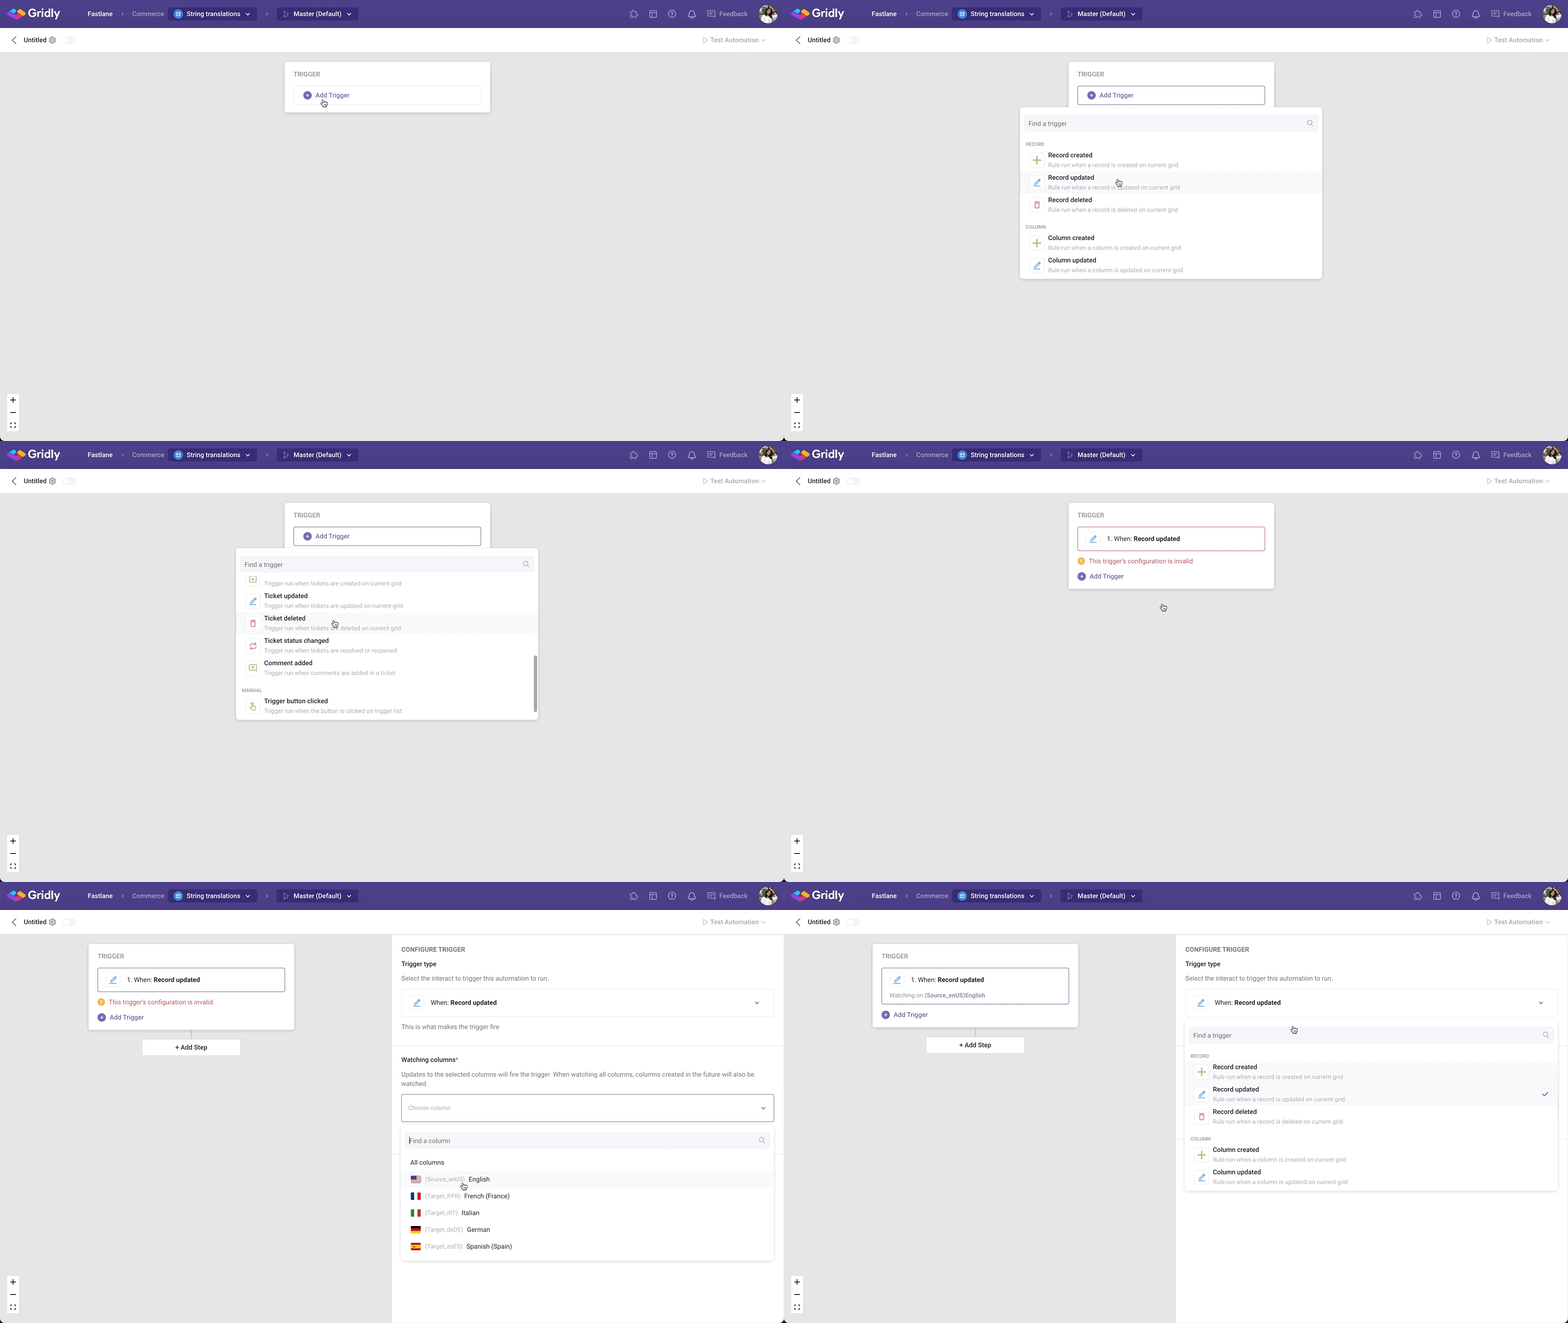
- Click Add Trigger, then select “Record updated” from the dropdown list’
- In the Watching columns section, select the Source language column (Source_enUS).
Add “Send Slack message” action
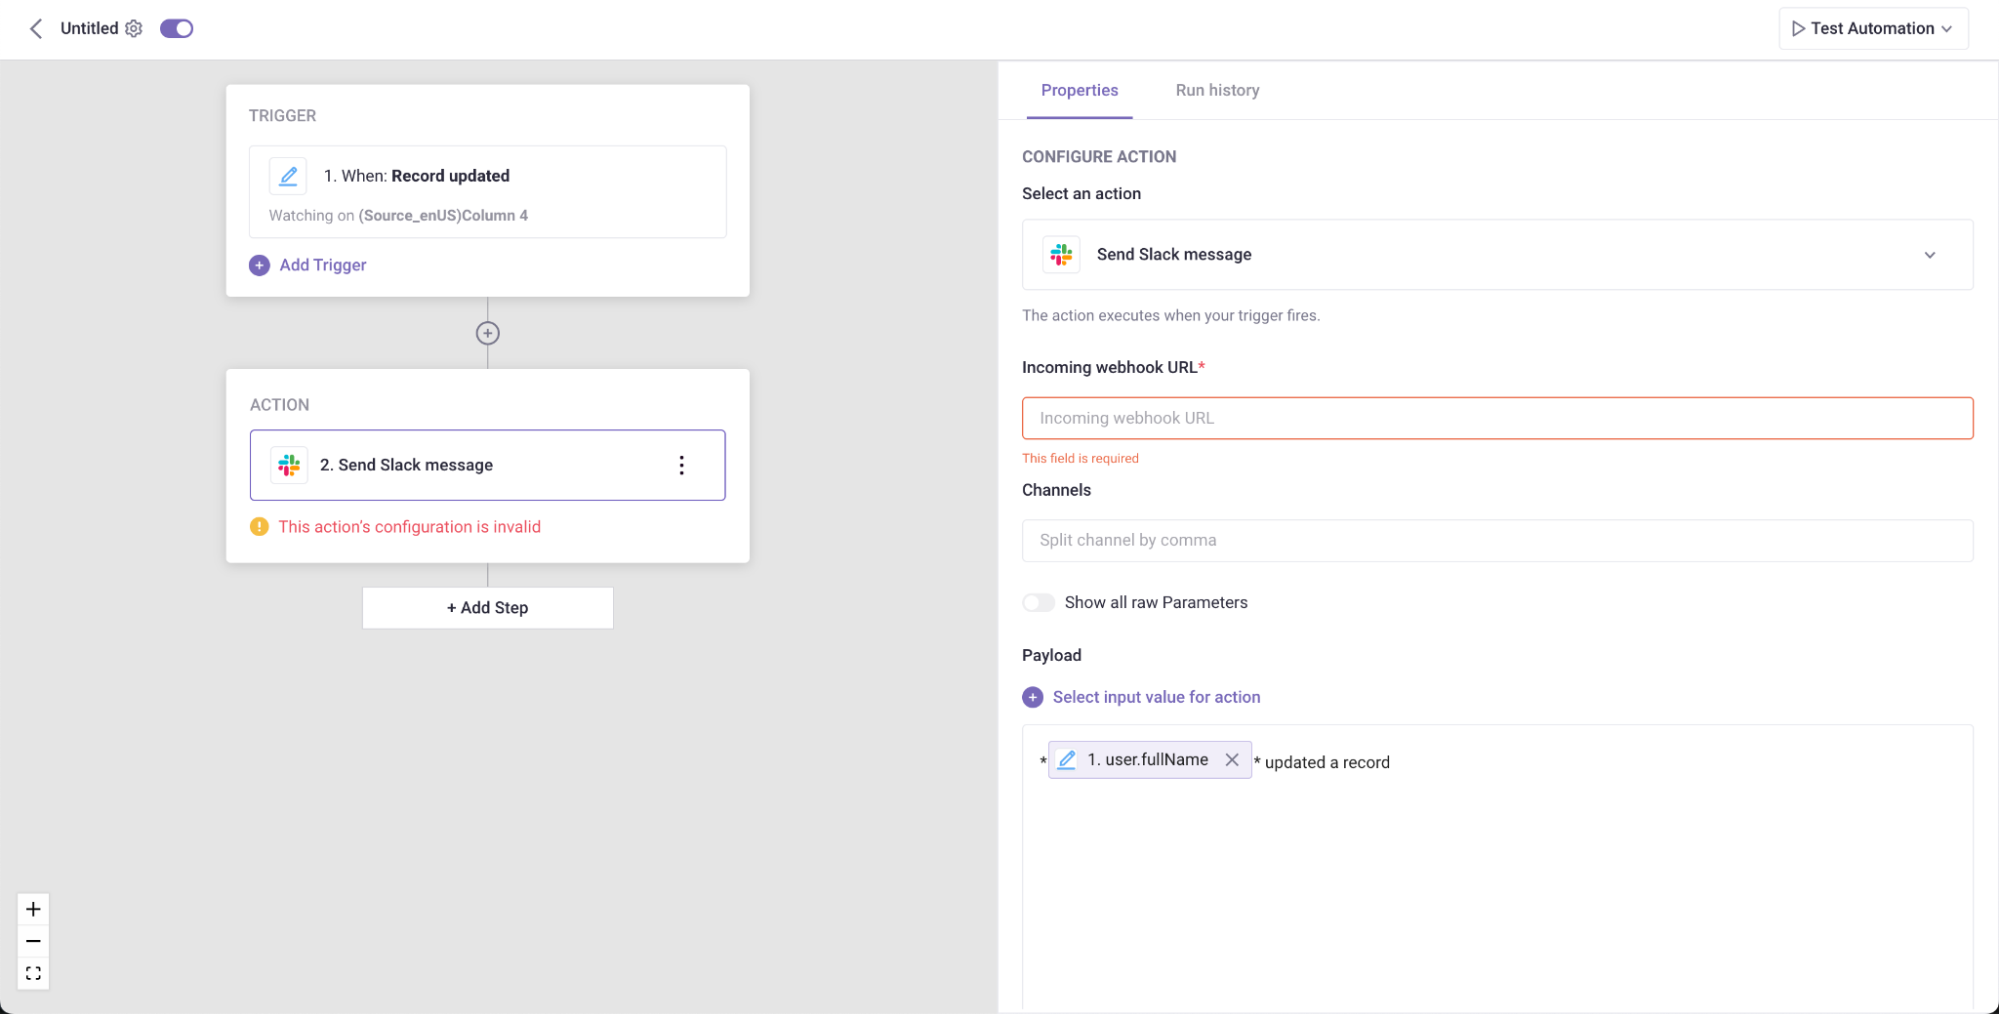
- Click Add Step and select Send Slack message in the list of actions.
-
Input your Incoming webhook URL:
- If you do not have one, you can visit this article to create a Slack app and get the webhook: https://api.slack.com/messaging/webhooks#create_a_webhook. By doing this, you are creating an app that acts as a person who will send the message to the specified channel you want.
- Or you can Install the custom integration created by Slack Incoming Webhooks here and get the Incoming webhook URL. Please note that this is an outdated custom integration.
-
(Optional) Input Channels (split channel by comma): For those who are using Slack Incoming Webhooks, you are able to send messages to other public channels.
-
Customize Payload: Payload is how your message is formatted and sent to the channel. To customize the payload/message:
-
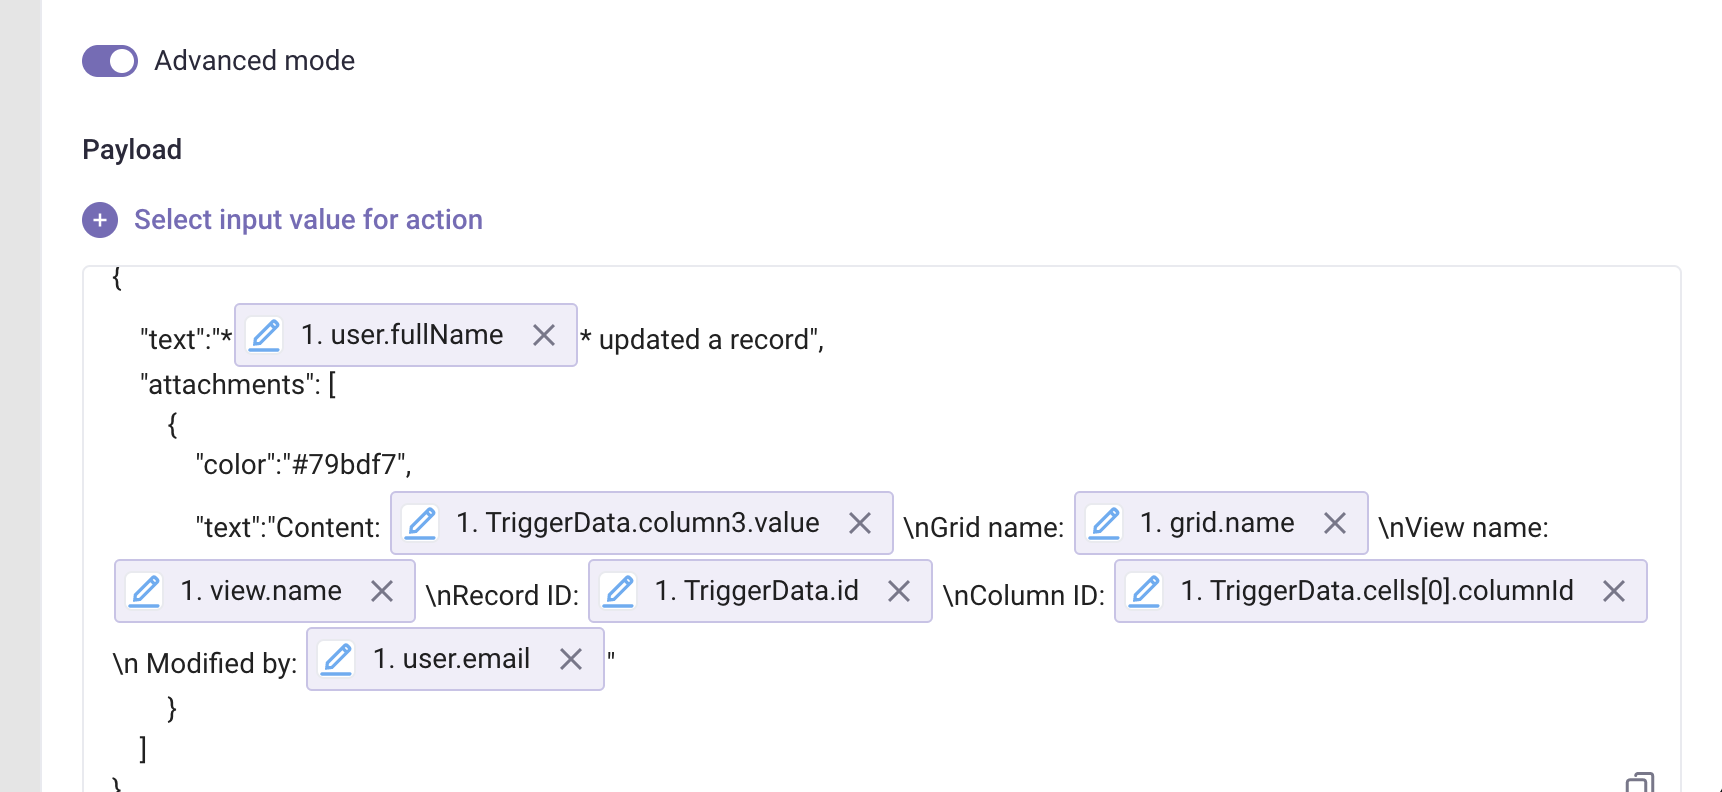
- Click the toggle to turn on Advanced mode
-
You can visit this article: Slack - Block Kit Builder to learn how to customize an advanced payload. Our default payload would be something like this:
-
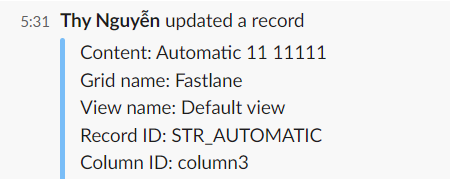
My message would be like:
Test Automation
- Switch the toggle on to turn on the Automation
- Click Test Automation. If your Automation is not turned on, Gridly will require that you turn on the Automation in the resulting pop-up message. Click on the toggle to turn on and select Test again.
- (Optional) Change the name of your Automation by clicking on the top-right corner.


