Gridly's IP access restriction allows you to specify authorized IP addresses for account login. By allowing only approved IP addresses to log in, you are restricting your users to log in from a specific location (i.e. from the office or those using a certain VPN), and therefore enhance security.
How the IP access resctrictions work
After setting up the allowed IP addresses, any user who signs in with an IP address that does not match an address on the allowed list , they will receive the error message below. The user will not be able to sign in to the restricted company in Gridly until they’re in the allowed network or their IP is added to the allowed list.

Set up IP access restrictions
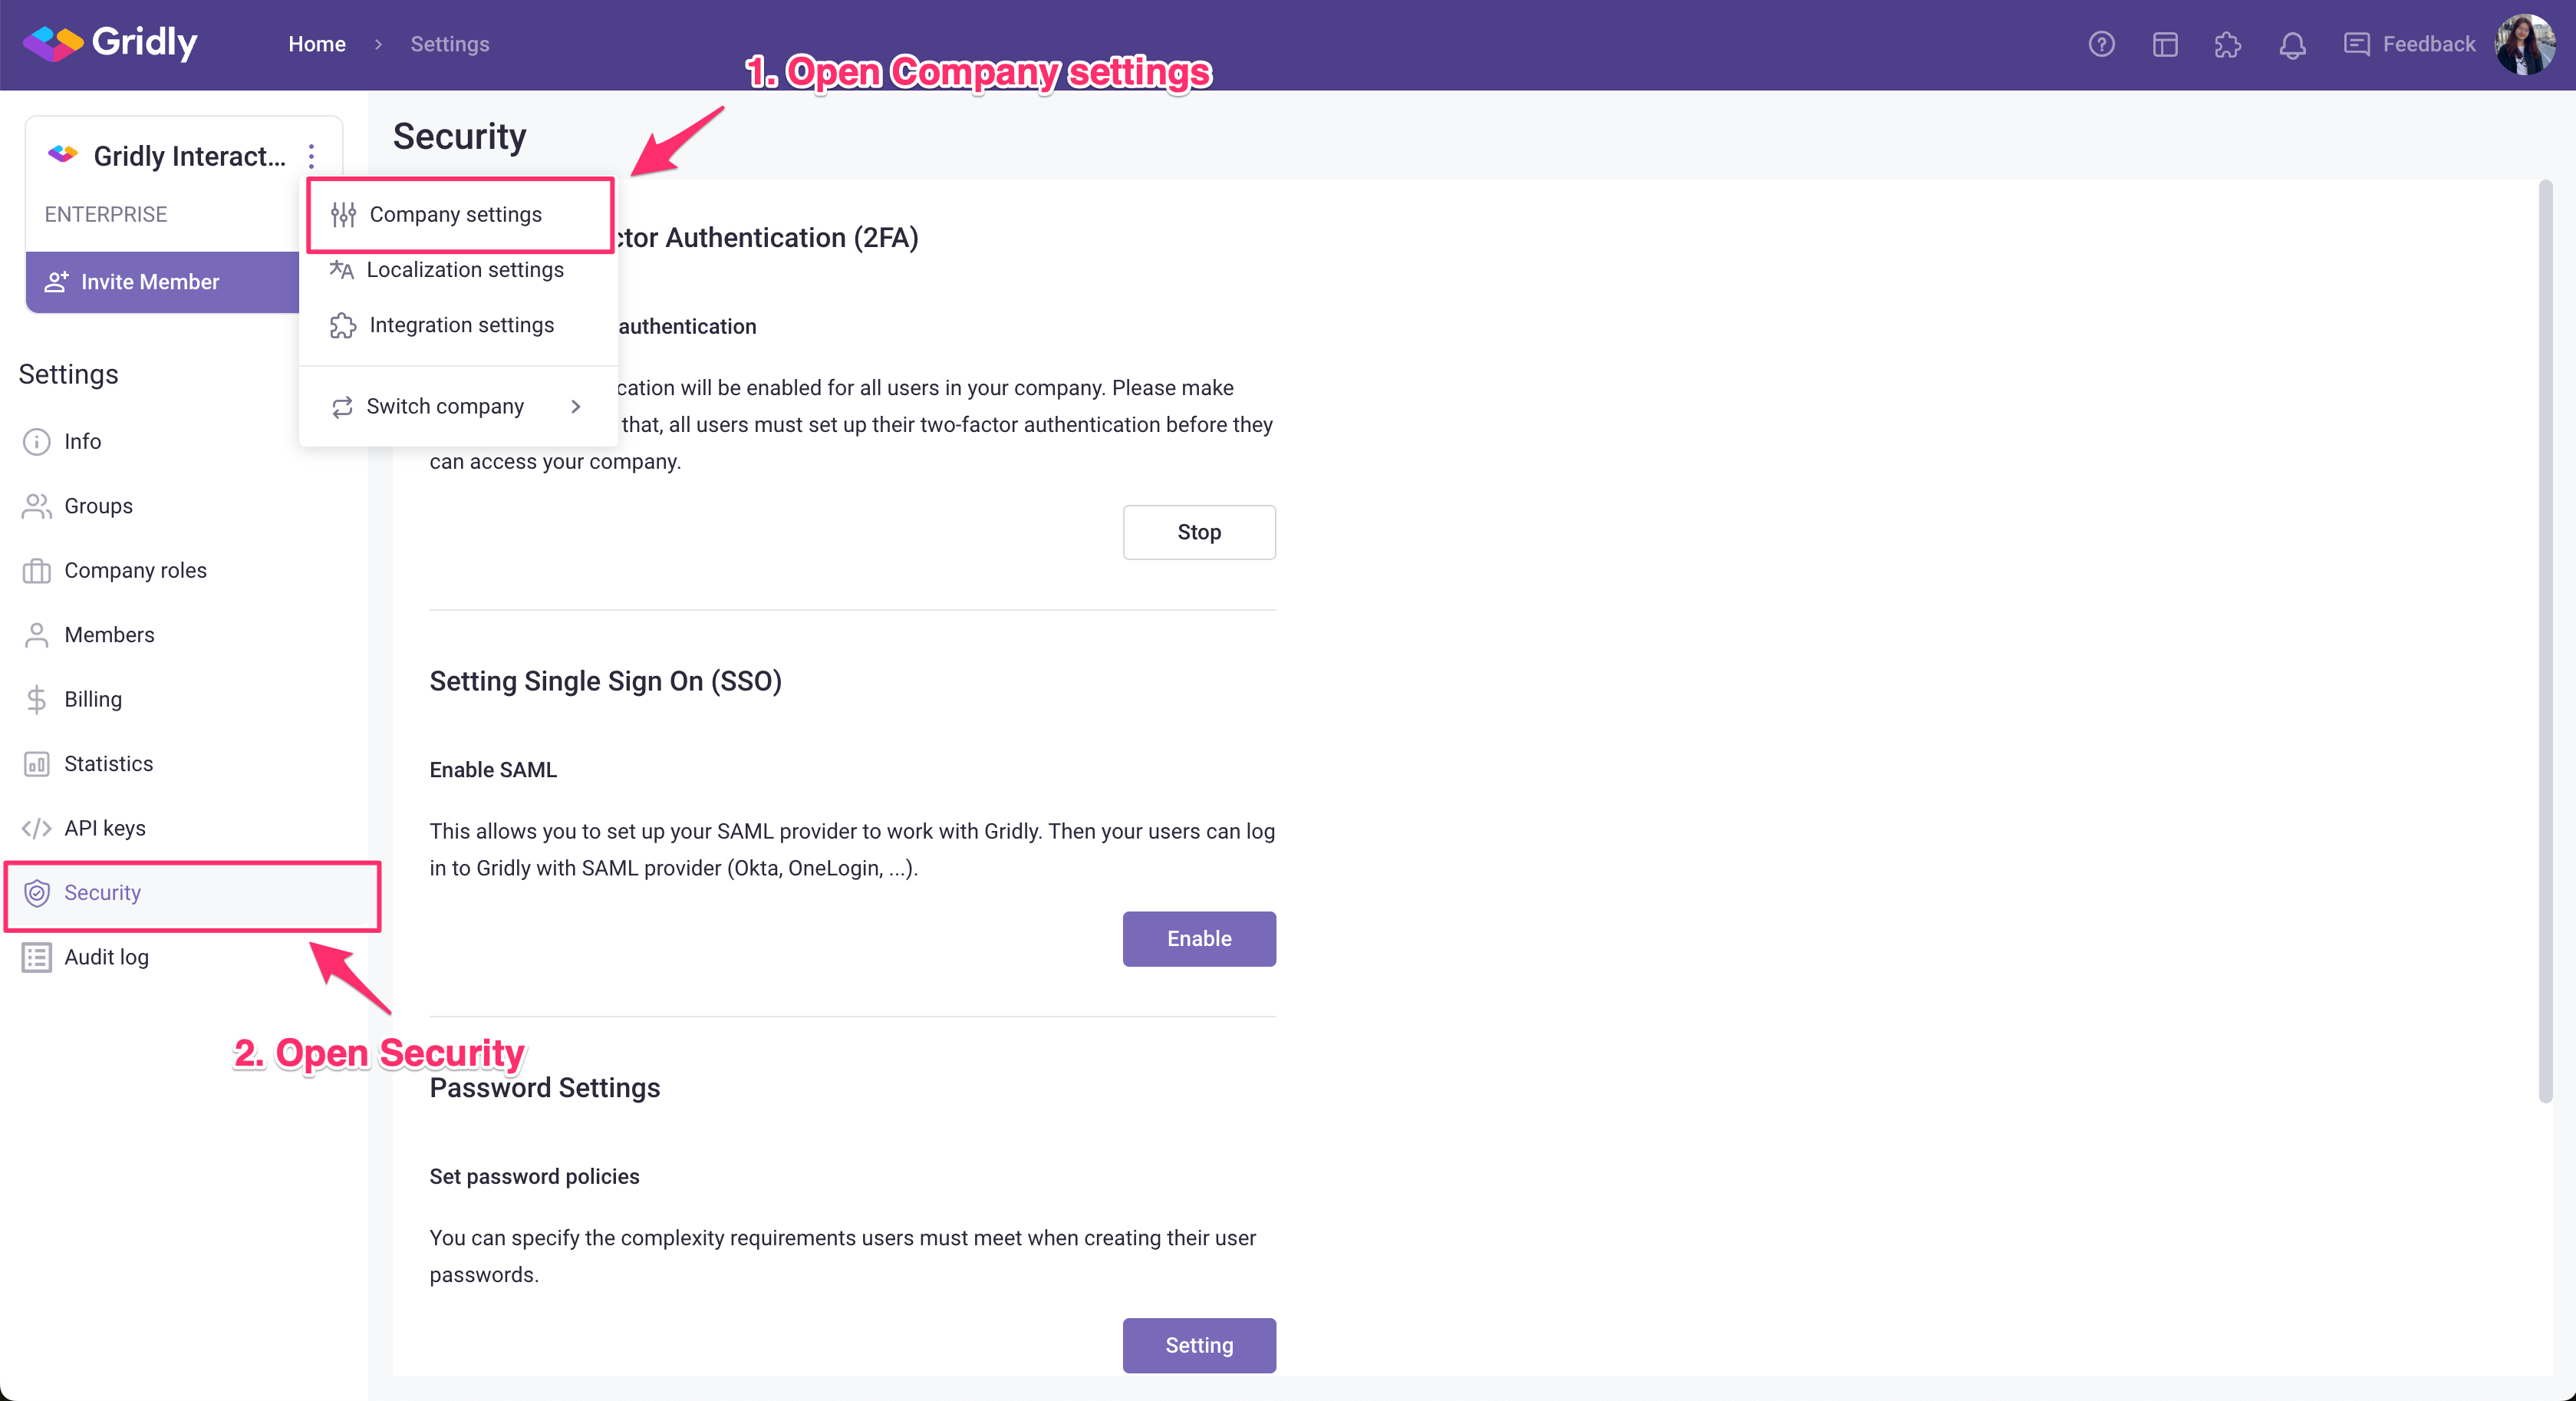
Open Security tab
Note
Only Owner or customized company Roles that have the same security rights as Owners can access Security options. Learn more about Company Roles here.
- On the Dashboard page, click
 and select Company Settings.
- Select Security from the side panel.
Add IP address
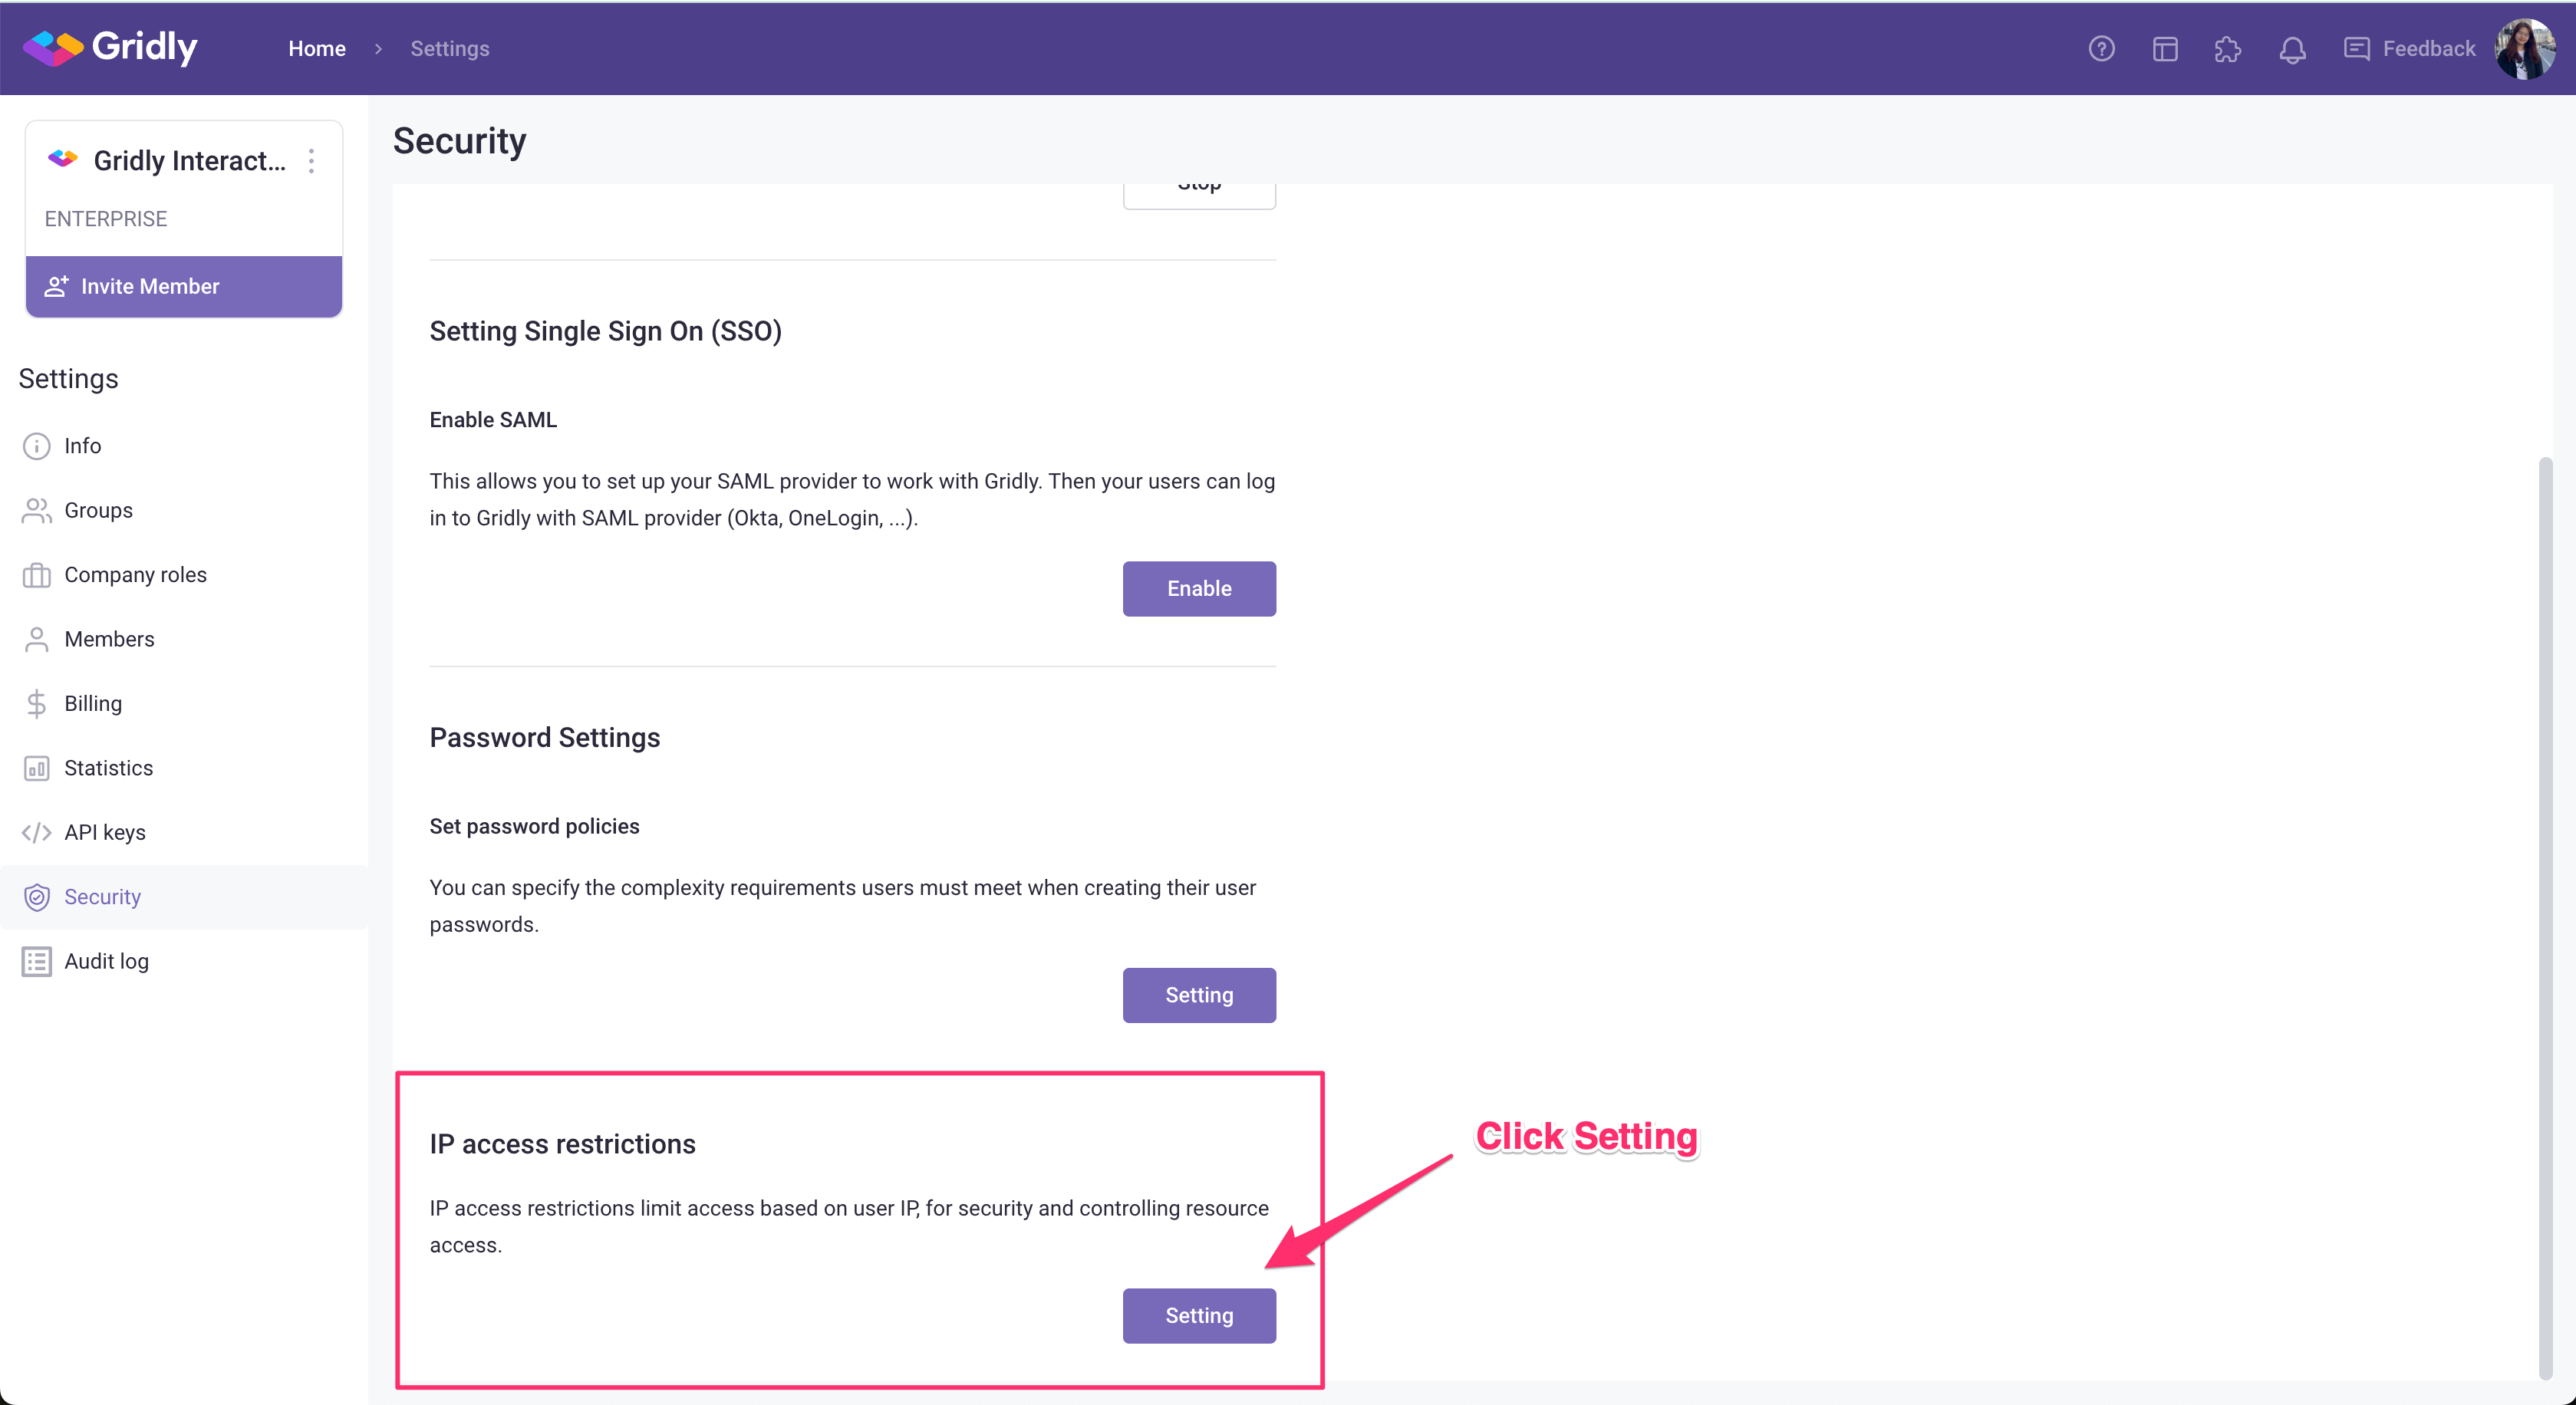
- Scroll down and find IP access restrictions section, then click Setting.
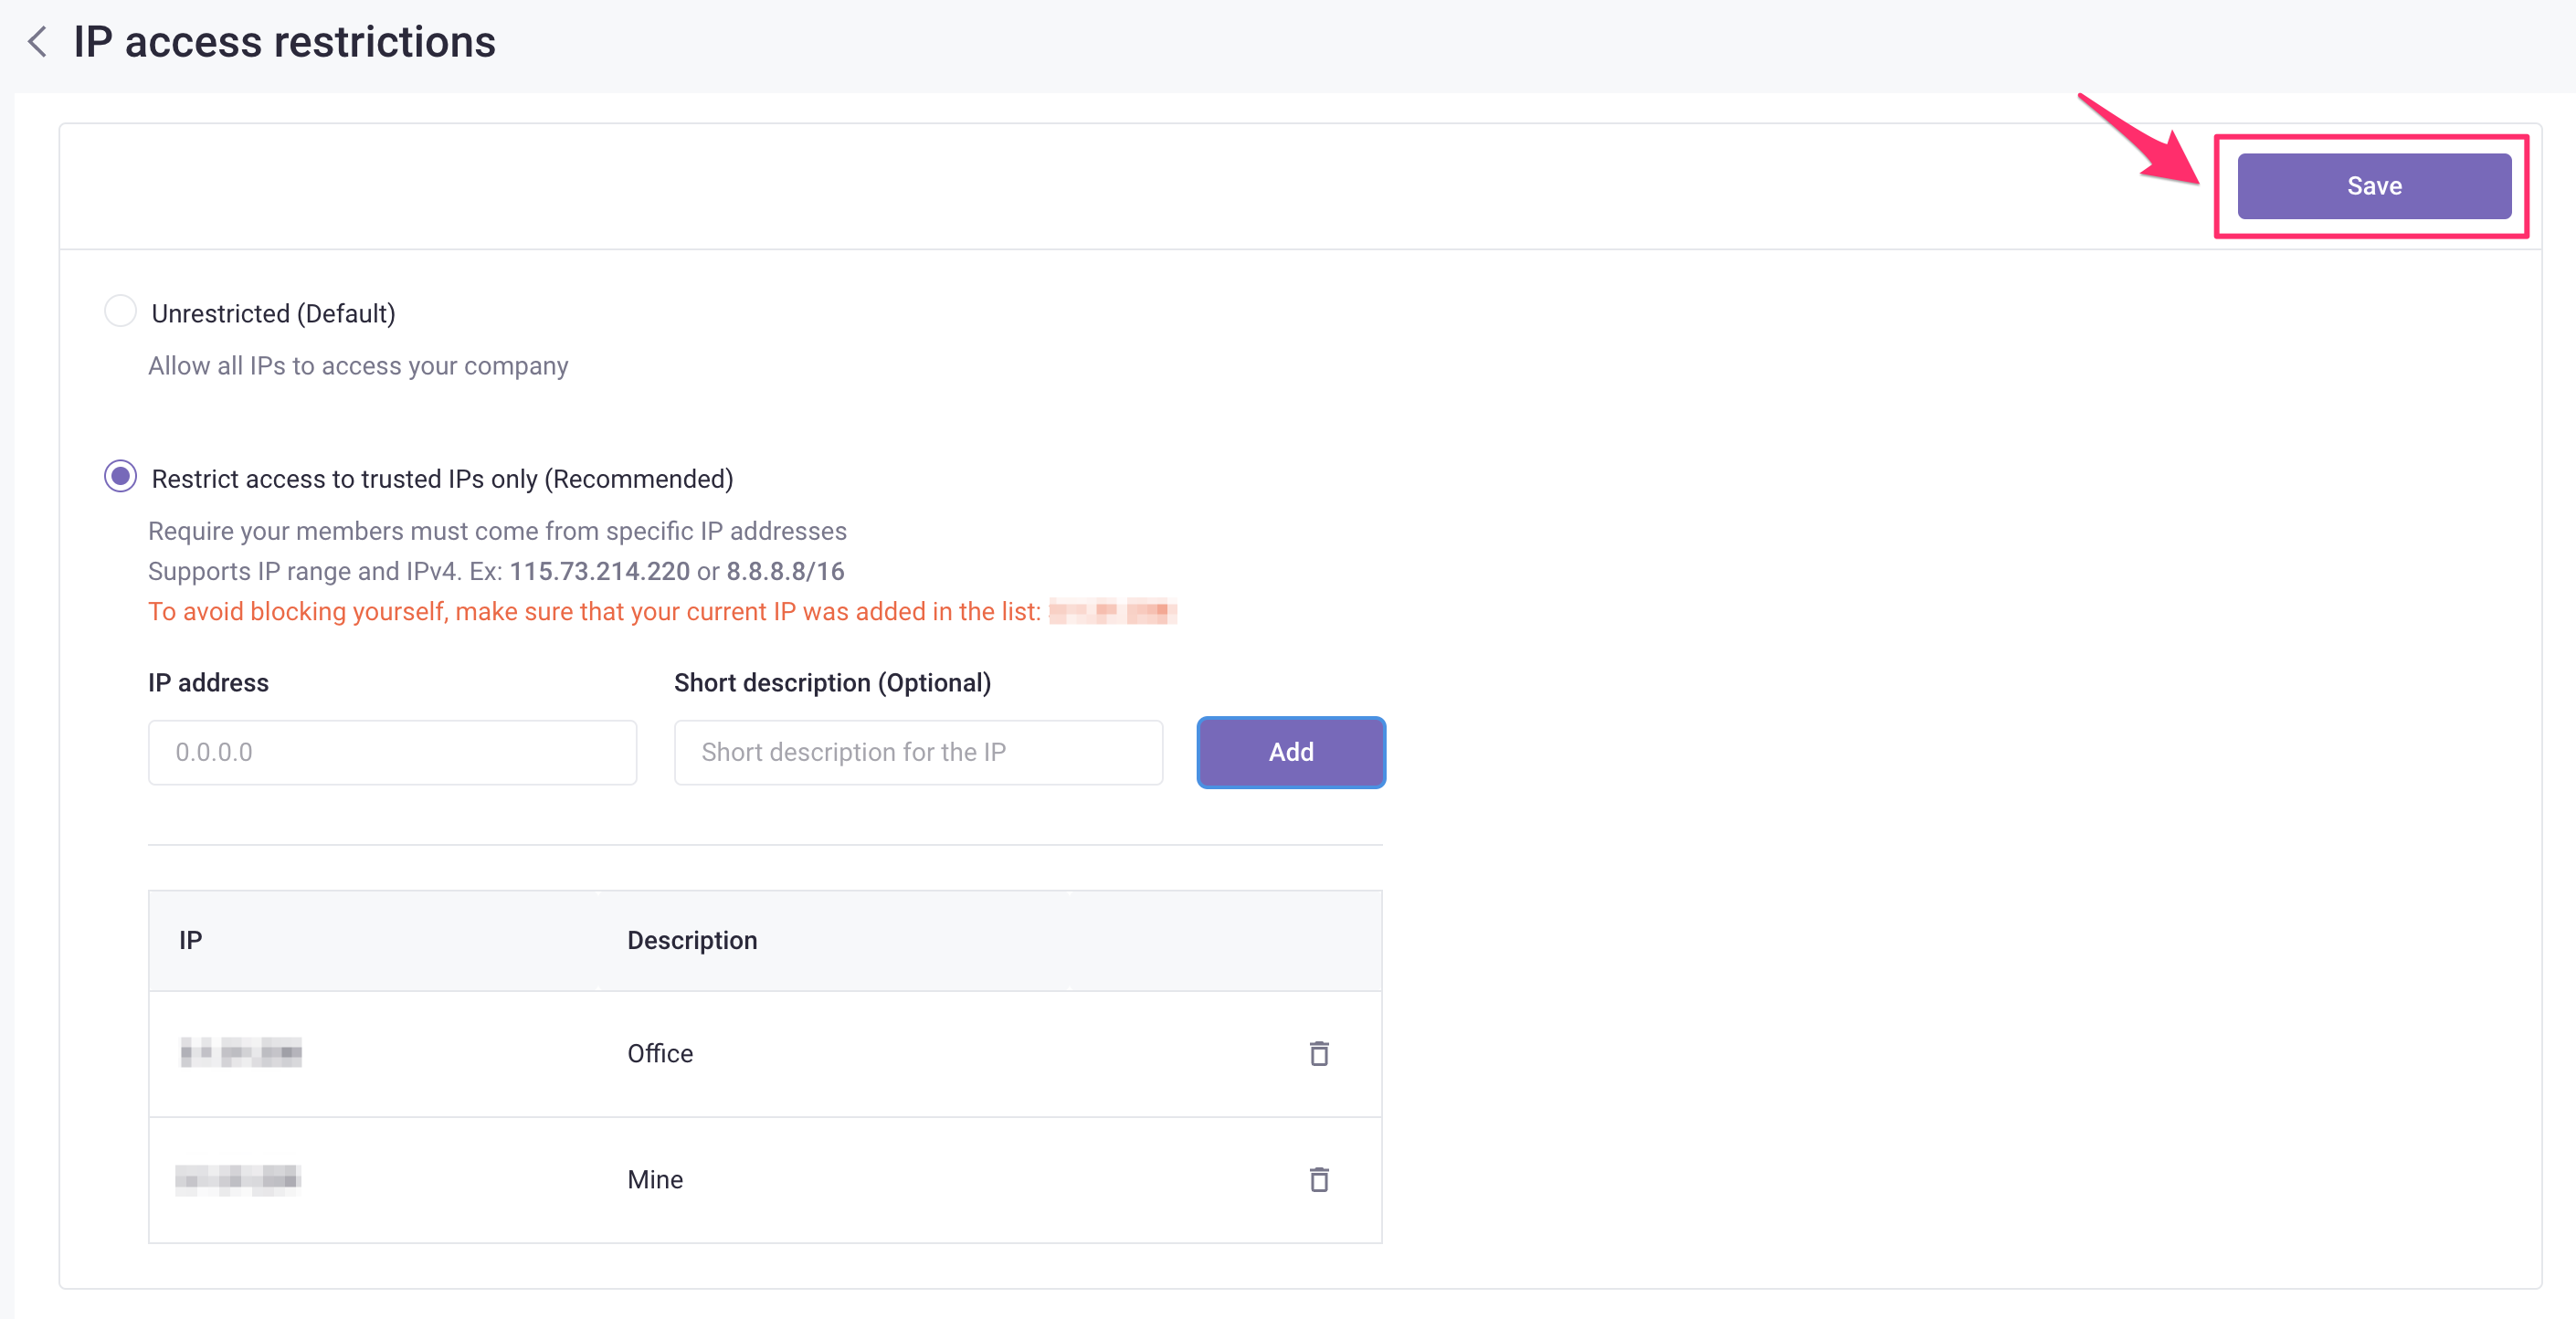
- Select Restrict access to trusted IPs only
- Enter the following information to add an IP address:
- IP address.
- Short description (Optional).
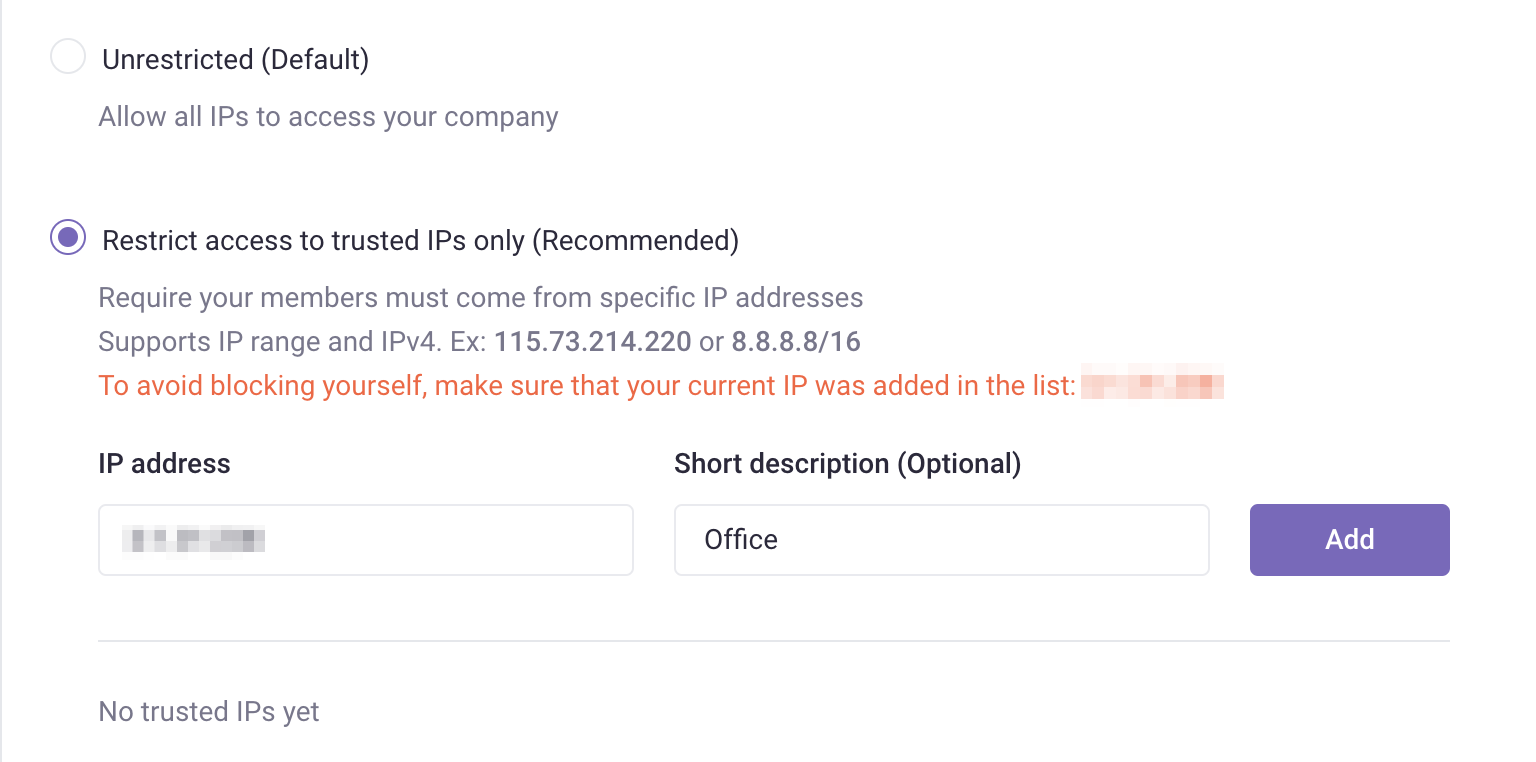
- Once done, click Add.
Warning
To avoid blocking yourself, make sure that your current IP was added in the list. Copy and paste the IP address in the highlighted text to add it to the list.
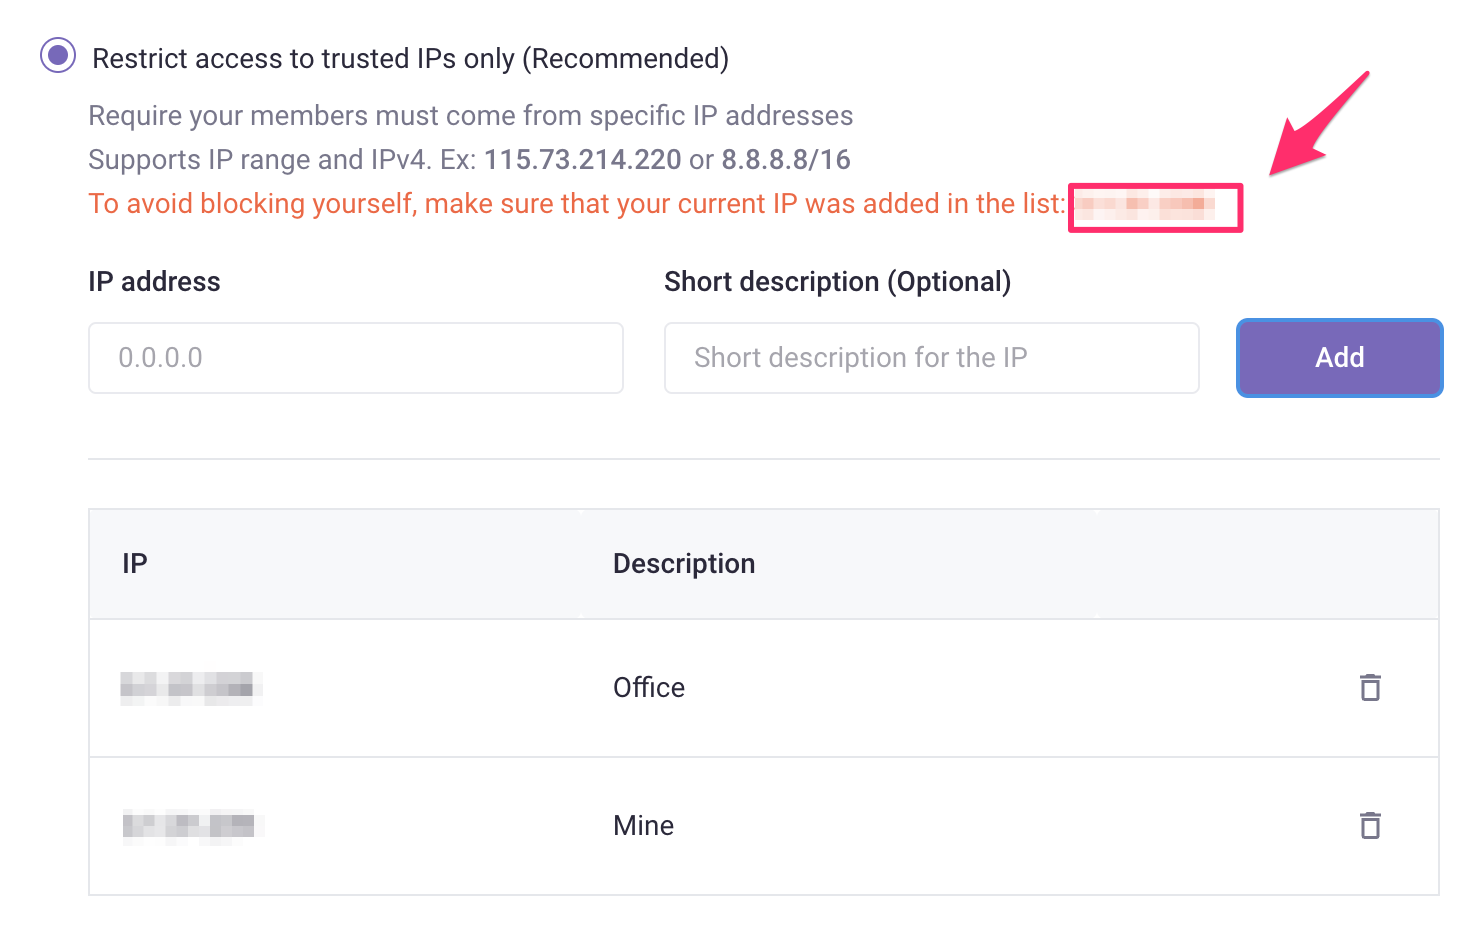
Activate IP access restrictions
After adding a list of IP addresses that you wish to have on the approved company members' accounts, click Save.
Now you've finished setting up the IP access restrictions in Gridly. Click here to learn more about how to set up your company in Gridly: Company & Account.