This article will help you set up an Automation to send Discord messages. You can use this to keep track of changes in your projects.
If you are not familiar with creating an Automation, please view the following article: Creating an Automation.
Set up
After creating the automation, you need to configure the trigger and action. In this example, we’ll create an automation that sends a message to the Discord channel when a string in the source language column is edited.
Add and configure “Record updated” trigger
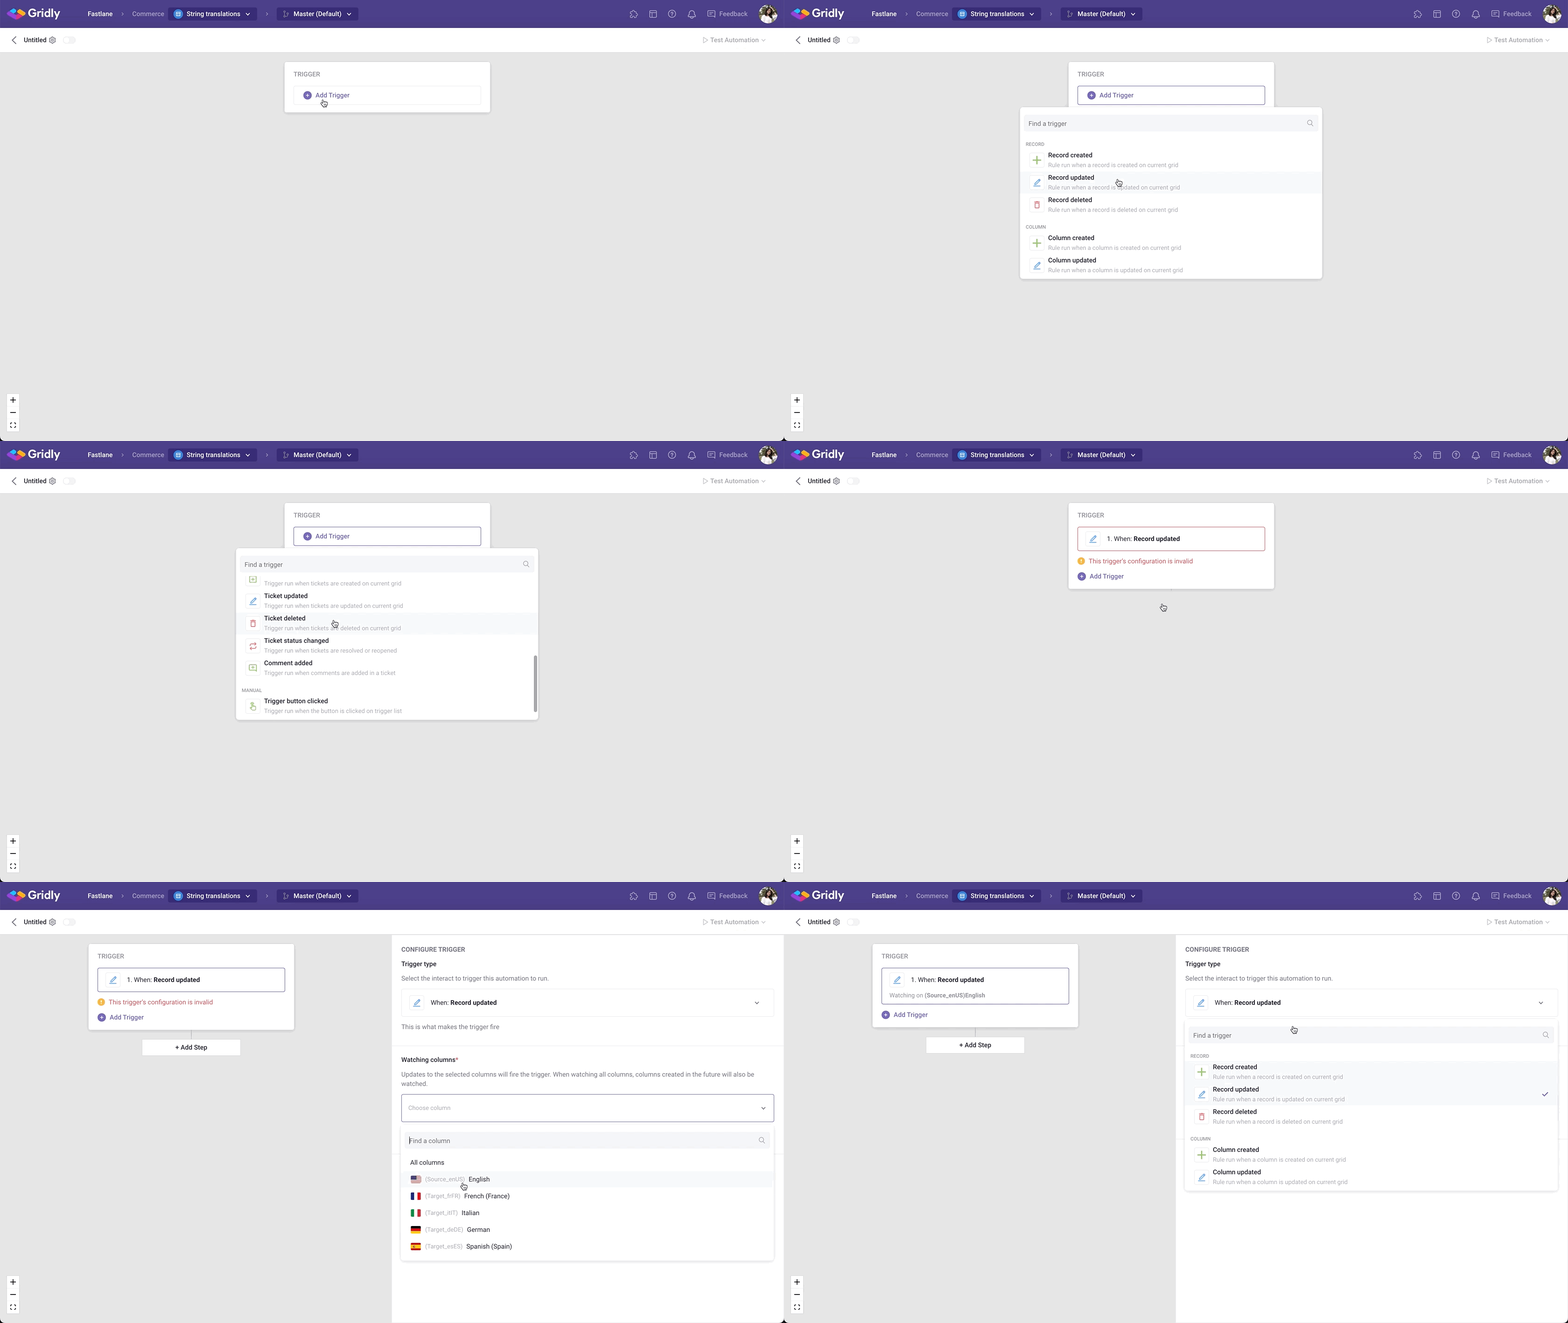
- Click Add Trigger, then select Record updated from the dropdown list.
- In the Watching columns section, select the source language column (Source_enUS).
Add and configure “Send Discord message” action
-
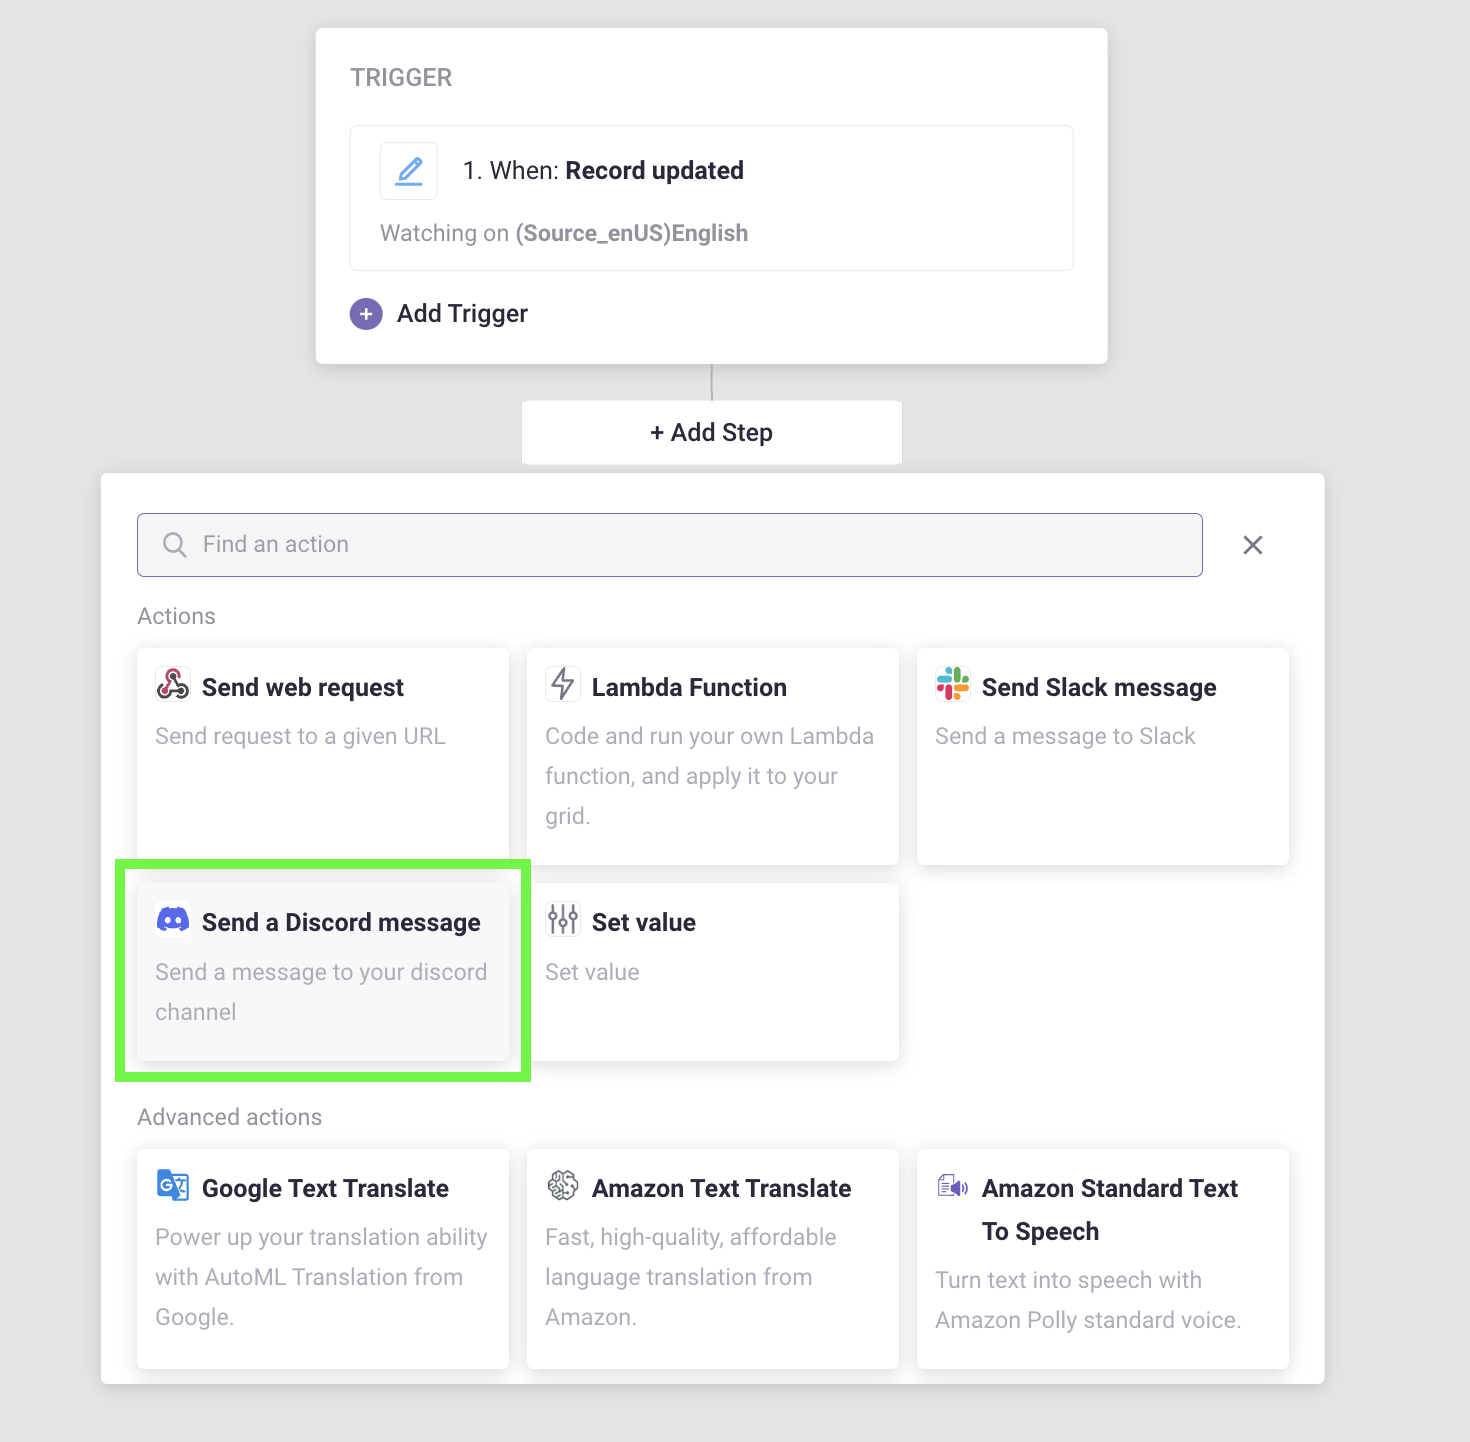
Click Add Step and select Send a Discord message in the list of actions.
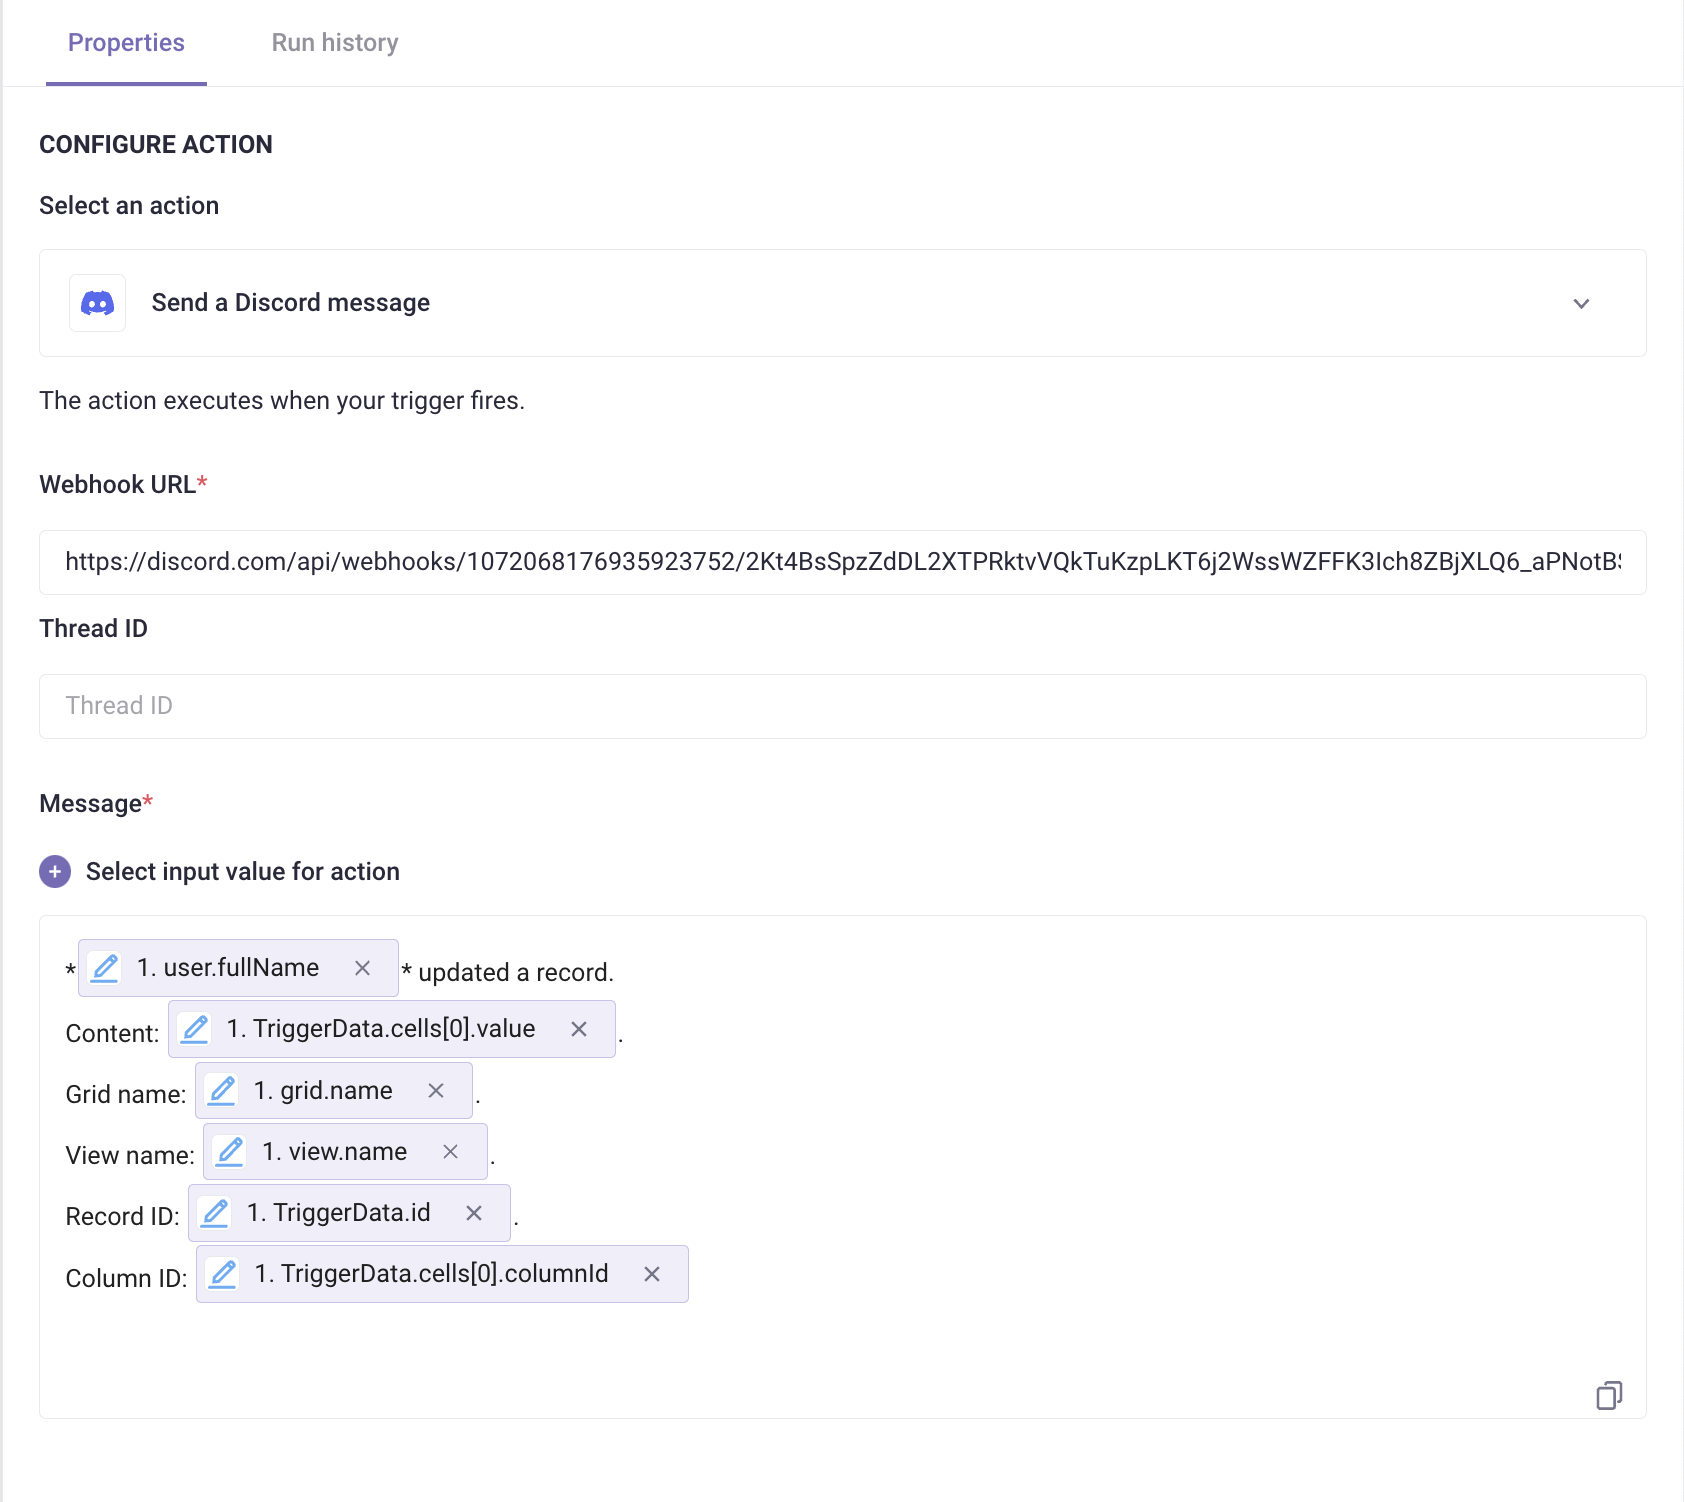
- Webhook URL: Input your webhook URL. If you do not know how to create one, please read this article from Discord.
-
Message: you can customize the message to your needs. Click Select input value for action to add value from the Grid such as: cell value, Grid name, etc. Here is a sample message.
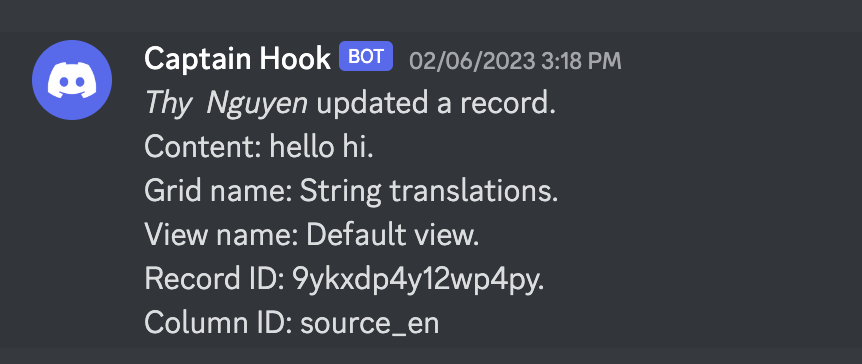
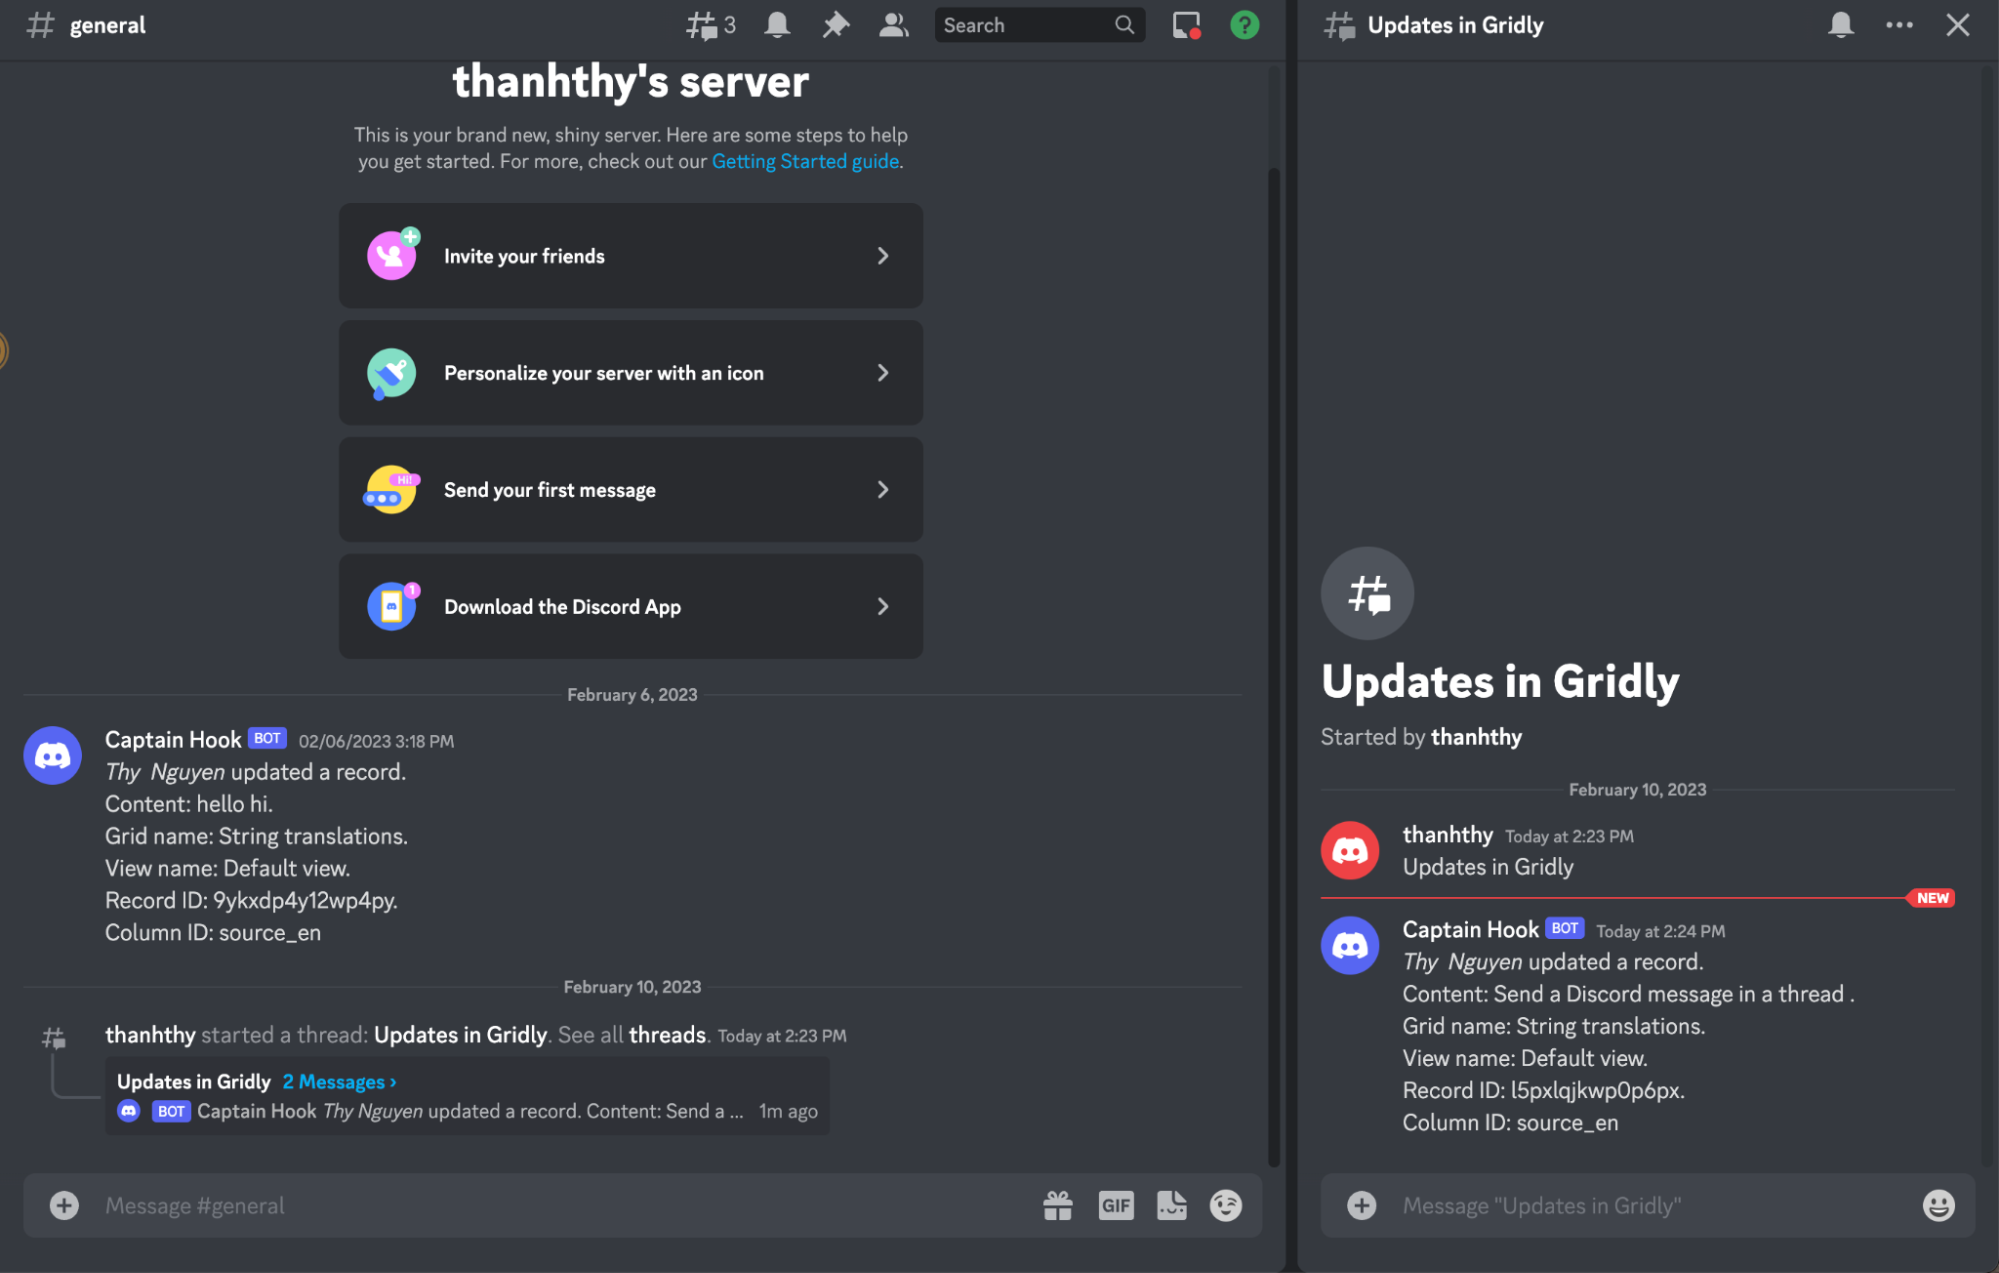
The Discord message would look like this.
Advanced: Send messages to a Discord thread
You can also add a Thread ID so that messages will be sent to a thread in the channel.
To find the Thread ID:
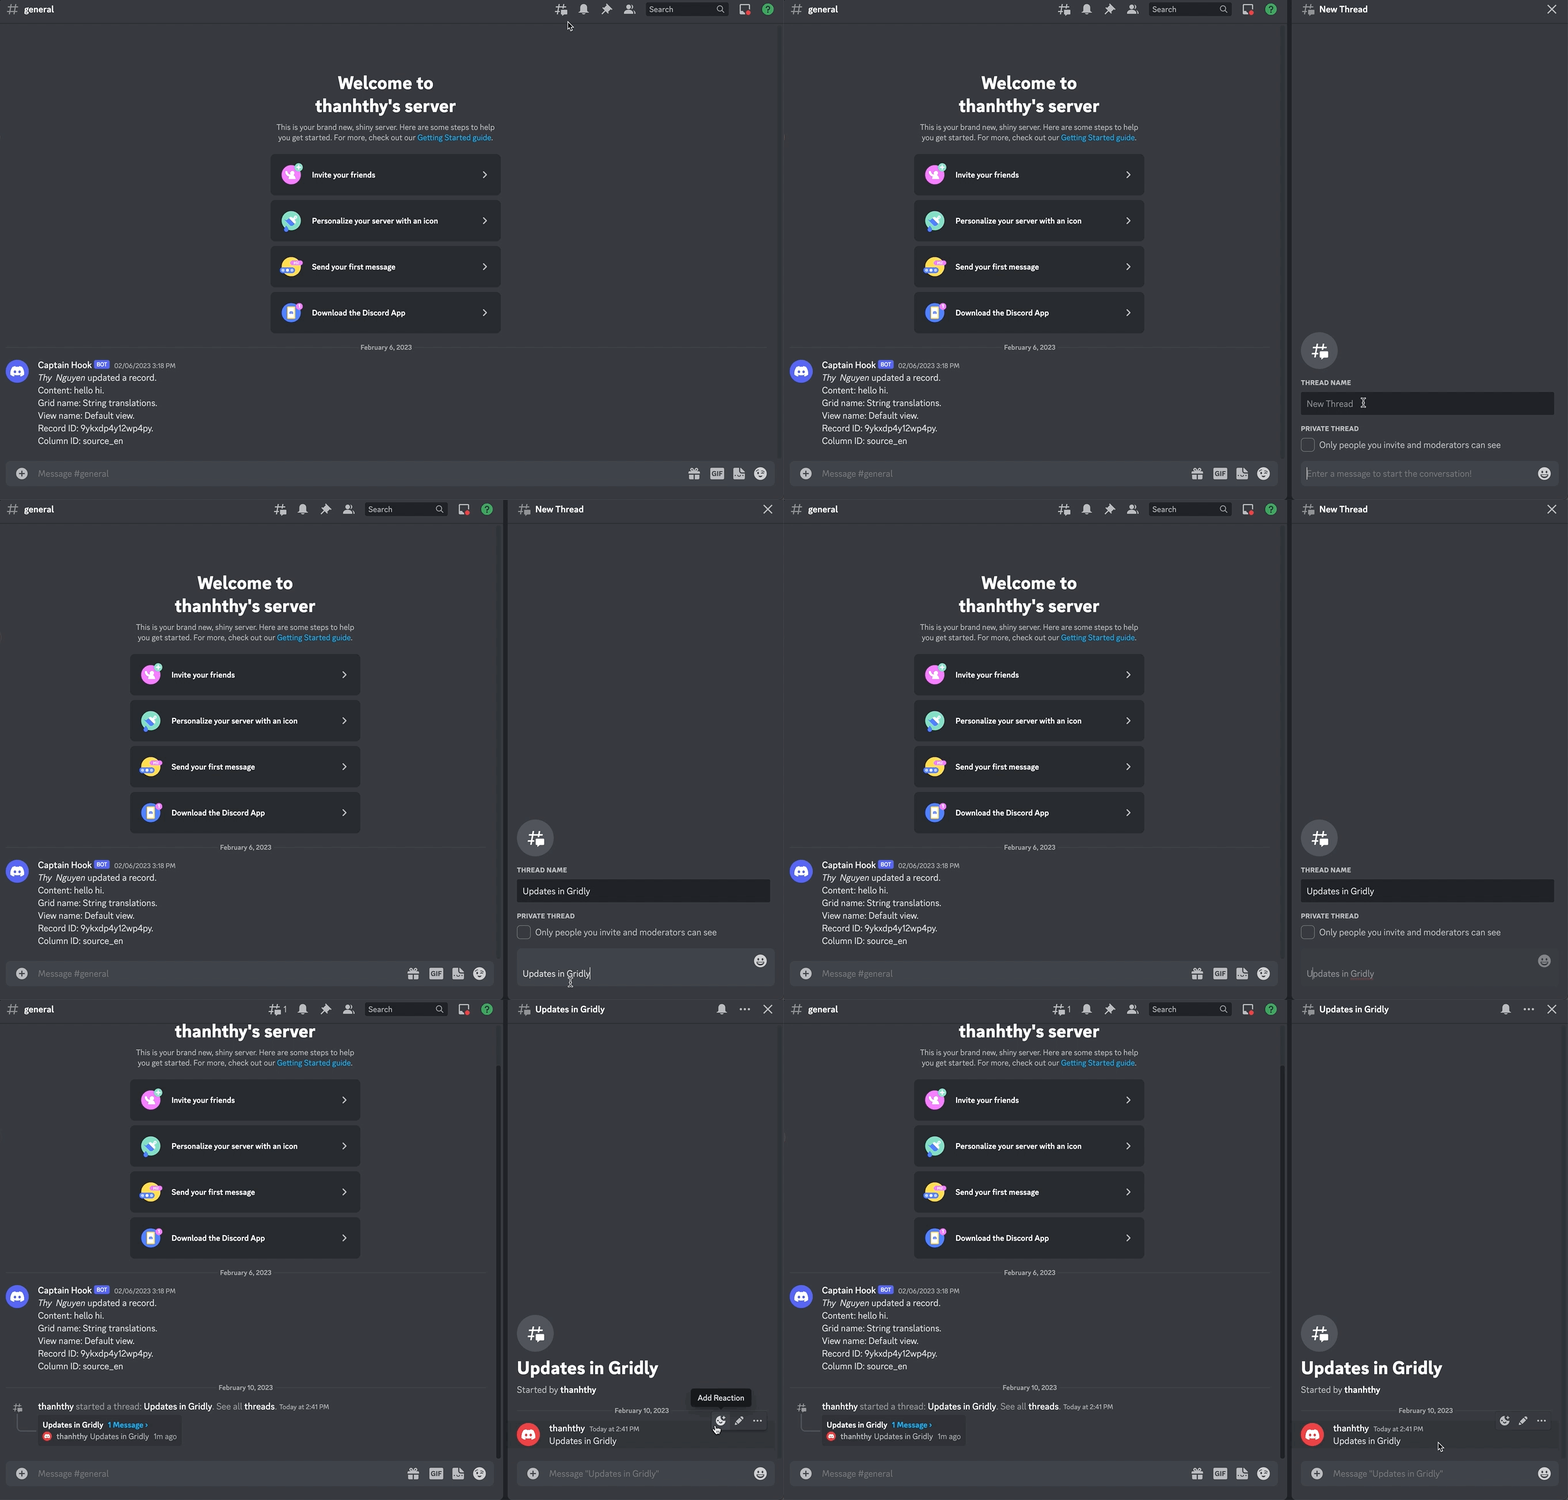
- Click and click Create to create a thread in the channel.
- Add a Thread Name and enter a message to start the conversation.
-
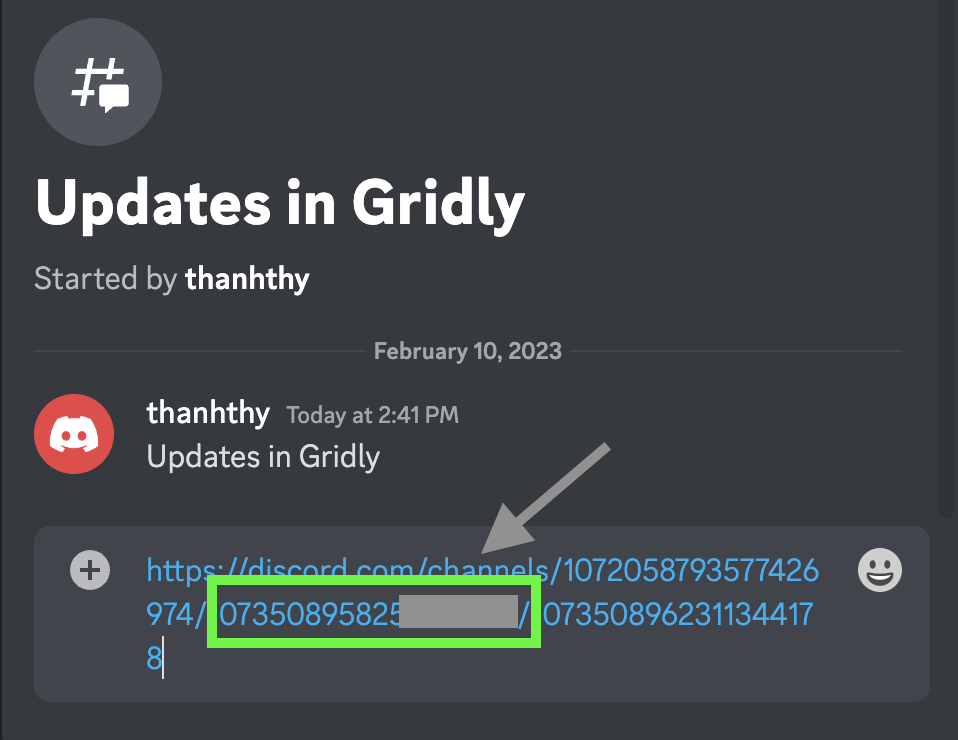
Right click on the starter message and select Copy message link. Paste it to a note.
-
Copy the highlighted part only and paste in to the Thread ID in Gridly.
Test Automation
- Switch the toggle next to your automation's name to activate it.
- Click Test Automations. If your automation is not activated, Gridly will require that you turn on the automation. Click on the toggle to turn on and select Test again.
Now you can edit a record in your Grid and the following message will be sent to your Discord.
To view all the related articles to Automation, click here.
