Open the CMS module from the dashboard:

1. Add content
The first step is to add content to Gridly. We’ve made it easy for you by supporting various ways to import your content.
- Click + Add Grid under the New Database
- Select Import file, or simply drag and drop it to the New Database
- Add your file and follow the instructions depending on which file format you are using.

Import CSV/XLXS files
Import JSON files
Import PO files
Import Google Sheet files
Use Gridly API
Refer to the Gridly API documentation.
2. Organize content
Now you’ve added content, let’s learn how to organize and track it for efficient localization.
Organize data in columns
When you import your data, make sure each column’s data type is correctly recognized. If a column’s type isn’t correct, you can update it within the Grid.
You can choose from over 20 column types, including Datetime, Attachments, and special column types like Localization, Reference, Code Formatting. Learn more about Column Data Types.
For easier API calls, specify a Column ID for each column. This ensures consistency when retrieving or updating data programmatically.

Track content changes
In Gridly, you can use Dependencies to track content changes. When a change is made to the source data, dependent columns are highlighted to indicate an update is required. This is very useful for localization managers who need to know which changes have been made to the strings.
Usually dependencies are automatically set up after importing the content. You just need to play around to understand how it works.
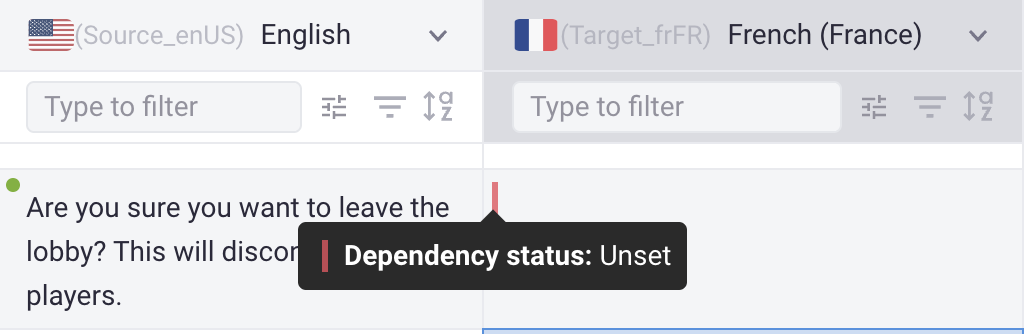
Take this as an example. You are setting Dependencies between English and French.
When you have not yet added translation in French, the state for French is Unset.
When you add the translations in French, the state for French is Up-to-date, indicating that someone has updated the translation.
When you edit the strings in English, the state for French is Out-of-date, indicating that someone has updated the source strings, and you need to update the translation.
So now you are able to track which strings need to be translated, and which strings are ready to be published.
Manage what you want to view
After creating the branch, you may want to customize your Grid by hiding distracting columns, such as system columns.
To manage view and edit access to your content, use Views. Views represent a way to display all or a subset of data in a customized format. You can create new views, hide, or reorder columns to focus only on what needs to be done.
Add new views
- In the Grid, click the view selector in the top corner → Create a view → choose Collaborative view so all users can access it.
- Click on the toggle to select whether to:
- View data: show/hide a column.
- Edit data: be able to edit cell content in a column.
- (Optional) Reorder columns by dragging and dropping.

Use quick filters
Quick filters is a fast and easy way to filter data in a Grid when you don’t need to preserve them for future use. The filters won’t be saved, so once you refresh the Grid or switch to other views, they’re cleared.
You can use quick filters to search a record and edit it instantly. Quick filters can be found on every column.

Use view filters
Tip
To track content changes with Dependencies, you can make use of the View filters.
For example, you may want to know which strings are not translated and need to be updated. Let’s create a view filter which shows the records with the Unset and Out-of-date status.
- Click
 to open view filter
 - Click Add condition group.
- In the first field, select French column
- Click
 next to the value and select Out-of-date.
 - Click OR to add another condition, then replicate the above steps, select Unset as the value.

Make use of other supporting tools
Check out the sidebar of your Grid for other supporting tools. You can find many useful tools here: Ticket center, comments, Automations, Translation overview, API quick start, etc.
For example, you can create an Automation to auto translate from English to multiple languages. Learn more
3. Deploy content & version control
Create a branch
Branch is a useful tool for creating separate environments for content creation and development.
When a branch is created, the content from the original branch is duplicated into a new branch, giving you the flexibility to make changes independently while still being able to merge those changes back into the original content when you're ready.
Your development team can then push the updated content from the main branch to sites or apps. In this example, we’ll create a branch specifically for translation.
To create a branch:
- In the Grid, click on the Branch name
- Select Create New Branch, name your new branch, then click Save.

Merge branch
Now you’ll need to start merging the Translation branch into the Master branch for the release.
- Open the Version control tab on the side bar, then Select Merge branch.
- Select Compare changes to preview changes in the current branch.
- Select merge options, check what is going to be merged and the changes, then click Merge.

Deploy updated content from Gridly to your app
Lastly, you can export your Grid and send the files to your developers.
- In the Grid, make sure you’re in the correct branch. Note that most users would export from the Master (Default) branch.
- Select the file format, columns you want to export.
- Preview data and click Export.

For developers, you can push updated content directly from Gridly to your web application by setting up an API connection, publishing JSON files with CDN, or leveraging the built-in Automations feature.
API documentation
Lambda function
Send web request
Publish JSON file
Now you’ve completed all the steps to get content released. Next, let’s learn how to manage members in your company: Inviting members.